GET TO KNOW THE ESTONIAN TEAMS SCIENSE MAGAZINE FOR KIDS:
....................................................................................................
SCIENCE CLUB ACTIVITIES
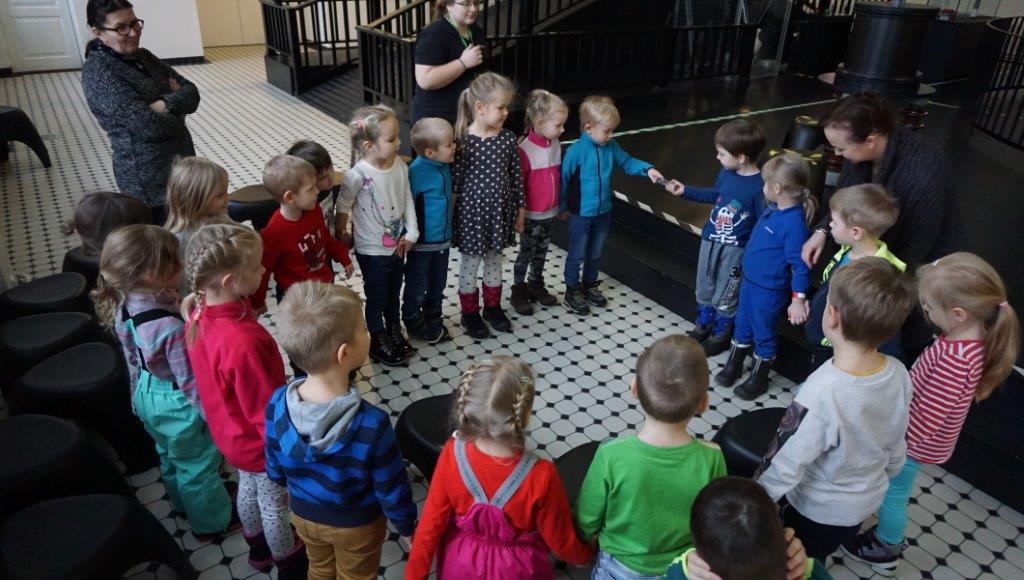
I ARCHAEOLOGICAL TESTS WITH SAND


A brief description of the action: In the course of its activities, children examine the archaeologist, profession, and the different characteristics of the sand (dry and wet). Making tests by filing, forming and painting on and with the sand. During these experiments kids will understand why are dry and wet sand useful.
Through the activities of the release time (date, time): 28.09.17
Group: NAERULINNUD The age of the children: 4 years
The teachers: Meeli Lugus, Hege Mardiste
Objectives:
• The child uses a speech to some of the opposite words (dark-light, dry-wet, etc.).
• The child uses a speech to some of the adjectives
• The child shall examine the different characteristics of the sand (dry-wet) and compare them, using a variety of tools.
• The child feels the joy out of the game
• The child plays 2 rule motion games
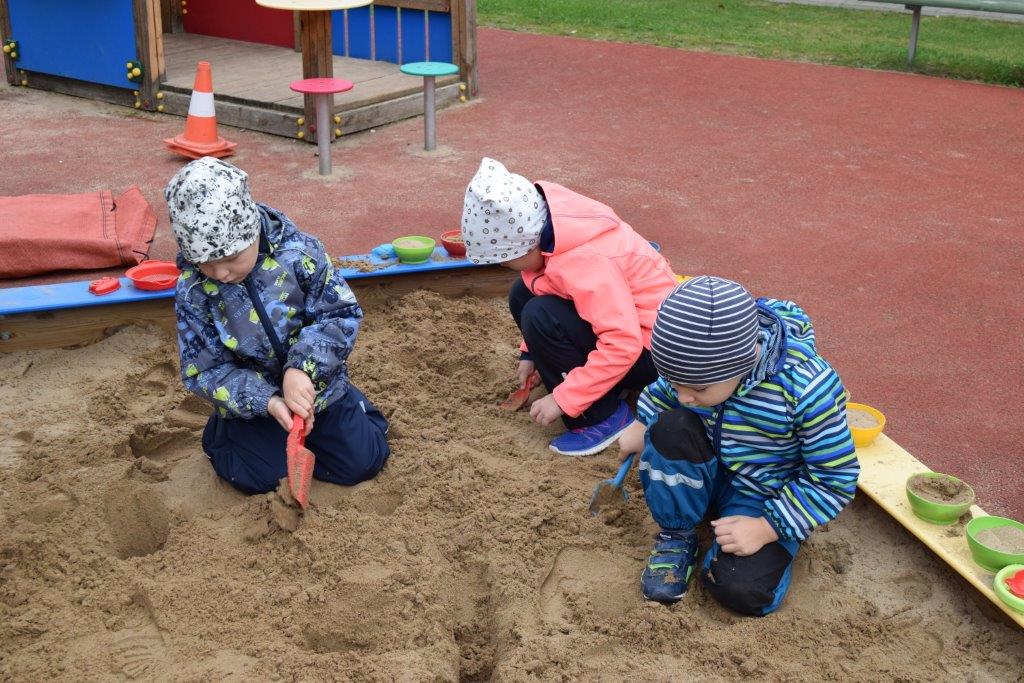
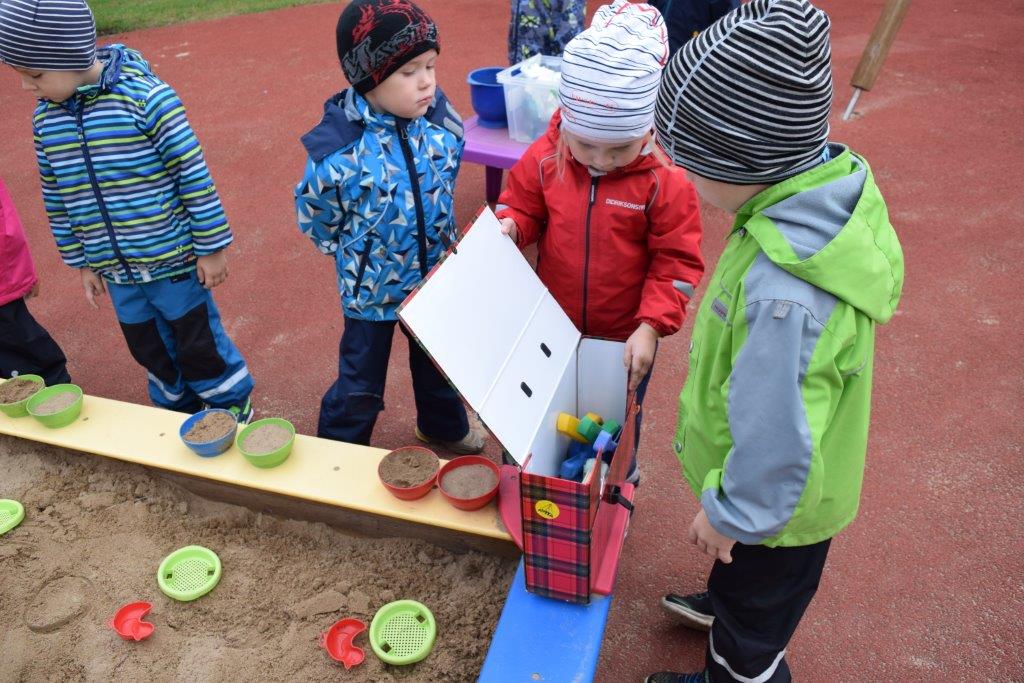
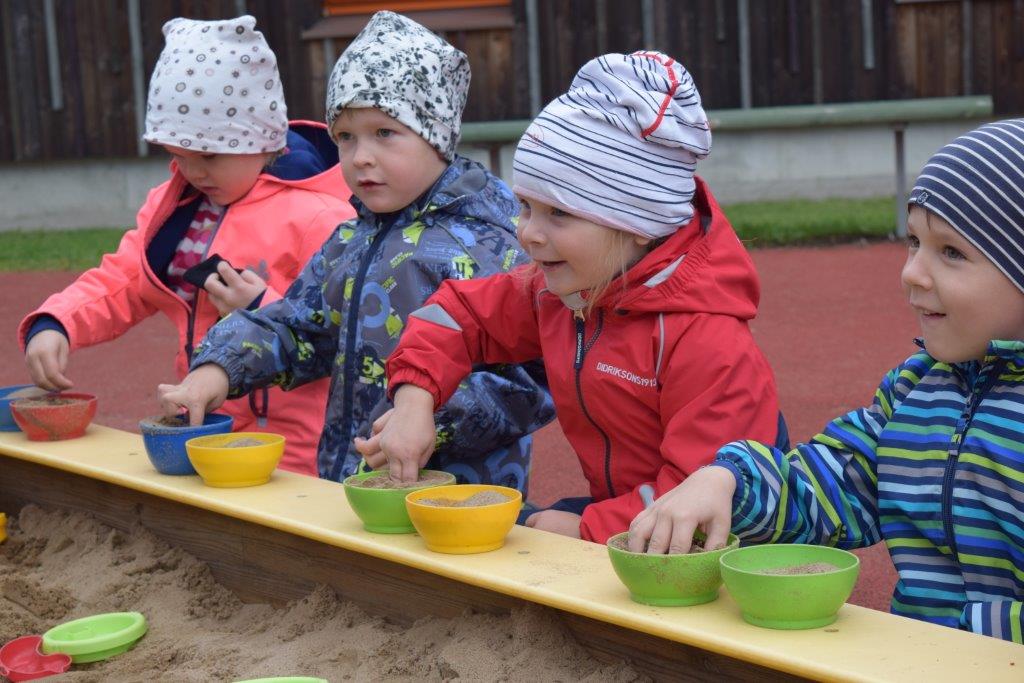
Tools: The researcher's suitcase, which is: 10 brushes, 10 BBQ matches and a small suitcase 10 magnifying lens; 2 small buckets; dry sand; the container, which is a small bucket (2 bowls for each kid, 1 for dry and 1 for wet sand), 10 sand sieves, 10 shovels, 10 sand forms, 3 small rakes, about 22 little plastic squeaky toy to hide in the sand (NB! They must hide in the litter box before the kids see).
The action of the gear: Today we will talk to you about the branch of science such as archaeology. Does anyone know which archaeologists dealing with? () They are dealing with the oldest history. Otherwise, how do we know how people lived in the old times. For example, thanks to archaeologist we know that there were dinosaurs living before us. Archaeologists main work method is by digging old sites and finding old relics. (Power Point „Arheoloogid“)
Now you become a little scientist, who study the characteristics of the sand today. One of the little scientist takes a researcher’s suitcase and gives everybody a magnifying lens.
Now we will investigate sand:
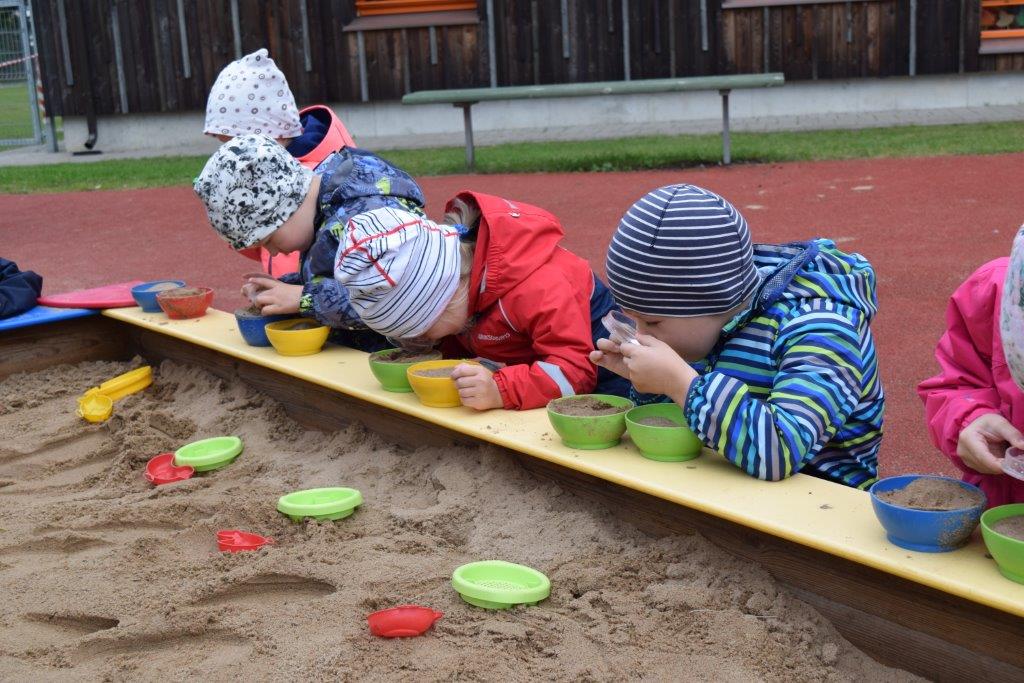
- Is the sand the same color in both bowls?
- Look with the Magnifier, with what the sand is composed with?
Let's put these lenses back in the suitcase and take the BBQ match.
- Draw something in the both bowls of sand with a BBQ match. In which one does the sand drawing remain to see better?
After drawing collect the BBQ matches.
- Put your hand in one of the dry sand and the other on the wet sand, which one seems the colder?
- Feel the wet sand, how does the sand feel for you?
- Feel the dry sand, how does the sand feel for you?
Each child takes the sand sieves in front of them.
- Sieves one of a handful of dry sand in the same bowl and do it also with the wet sand, in which of the sand is going faster and easy passing through?
Put a sieve back into its original place and take the sand form.
- First fill up the sand form with dry sand and then flip it upside down on to the same bowl, look at the result, don't spread out over time.
- Now take the form of damp sand and turn it upside down onto the same bowl, look at the result. Which of the sand must be beautiful sandform, either the dry sand or wet sand?
Now we have made different tests with sand and learned the children's responses.
Now let’s play one more game. Today we were talking about archeological work and you were making experiments with the sand. Now you have become a little archaeologist and now you can start making archeological diggings in this sandbox. Inside the scientists suitcase we have shovels and brushes. Why and what can you do with them?
We will thank the kids for playing with us and encourage them for future activities.
----------------------------------------------------------------------------------------
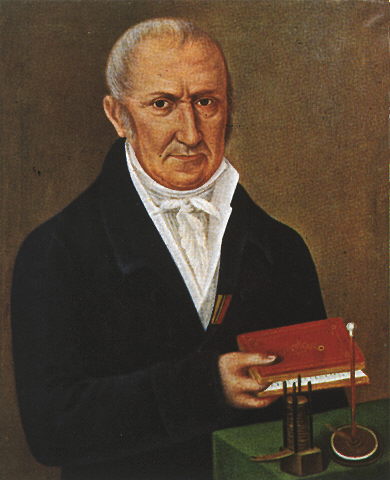
II Scientist Anders Celsius and thermometer
A brief description of the action: Kids examine the researcher's invention claimed. Find out how to have the thermometer in daily life to help. The principle of the manifestos of the thermometer. Solve tasks of the thermometer readings for comparison
Through the activities of the release time (date, time):
Group: Naerulinnud The age of the children: 4-5
The teachers: Meeli Lugus, Hege Mardiste
Objectives:
The child shall examine the thermometer and its principle of operation.
Kids will make different mathematical assignments with the reading of the thermometer.
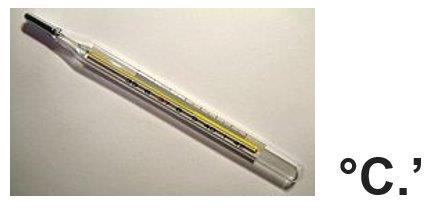
Tools: Different thermometers, two jugs, one for cold and one for hot water. Pictures of the scientist A. Celsius and his inventions.
The action: How can we make sure what kind of weather is outside. Is it worm or cold weather? How can we know do you have a fever? (children´s answers) For this we have different kind of thermometers in the world. Already in the older times scientists made many different scaled thermometers, but it made a lot of mess. Swedish scientist Anders Celsius invented a thermometer that had a zero degree what implemented the freezing of the water and hundred degrees that implemented boiling of the water. This was the thermometer that people started later to call Celsius’s thermometer (show the children picture of Celsius and the thermometer)
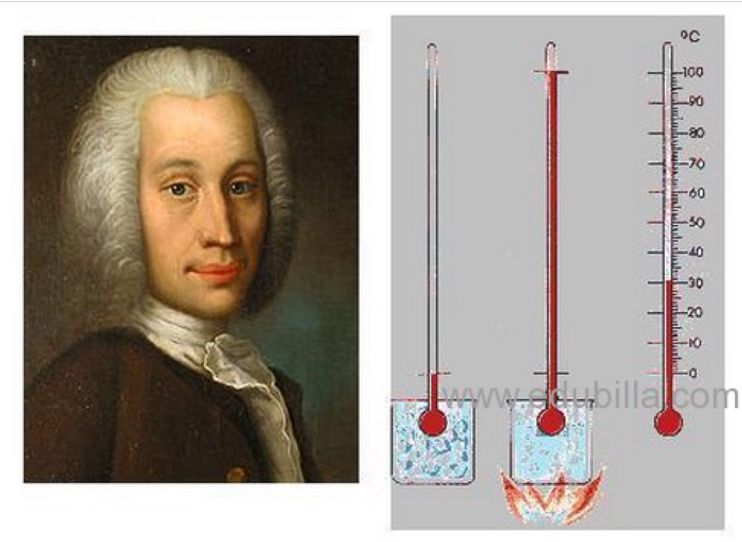
Nowadays this is the thermometer that is widely used around the world. His thermometers always have a ‘C’ so people would understand that this is his invention. Let’s see does our thermometers have the same markings?
I have here many different thermometers, let’s see why are they used for.
Let’s see what the thermometer is made of and what parts does it contain. Thermometer has a scale of numbers, then there is a container of liquid and a small glass pipe where is possible for the liquid to move up and down. When the liquid gets warmer it will expand and move up the small glass pipe, when the liquid gets colder it decreases and moves down the glass pipe.
Tools: Thermometer, 2 jugs for hot and gold water.
Experiments: First the kids will get the thermometers and will observe the room temperature. For the next step they will put the thermometer in to the cold water and they will see the liquid starting to go lower as it decreases inside, and then they will make the same experiment with the hot water and see the thermometer go up.
Tools: Small pictures of sun and moon. Small items for counting.
Test: Sunday morning thermometer was showing +3, in the day time the sun was up and thermometer went up for the evening +6. How many degrees did the thermometer rise? (Kids will count and set up the morning and the evening result of the thermometer, they will make comprising and will find a solution)
Test: Monday morning the temperature was +5, it was raining it the daytime and in the evening the temperature was risen +6 degrees. How many degrees did the temperature rise? Etc.
Sources:
Lukner, H, Müürsepp, M (2017). Füübits. Teaduse ja tehnika esimene lugemik huvilisele lapsele. Tallinn: Tammerraamat.
https://et.wikipedia.org/wiki/Anders_Celsius
----------------------------------------------------------------------------------------------
III STATIC ELECTRICITY
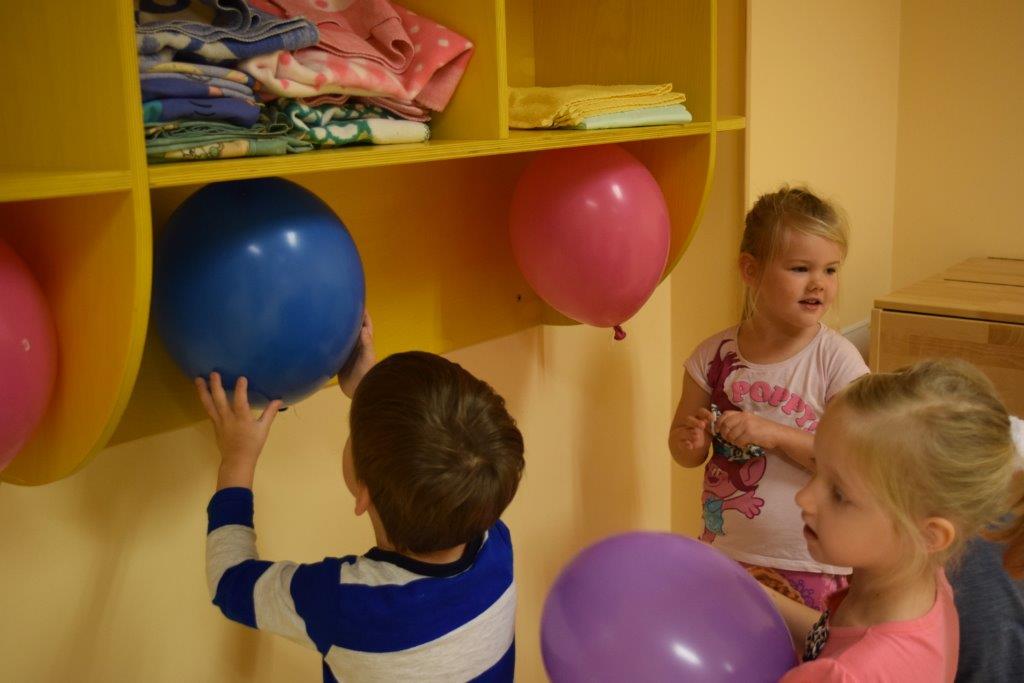
A brief description of the action: In the activity the children will learn about the static electricity and will make some experience. They will learn that by rubbing different materials they can make a positive charge of static electricity – some materials are better than the other materials.
Through the activities of the release time: 05. 10.17
Group: Naerulinnud The age of the children: 4-5a, work in two of the group.
The teachers: Meeli Lugus, Hege Mardiste
Objectives:
Child will examine the materials/differences.
The child examines and uses adjectives that describe the materials.
Quote: Patience leads to the goal.
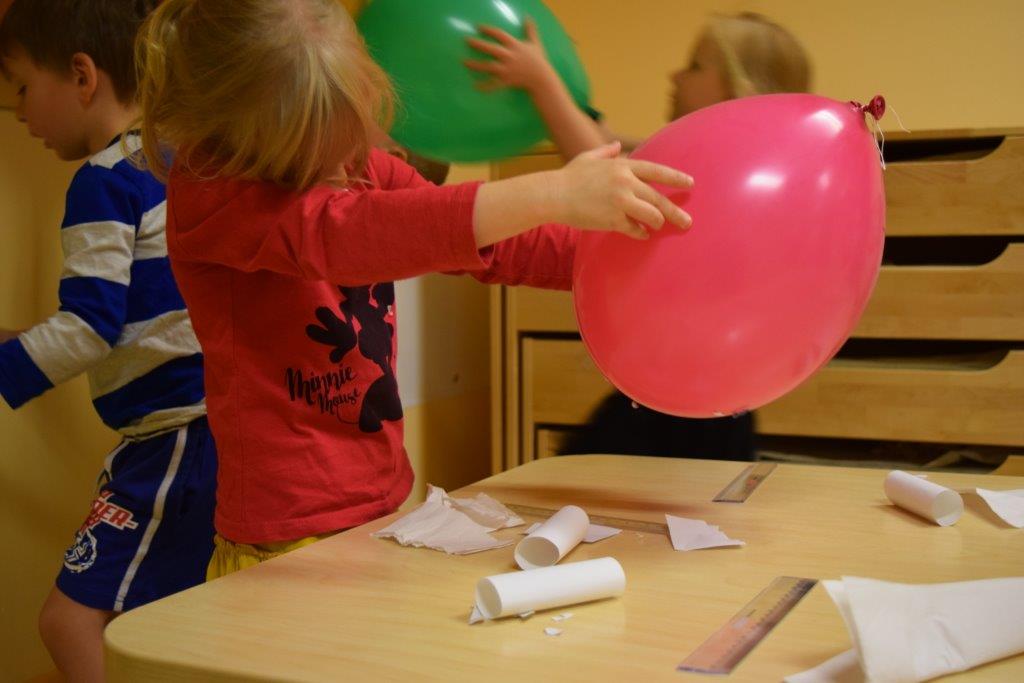
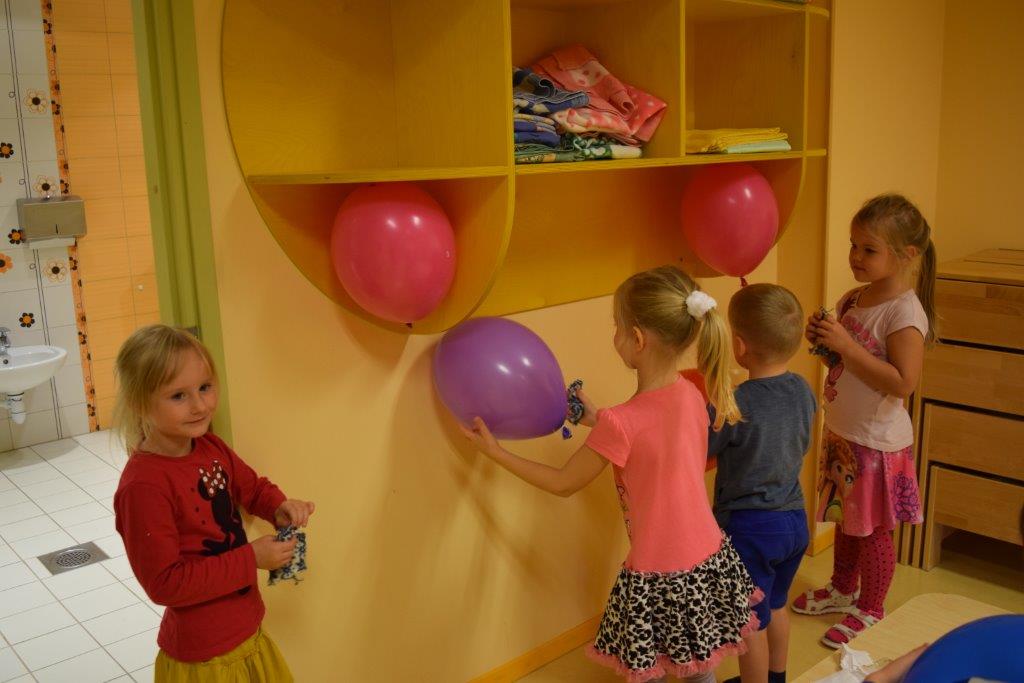
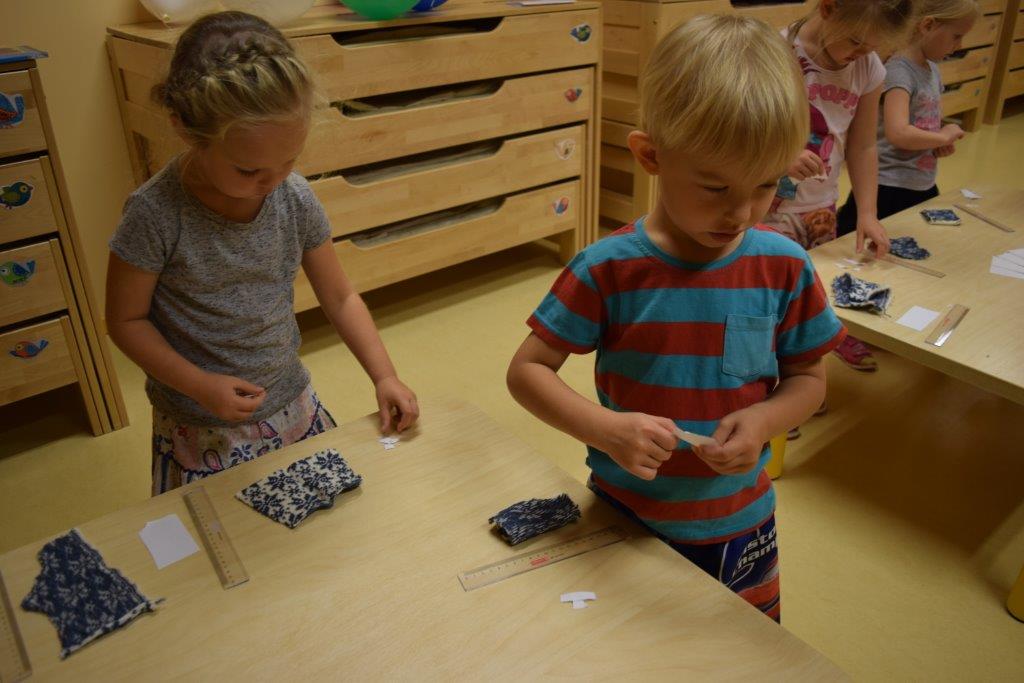
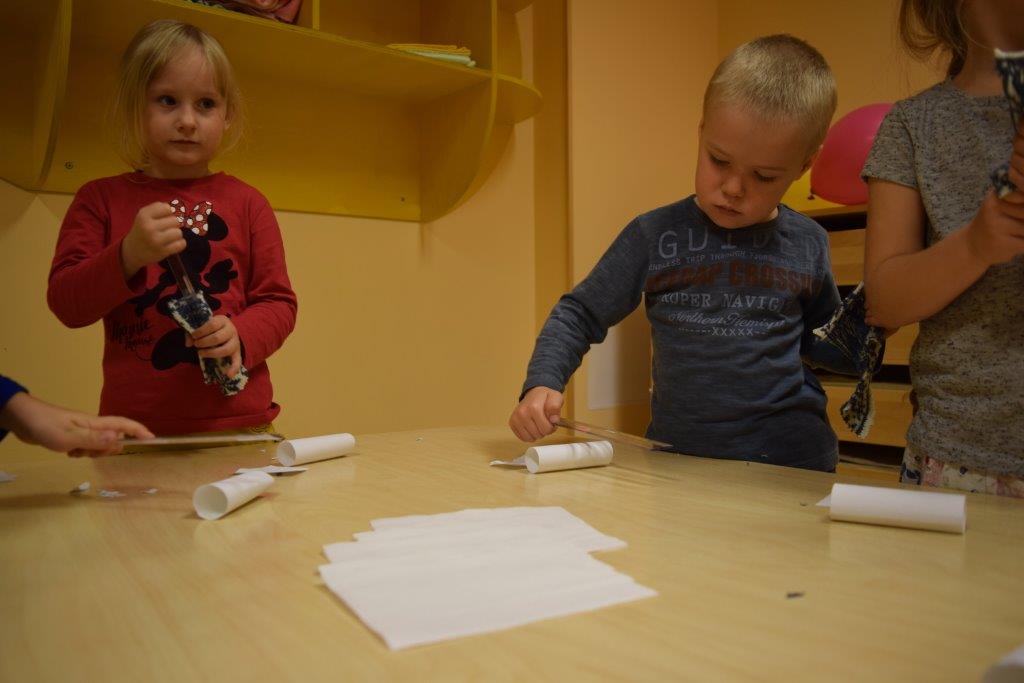
Tools: For each child a plastic rulers, a piece of paper for rip in half, a balloon, a patch of woolly, small rolls of paper (with a diameter of about 2 cm), disposable plastic bags Recycle Bin, which is the cut in the 2-3 cm wide strips (for making plastic rings), shelf or a book.
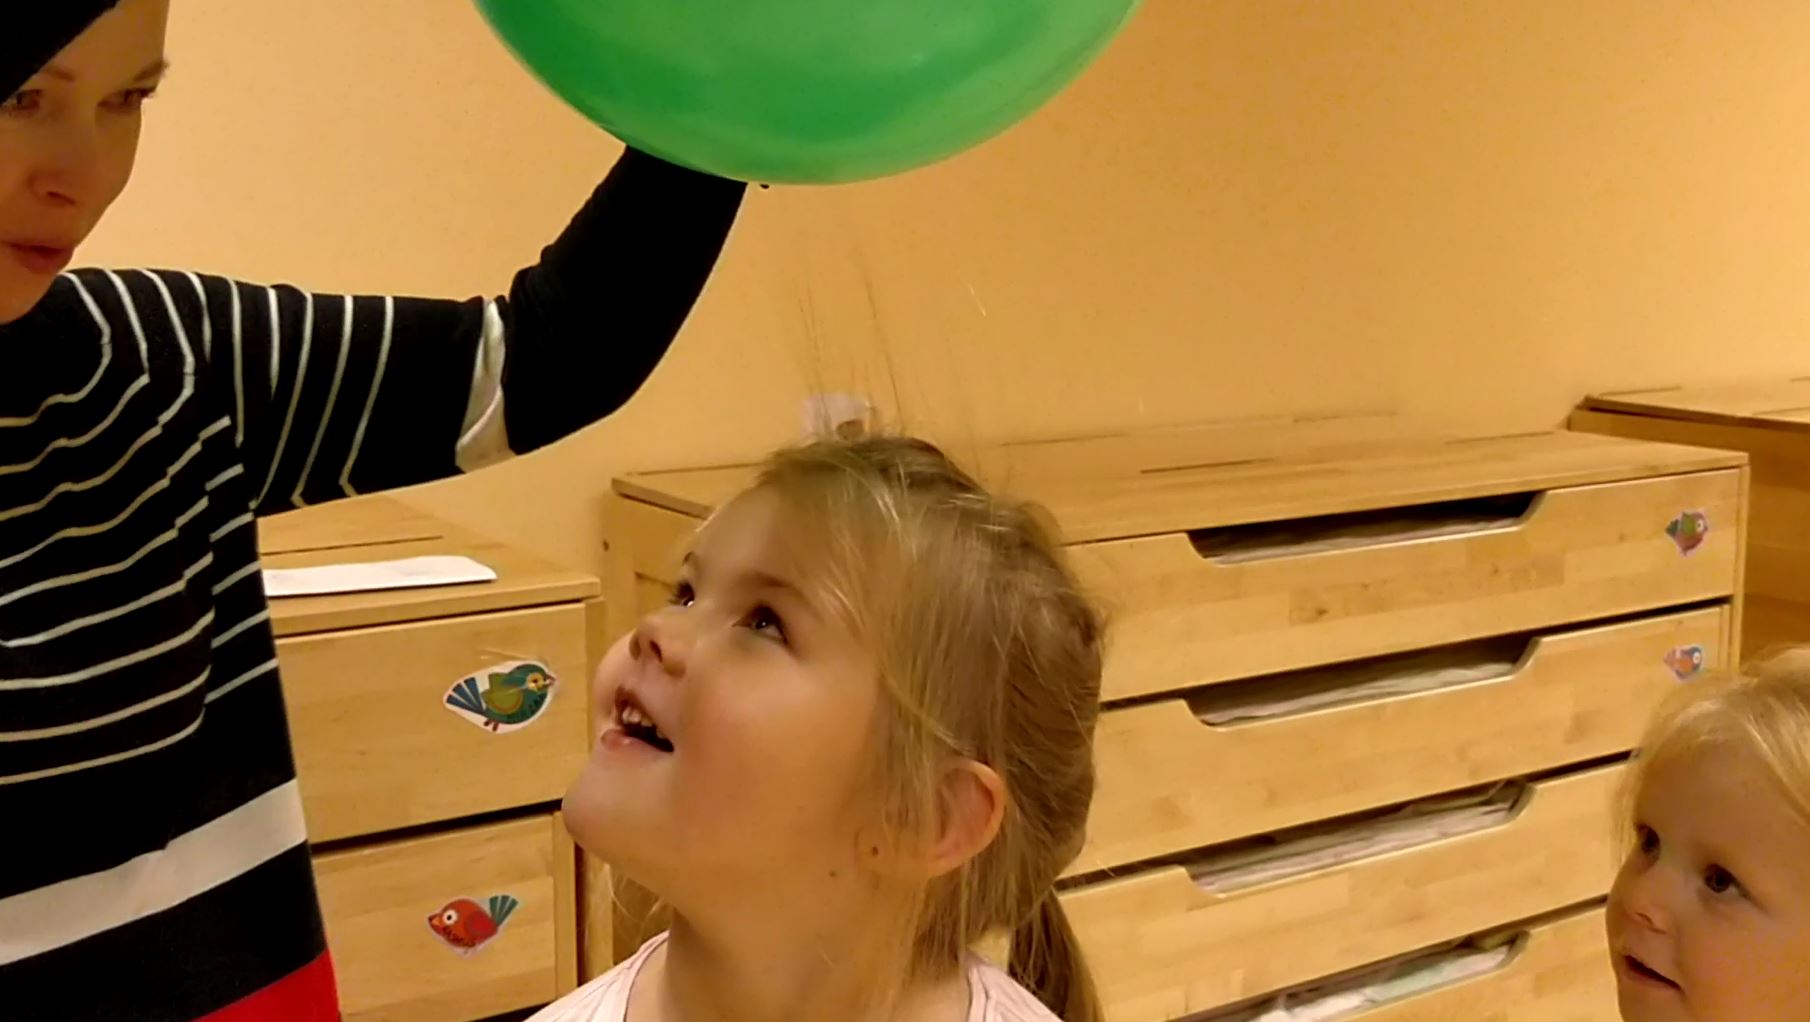
The action of the gear: You will definitely have had an experienced in taking off a sweater, it squeaks, may get the spunk and hair are attached to it. This is called static electricity. This may occur for each of the object, but it depends on how easily one or another material that takes over. For example, the woolly material frictional electricity takes the weight more easily than if the cotton material. Today we make with you a variety of experiments with static electricity.
First of all, one as an example of the teacher shows the attempts. He touches the balloon one of the child's hair (nothing happens). Then he rubs the balloons with a woolly material and shows what happened to the hair of the child.
Next, kids will make the tests:
Tools: a balloon, wool flannel, a piece of paper
1. Tear the paper 6-7 small paper pieces, the smaller the pieces of paper is, the more easily they remain attached to the balloon. Rub the balloon on the cloth, the more and better you will rub the more sure it is that the balloon is charged with static electricity and the experiment will succeed.
Tools: a balloon, wool flannel, a book, or a shelf.
2. Lift up the book and try to stick a balloon to it, whether the balloon remains attached to hang or not? Rub the balloon with the woolly flannel. Try again to stick a balloon to the book, who managed to rub the balloon enough will make succeed the experiment.
Tools: a plastic ruler, pieces of paper, wool flannel.
3. Rub a ruler with the woolly flannel. If the ruler is loaded with static electricity, place it close to the pieces of paper and see what happens? Pieces of paper will start to fall, and attached to the ruler down and jump back on again, like begin as a dance.
Tools: a plastic ruler, paper, small rolls of paper (with a diameter of about 2 cm), woolly fannel.
4. Rub the ruler and try to move the ruler above the paper roll, so that paper roll would start to move on. For this test to succeed, it is particularly important that the paper roll would be small and light, and a ruler fully rubbed .
Tools: a balloon, woolly flannel, disposable plastic bags Recycle Bin, which is the cut in the 2-3 cm wide stripes (rings).
5. In this experience you need a help of a friend. Friend rubs the cloth to the balloon and the other rubs the strip of plastic bag with the woolly rug. Both object shall be granted the same charge of positive static electricity. Now you can take the strip of plastic bag and but it above balloon. The plastic strip should start hovering above the balloon.
The sources of the: http://opik.fyysika.ee/index.php/book/section/3046
------------------------------------------------------------------------------------------
IV Experiments with light and shadow
A brief description of the action: In this activity children will understand how the light travels, they will make tests with flashlight to see how the shadows will change and what kind of materials the light will penetrate or not. They will make shadow theater and play a game with shadows.
Through the activities of the release time (date, time): 03.11, 2017
Grop: Naerulinnud The age of the children: 4-5a.
The teachers: Meeli Lugus, Hege Mardiste
Objectives:
A child will learn how shadows are made.
A child will learn how the shadows will change depending the source of light and distance.
The child can make experiences to understand how some materials let the light trough and some not.
Tools: A flashlight, a projector, a carrier, a white flax, dolls for shadow theater, a magnifying glass, a pencil, a piece of silly Putty, varying in shape and pattern on the drinking cups, a mirror, a toy.
The action of the gear: Show the children a picture of where people are on top of the shadows. What is in the picture? How the shadows occur? Show a picture of the two in the natural landscape, where the one is the sun up high and the other is the Sun already setting. Kids will find the differences between the pictures up. I have come with a flashlight, what do you think, what we do with it today, offer? () Because we are the light and the shadows of the images looked so now what do we do some tests by using a flashlight. Turn the lights off and the lights on the space remains the only flashlight. Everybody will examine the source of light that the flashlight makes.
Tests:
What happens if you put your hand in front of the flashlight?
In the light path by making hand shadow can be extended or shortened?
Also, have you noticed how the moving of the Sun during the day? Let's do this now in a flashlight, pen and using Silly Putty virtually. We confirm the pen by using the Putty on the floor of the stand. With a flashlight, imitating the movement of the Sun, children can see how the pen shadow becomes.
When is the shadow of the tallest?
When is the shadow of the most shorter?
What do you think, does the light make a shadow behind every object or can it go through some objects without leaving a shadow? First, they will but drinking cups with different patterns in front of the flashlight, then mirror and magnifying lens.
Whether the light passing through the lens?
Does the light pass through both of the drinking cups the same way?
What happens if a light hits the mirror? (Takes back the reflection).
What shape will give the lens to the light? (Flexes the light).
Because the topic is shadows, we will play a game with them. They have to show flashlight on to each other and then step on each other’s shadows to win the game.
Lastly, children can play shadow theater all together. They will move the objects in front of the light source and will understand more about the light and how shadows are made.
The sources of the:
"This book makes you a scientist". A translation into the language, and the Estonian Olvet Triin publishing company Argo, 2017. "This Book Thinks You ´ re (a) Scientist" 2016, Thames Hudson Ltd &, London. P. 42-43.
http://miksike.ee/docs/elehed/2klass/6meeled/elutuba/2-6-7pae.htm
www.tlu.ee/opmat/tp/loovus2/varjuteater.html
-----------------------------------------------------------------------------------------------
V Battery, rechargeable battery, electricity
Short description of activities: In the activity the children will see and loot the battery that A. Volta invented. Find out what's the difference between the battery and the rechargeable battery. Search the battery and rechargeable battery the hazardous waste sign and find out why they must not be thrown into the same trash. Where we have electricity. How to safely walk around the electricity.
Time of activity (date, time): 22.12.2017
Group: Naerulinnud Age of children: 4-5 Years
Teachers: Meeli Lugus, Hege Mardiste
Objectives:
The child knows where the electricity is coming from, which is battery and rechargeable battery.
The child appoints objects and activities that may be dangerous (electricity).
The child knows that batteries/rechargeable batteries are dangerous to the environment and are not thrown into the trash.
The child is acquainted with the researcher's Alessandro Volta invented battery.
Action Gear: I have a single item (battery) Today, what is it used for? The first battery was invented by the Italian physicist Alessandro Volta.
Let's look at the movie how he saw the first battery he invented, and what he consisted of Https://www.youtube.com/watch?v=c_0N-0lfxpE . That's what the first battery looked like, but over time, it has changed a lot.
There's a battery now, and there's a rechargeable batteries on the side, do you know what the difference is?
Here are a variety of batteries and rechargeable batteries, we'll find out where they can be used. For example, how Power Bank works (battery charging, use options).
If the battery, or the battery becomes empty/old, can you just throw them in the trash? We are looking for a corresponding character (picture) on the battery. Batteries and other hazardous waste must be collected separately and carried out in the corresponding collection points.
Do you know where electricity is coming to your homes? Electricity is produced in Estonia in power plants. In order to produce electricity, oil shale is extracted from the ground. It transported power plants and burns in ovens. As a result, the combustion is emitted by heat and energy, which makes it work on a machine that produces electricity. From there, the wires had to move to the homes.
We're going to make one game to understand how electricity moves in the circuit. Let's grab our hands and form a circle. The Power's going to move. Game host squeezes the hand of the child on the left, the electricity moves from the game to his other hand and he squeezes the hand of his friend, etc. The pace of the game will be accelerated and played for a short time.
Electricity is a powerful energy that makes many machines work. People have a lot of help in electricity, but electricity is a very dangerous thing. Let's look at the pictures together and talk about the safety of electricity. https://www.slideshare.net/pirka/elektr-44209040
Sources:
https://www.youtube.com/watch?v=c_0N-0lfxpE
https://www.slideshare.net/pirka/elektr-44209040
------------------------------------------------------------------------------------------
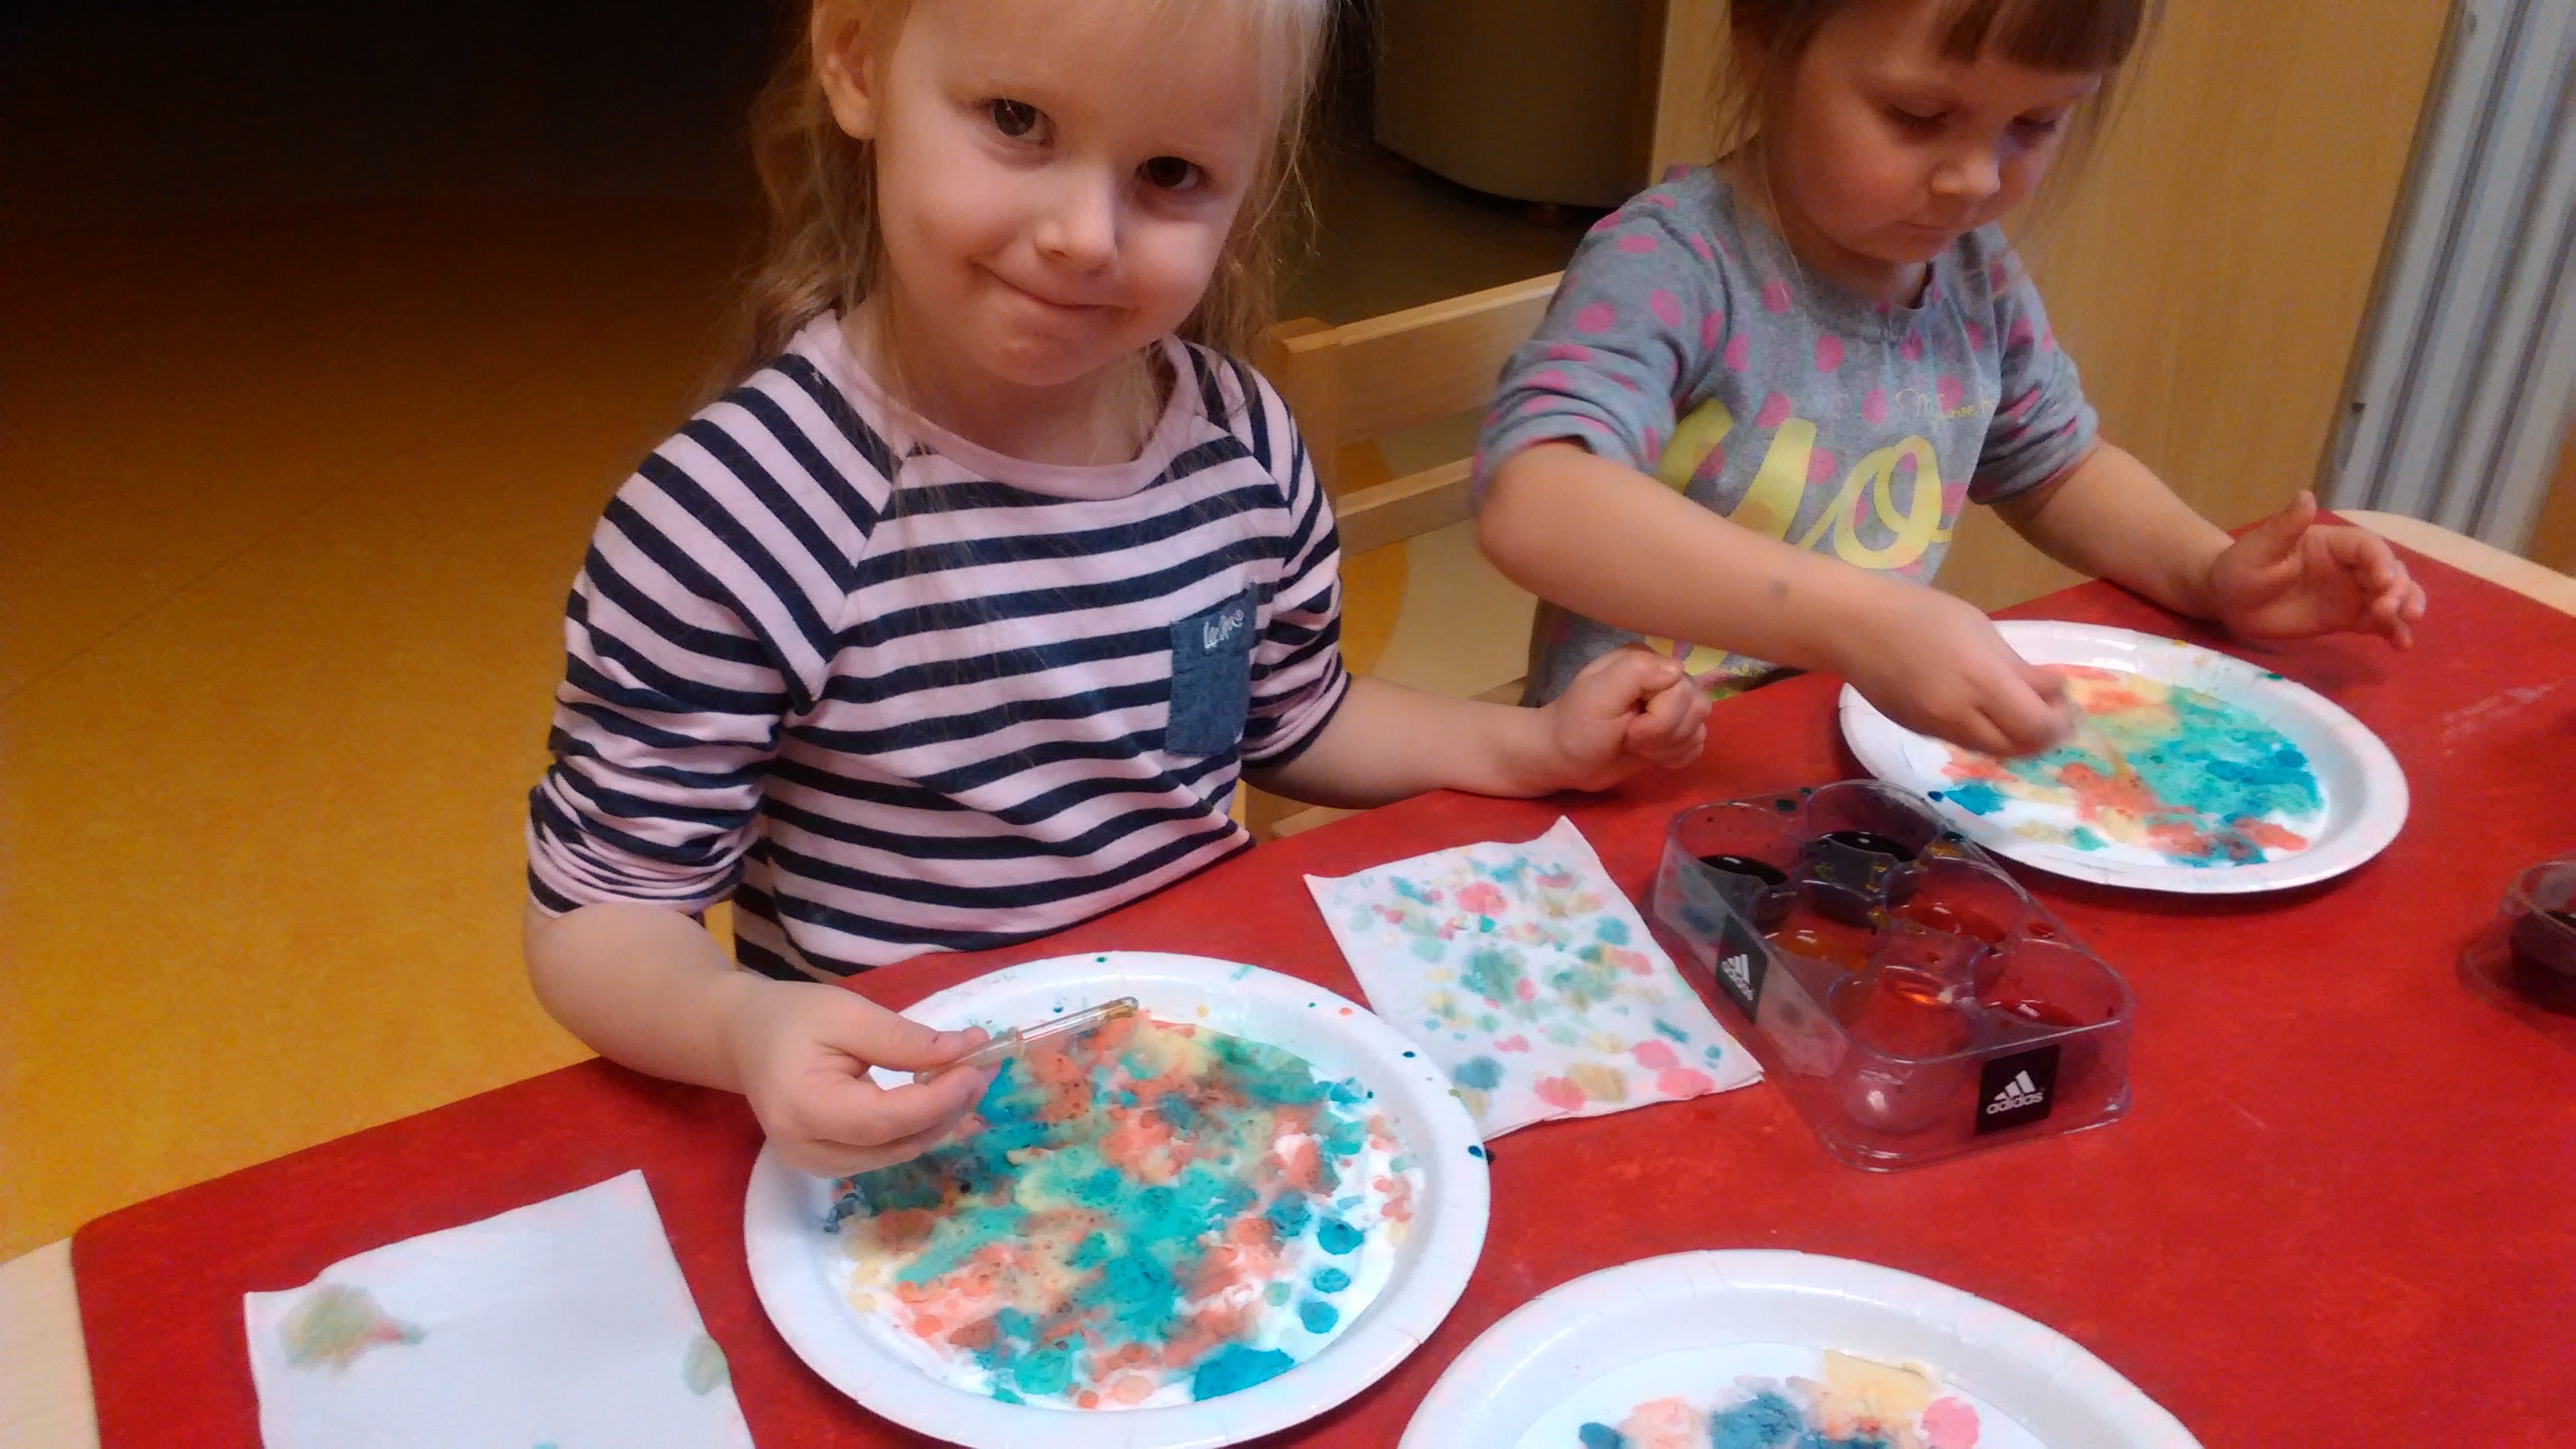
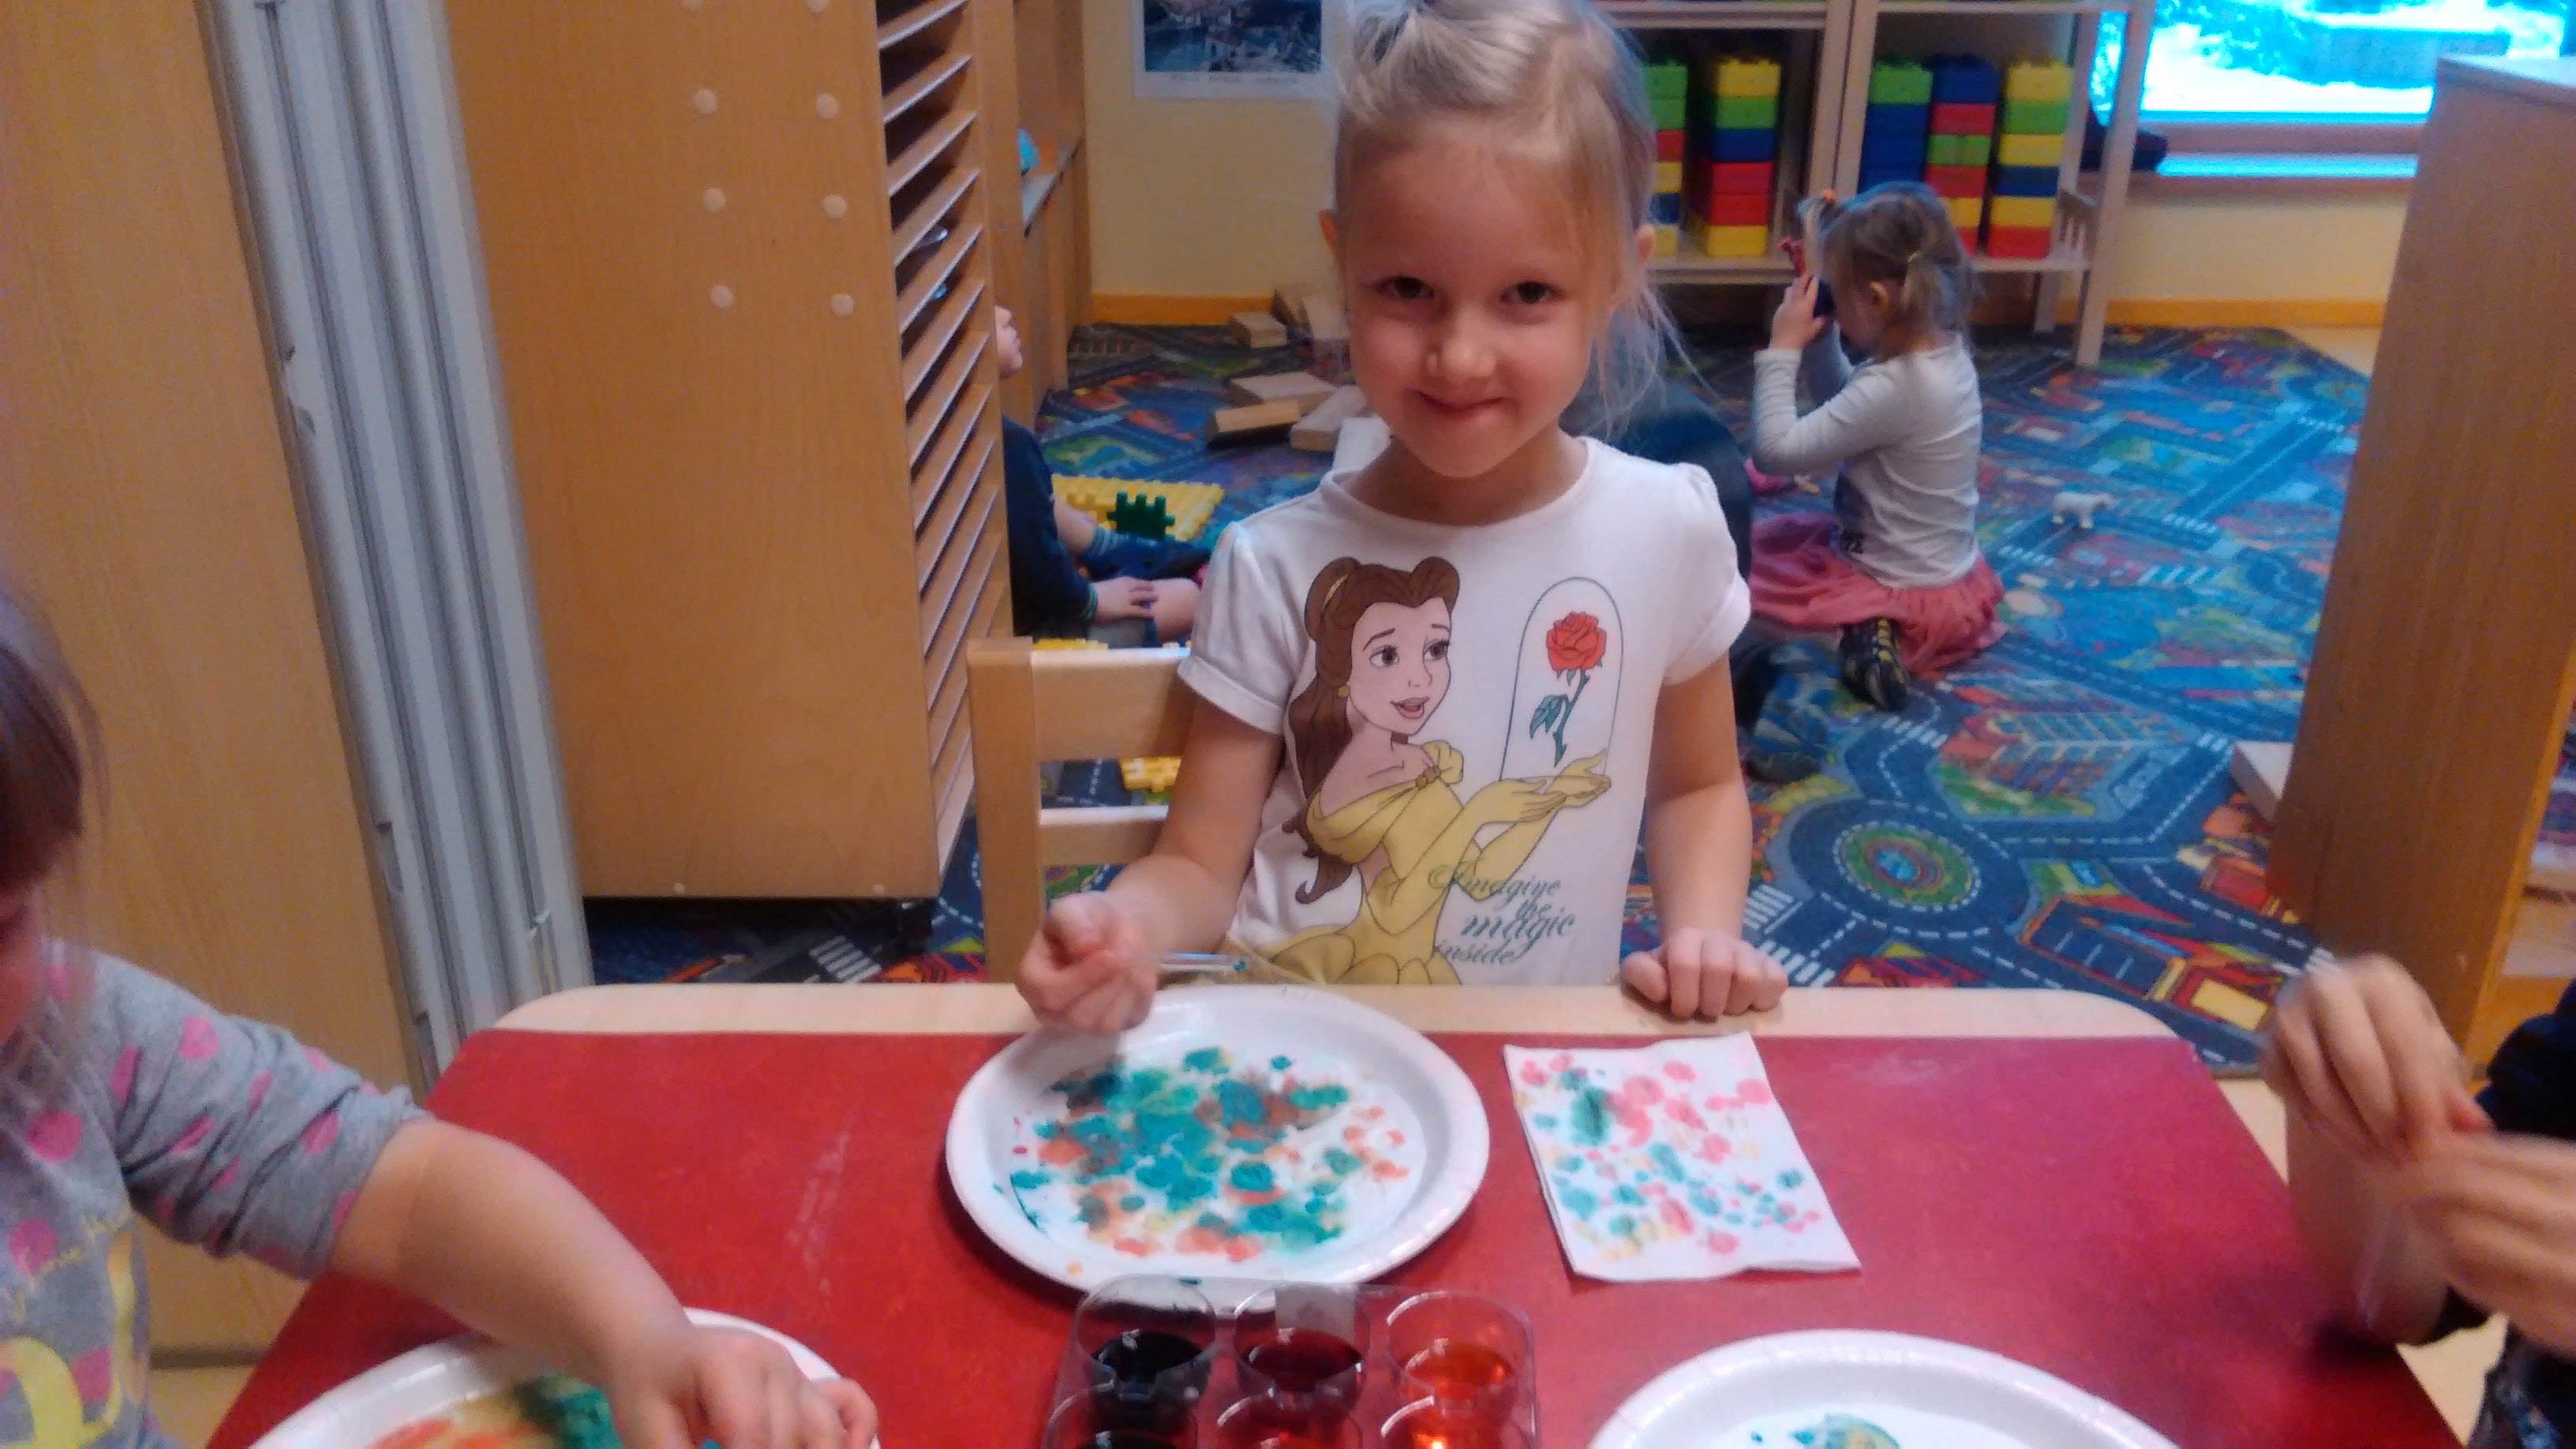
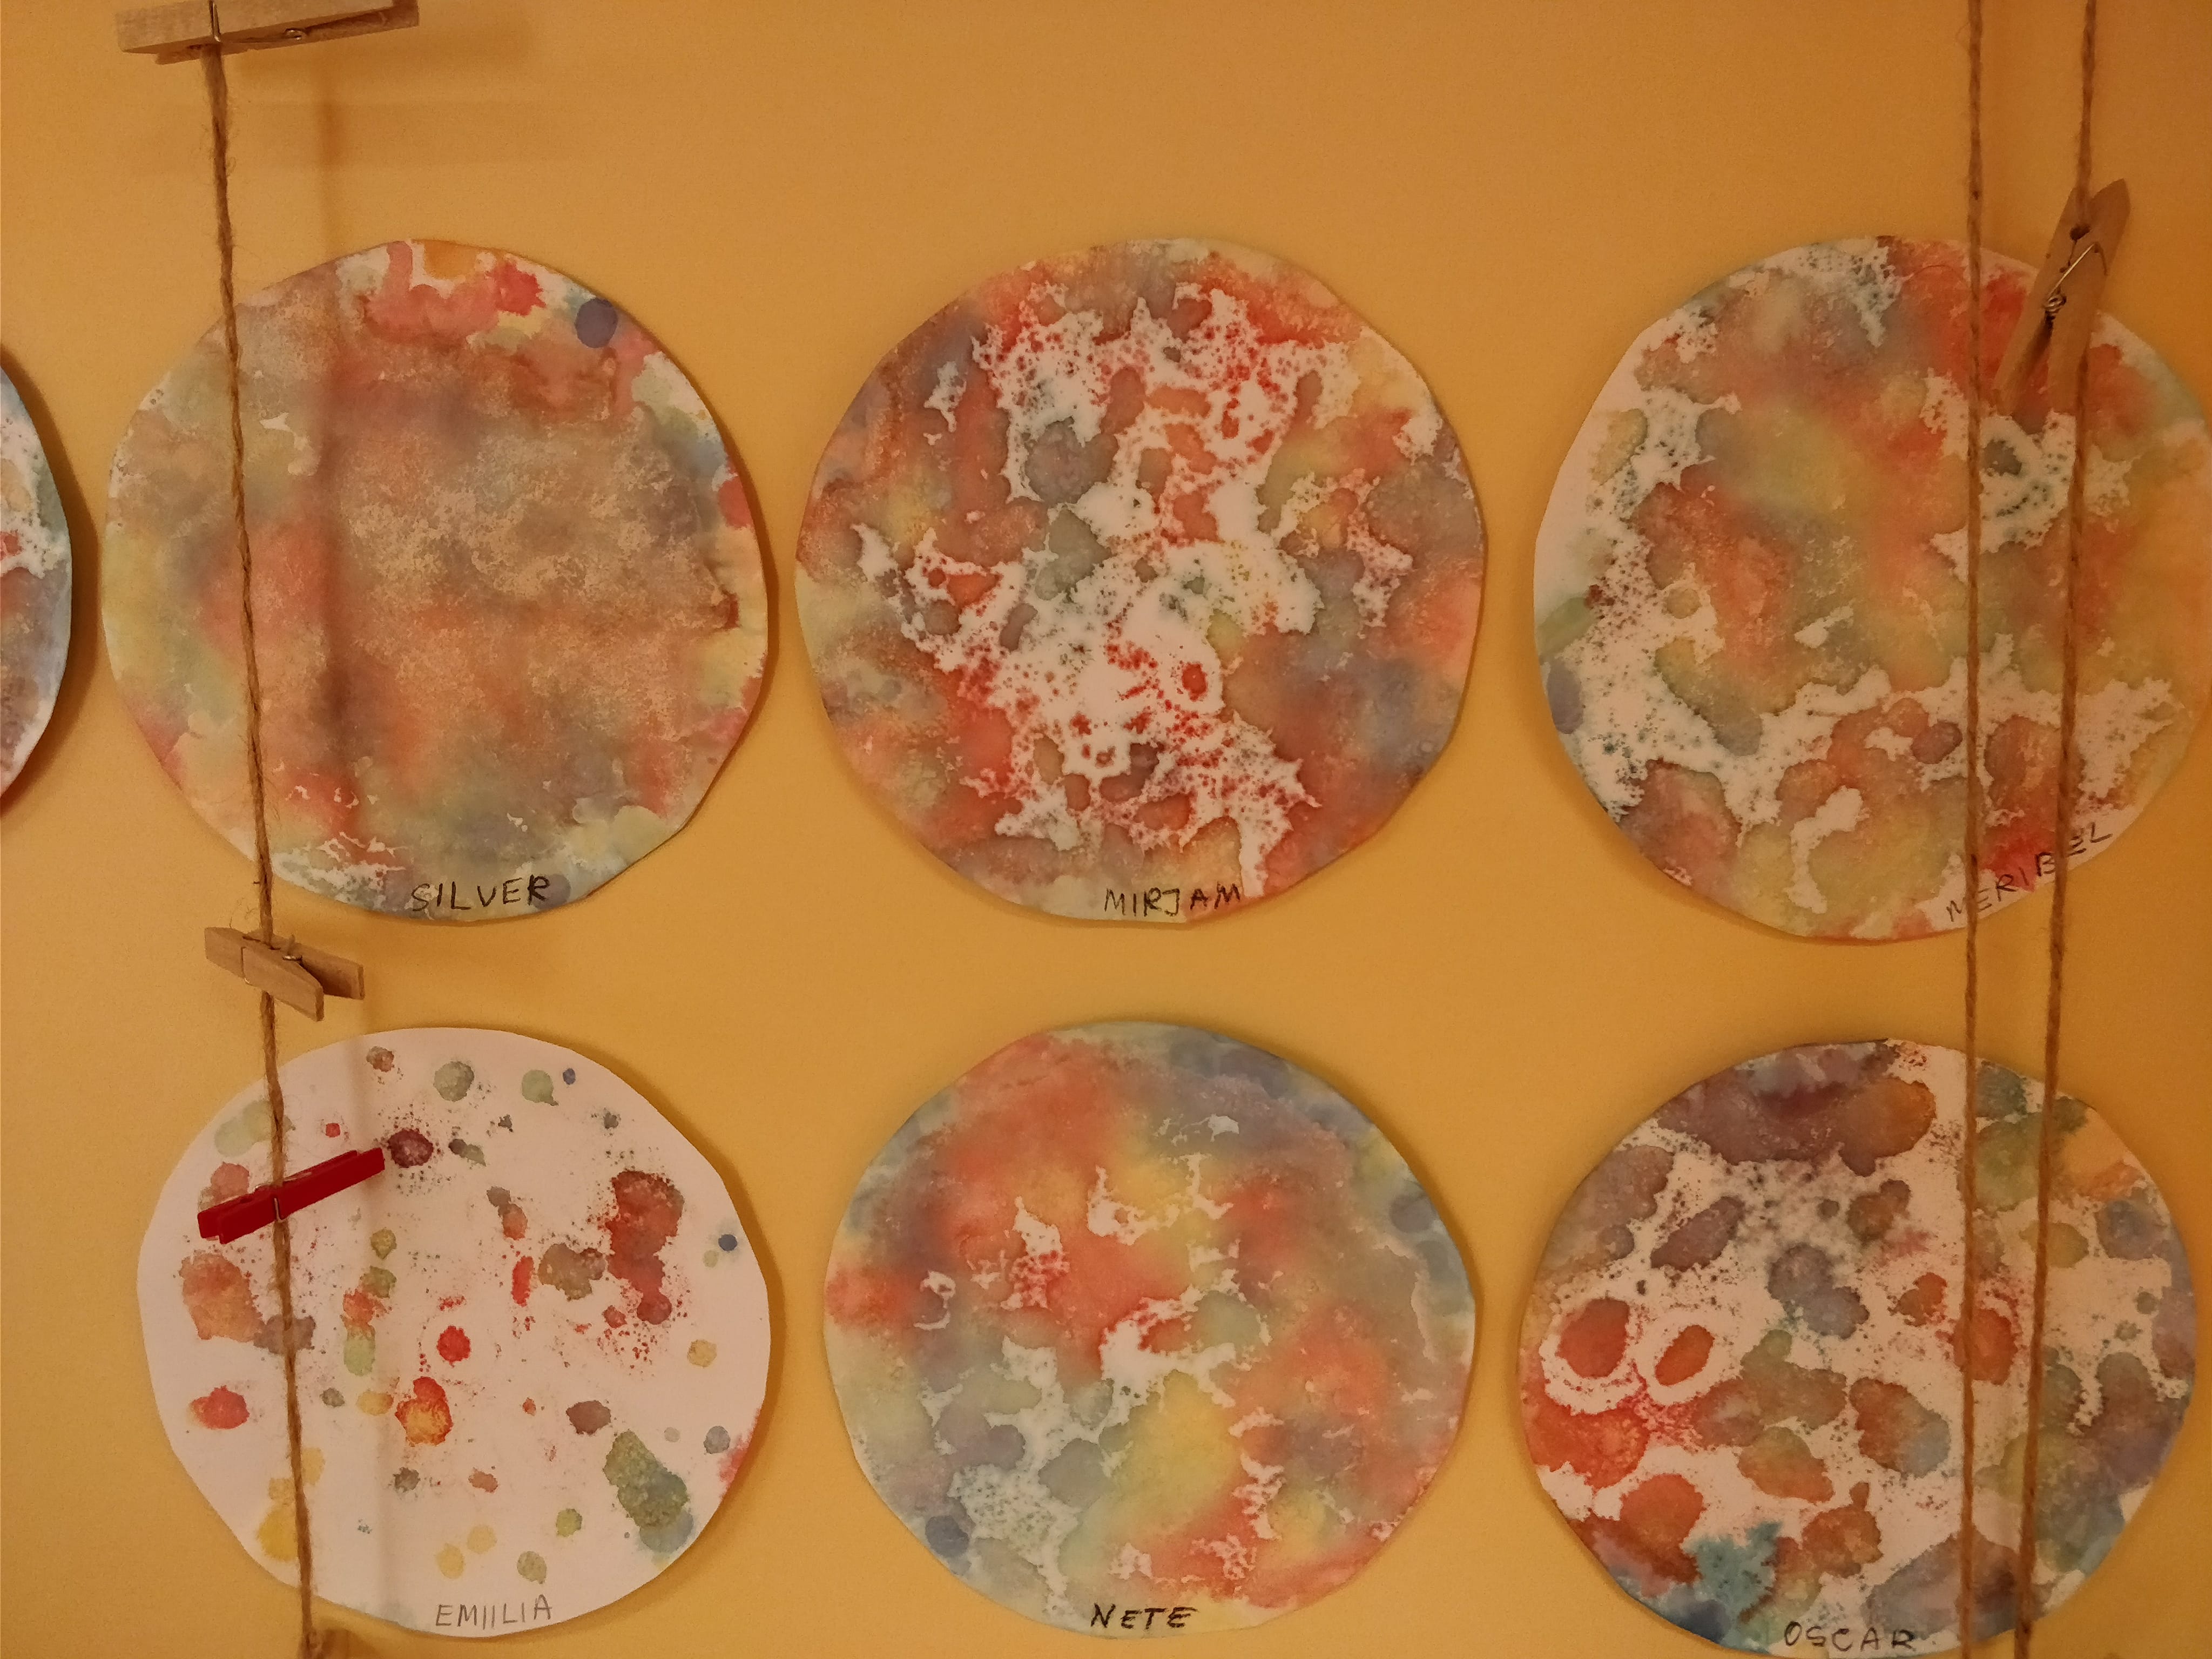
VI Color games with soda and vinegar
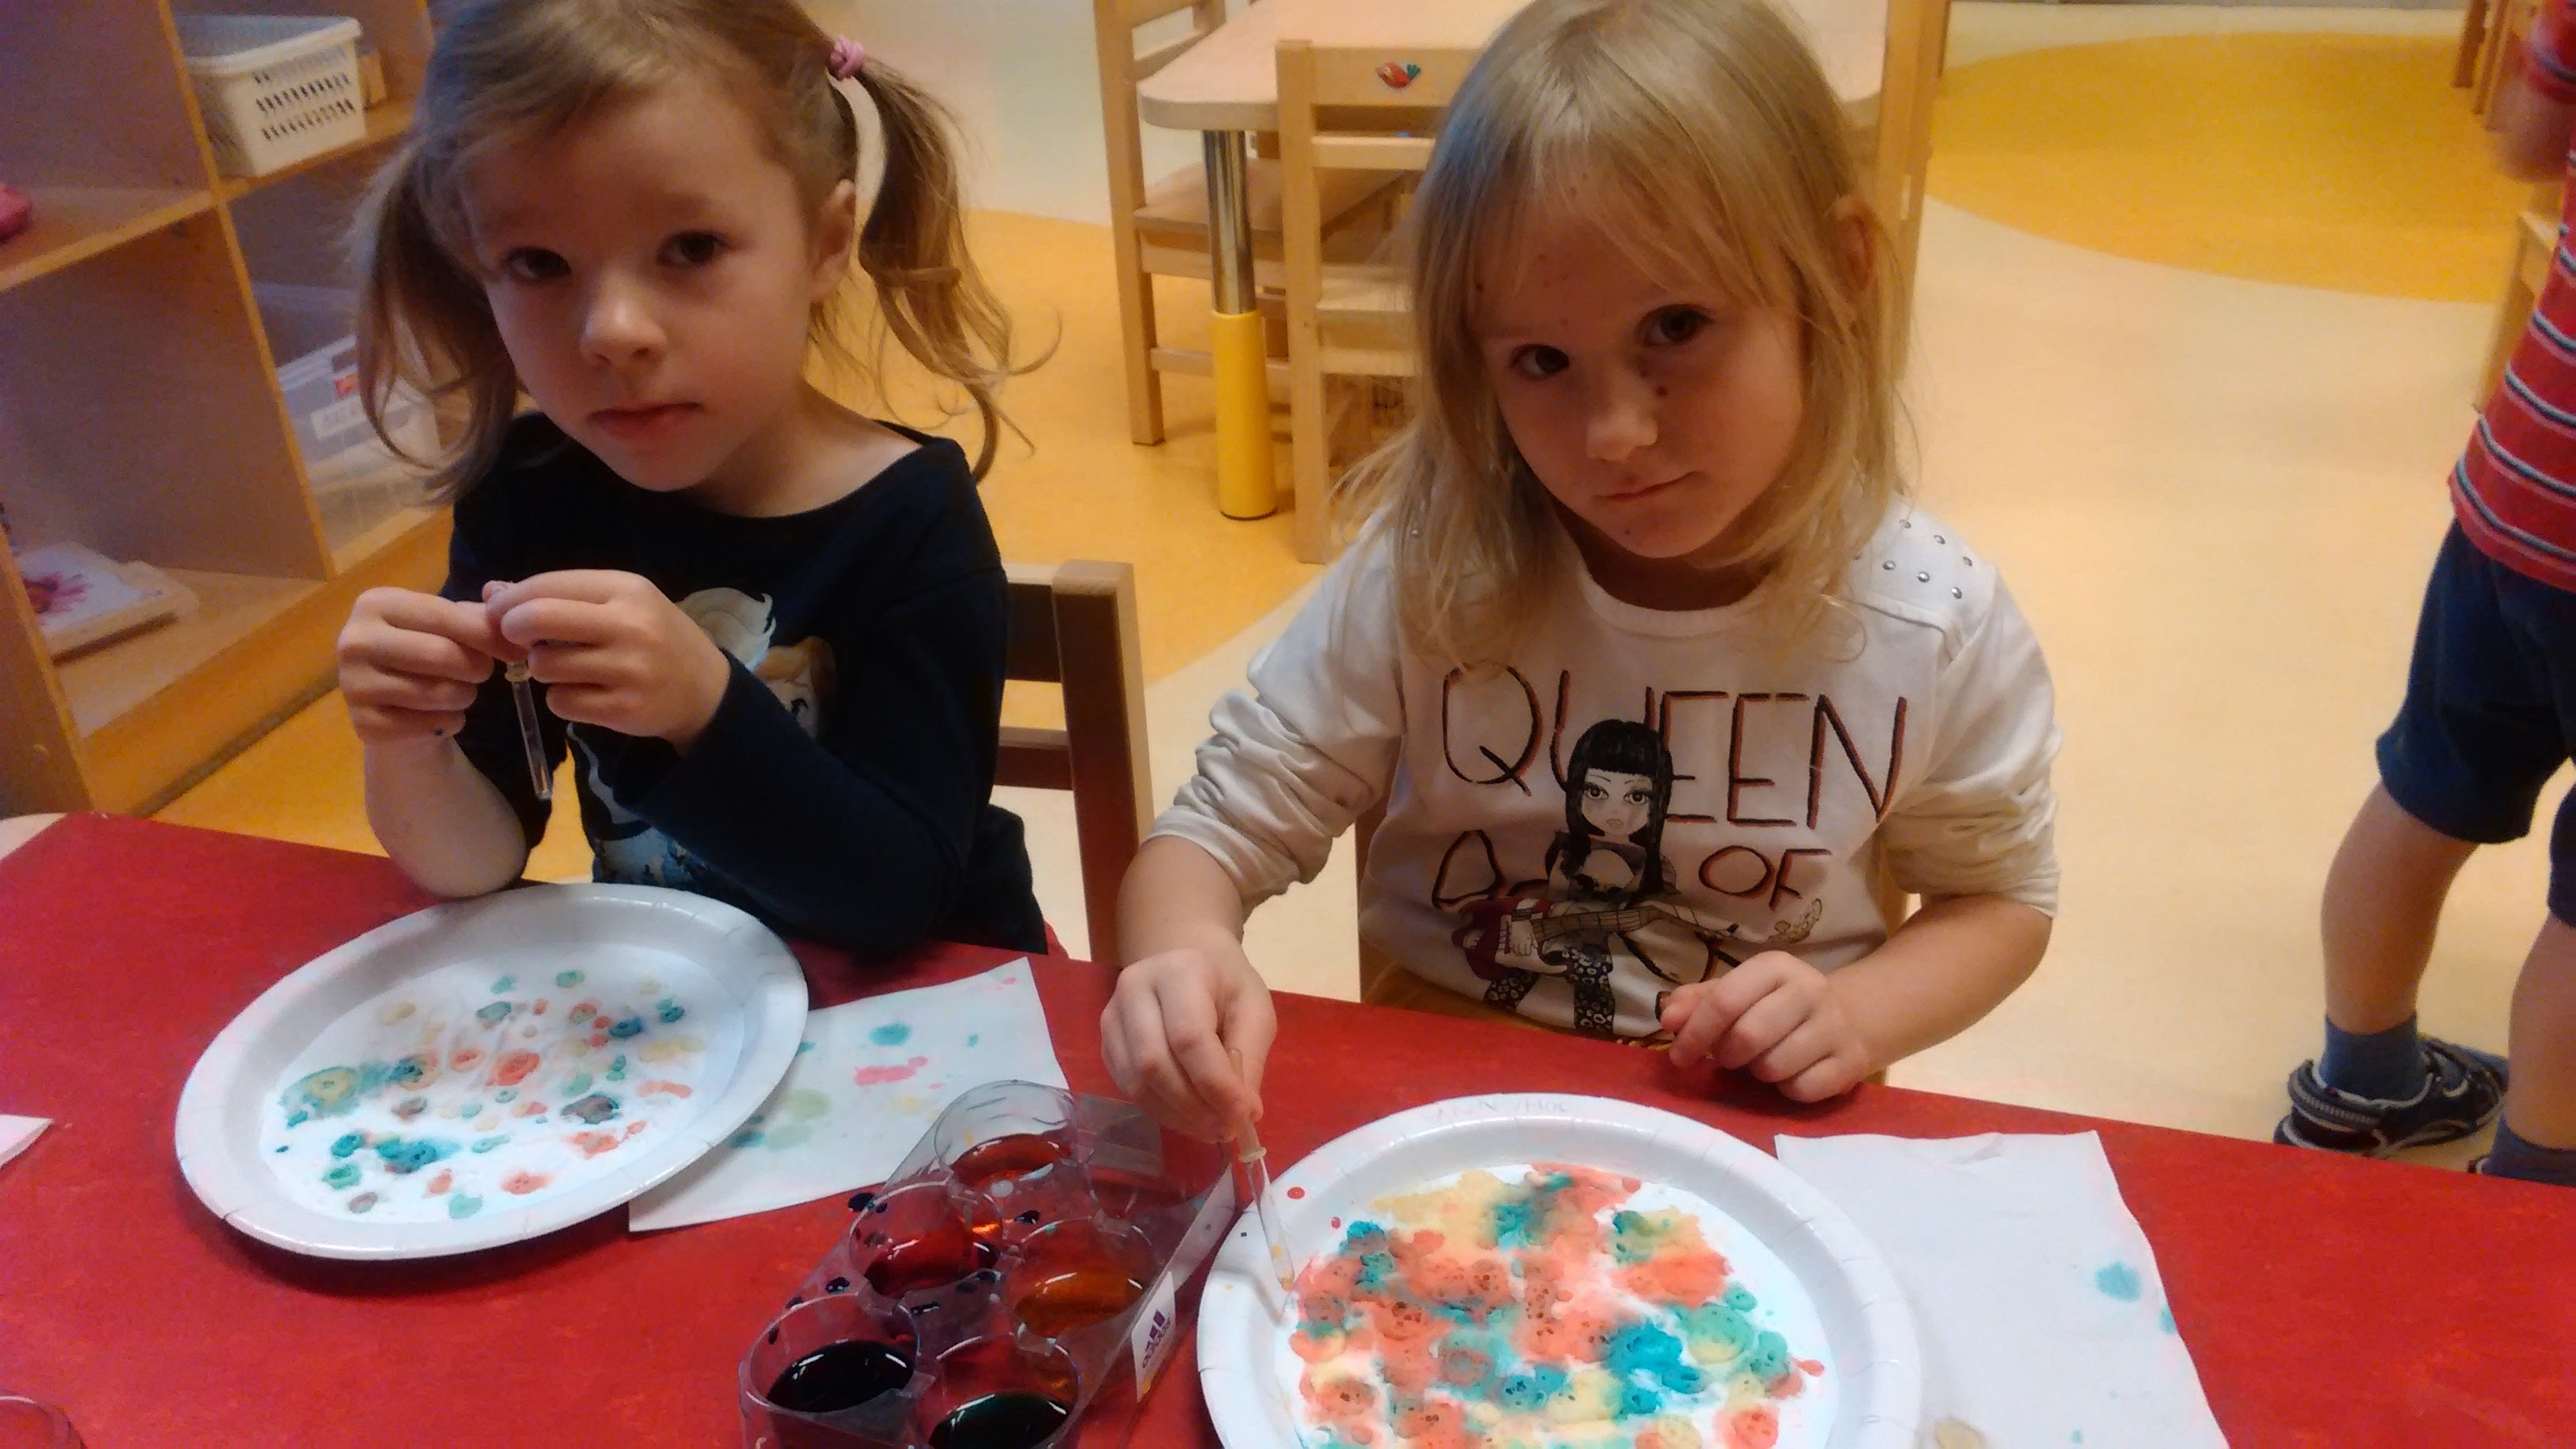
Short description of activities: During this operation, children can drop the colors of the soda layer. See the reaction of soda and vinegar, which puts all the fun and starts fizzle.
Time of operation (date, time):
Group: Naerulinnud Age of children: 4-5 years
Teachers: Meeli Lugus, Hege Mardiste
Objectives:
The child learns how to respond to contact with soda and vinegar
The child learns transport fluid with pipette.
The child uses a speech in some of the impressions associated with activity.
Facilities: Vinegar, food coloring (colors for painting on the eggs), pipettes, paper plates, color paper (cut by the size of paper plates), with baking soda, small cups or color palette to place colors.
Action Gear: There are pre-prepared colors for children, accompanied by a vinegar. Each child's workplace has been placed in colors, pipettes and paper plates, color paper, which have been put on baking soda light layer. The name of the child is written on the plate and paper.
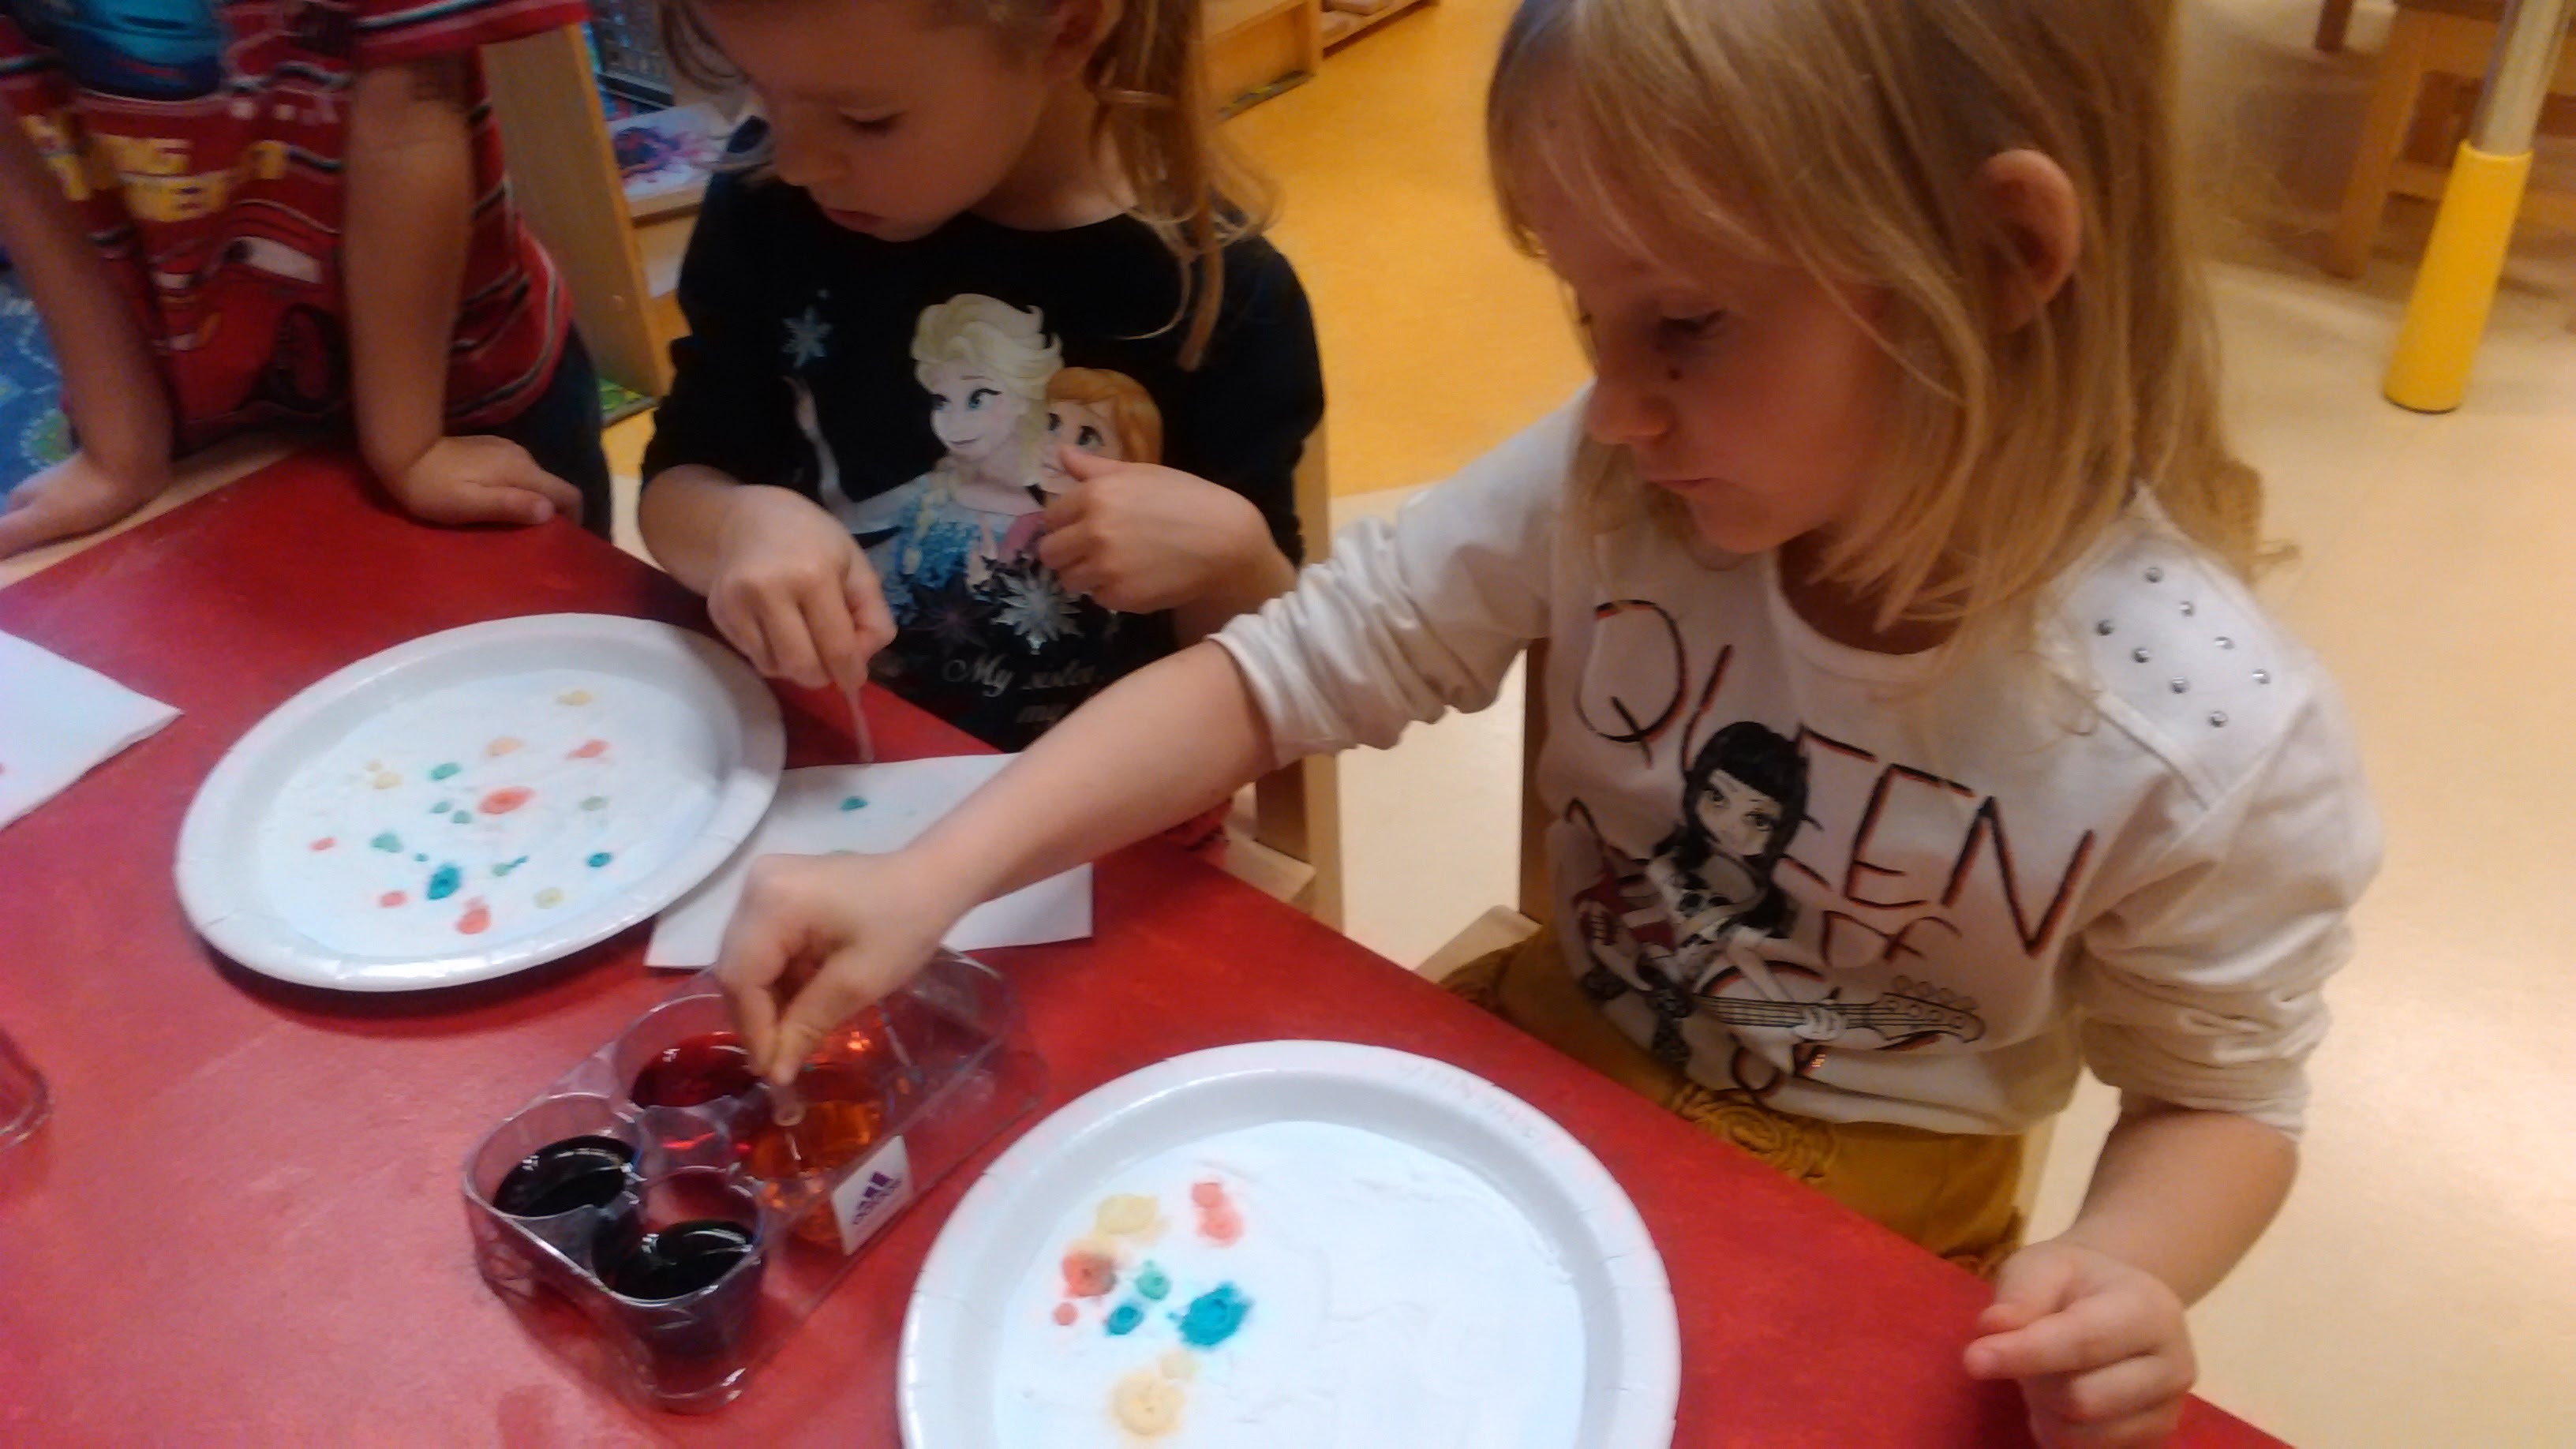
The teacher shows how the pipette works, and then the kids can start playing with colors. In contact with a vinegar-blended dye, a reaction occurs during which carbon dioxide is emitted, which makes all of it to fizzle. Children can drop the colors and see the reaction. A very exciting activity for children.
----------------------------------------------------------------------------
VII Scienceshow "Miracles of science"
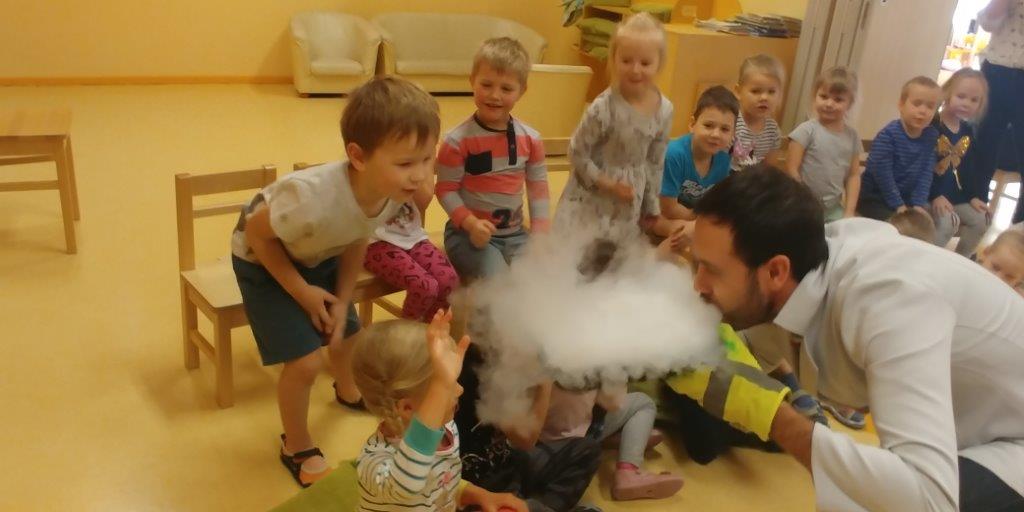
Naerulinnud invited Mr. Evgeny Moiseenko to show what kind of wonderful miracles science actually holds. It turnes out science really is wonderful and very interesting!