This is a second task sheet focusing on a different pattern of the mosaic 'The Ocean's God'.
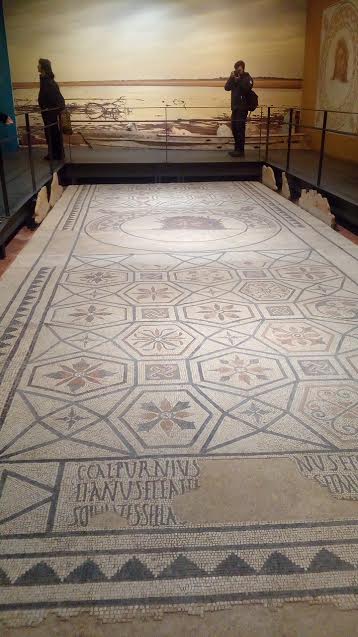
The Ocean´s God - II
Mosaic from Faro (capital of the Algarve), Portugal
- Historical background of the mosaic.
- Artistic background of the mosaic.
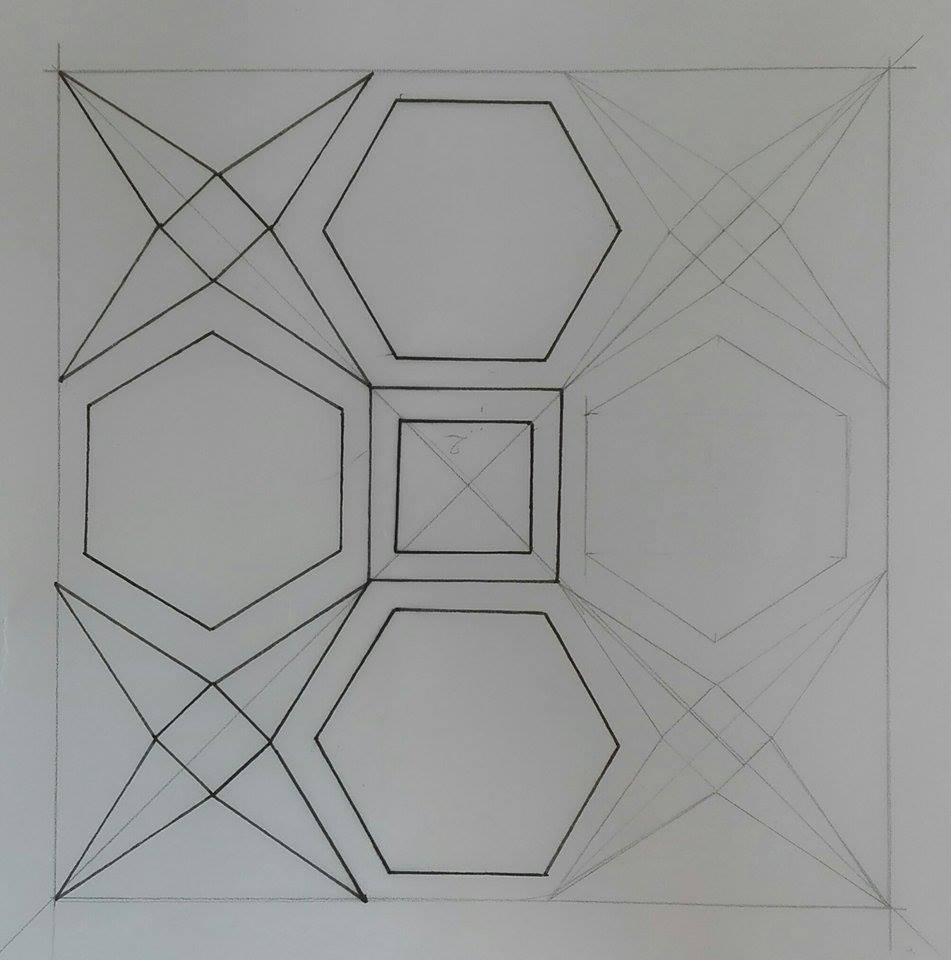
- Geometry task. Try to reproduce a part of the pattern of the mosaic following the steps below.
Materials: A3 paper sheetPaper, Straightedge, Compass and Pencil-Pen.
- Start by drawing a square, with 2cm on each side.
- Draw and extend the diagonals and biometrics.
- Draw a second square with 3 cm on each side, apart of de first one by 0,5 cm.
- Draw another square, 3 cm apart from the first one and with 8cm on each side.
- Draw 4 circumferences with center in the intersection point between the biometrics o and the biggest square, with 2,5 cm of ray, for the construction of the 4 hexagons with two sides parallel to the squares.
- Draw diagonally 3,5 cm from the second square, a square with 1 cm on each side.
- Finally, the construction of the star has as a base of 1cm, it develops from the diagonals and it´s parallel to the sides of the hexagon.
What is the next step that you need to take so that the part of the pattern from the Ocean´s God mosaic appears?
The Ocean's God II - Construction of pattern with Geogebra
First: We follow the previοus steps and we construct the pattern with geogebra
Second: An Alternative construction
First of all we will describe the steps of the construction and then we will create the pattern
1. We construct the geometric pattern by using the following underlying grid. First, we draw squares. We draw one square, leave the next two ones blank and then we draw again one.

2. We draw circles with a radius equal to the side of the squares.

3. We could now erase the purples line, because we will not need them anymore.

4. By using the circles, we could draw the regular hexagons. The circles of each line will produce hexagons of a different orientation. We begin with the hexagons, which are on the first horizontal line. For them, make a circle with the compass point placed near the intersection point of the circle and the perpendicular line.


5. We draw the regular hexagon by joining the intersection points of the circles.

6. For the hexagons, which are on the second horizontal line: Make a circle with the compass point placed near the intersection point of the circle and the horizontal line.


7. We draw the regular hexagons by joining the intersection points of the circles.

8. Now, we want to colour a rosette with six leaves. We choose the button for the Circular Arc with a center which goes through two points.


9. We erase the circles.

10. And the blue lines.

11. Last, we must draw the triangles

For them, we draw parallel lines from the tops of the squares and join the intersection points.

Implementantions of pattern with Geogebra
We create two files, which have different colours
fisrt file
and second file