The workshop that was developed during the stay of students in Turkey consists of several parts defined by different activities that sought the following objectives:
1. Improvement of digital competence.
2. Promotion of creativity and innovation.
3. Development of the capacity to investigate.
4. Empowerment of autonomy, leadership.
5. Improving the ability to learn to learn.
6. Development of critical and relational thinking.
PARTICIPANTS:
7 Spanish students and 10 Turkish students.
METHODOLOGY
Cooperative Learning
Learning by Doing
Web 2.0 in education
Games Based Learning
The workshop was divided into three parts: In the first place, the students learned and reflected on knowledge today as well as on the latest discoveries made and their reach in the daily life of people. For this, several presentations and videos were used and a very pleasant debate was held among the students in which they tried to answer the question of "What is necessary to invent?" And "How do the latest discoveries and inventions made by humans affect us in our lives?"
The second part of the workshop had an eminently practical nature, it was about getting the students to put themselves in the skin of the inventors through an experiment (the realization of homemade batteries) in order to know better the process of creation, invention and discovery .
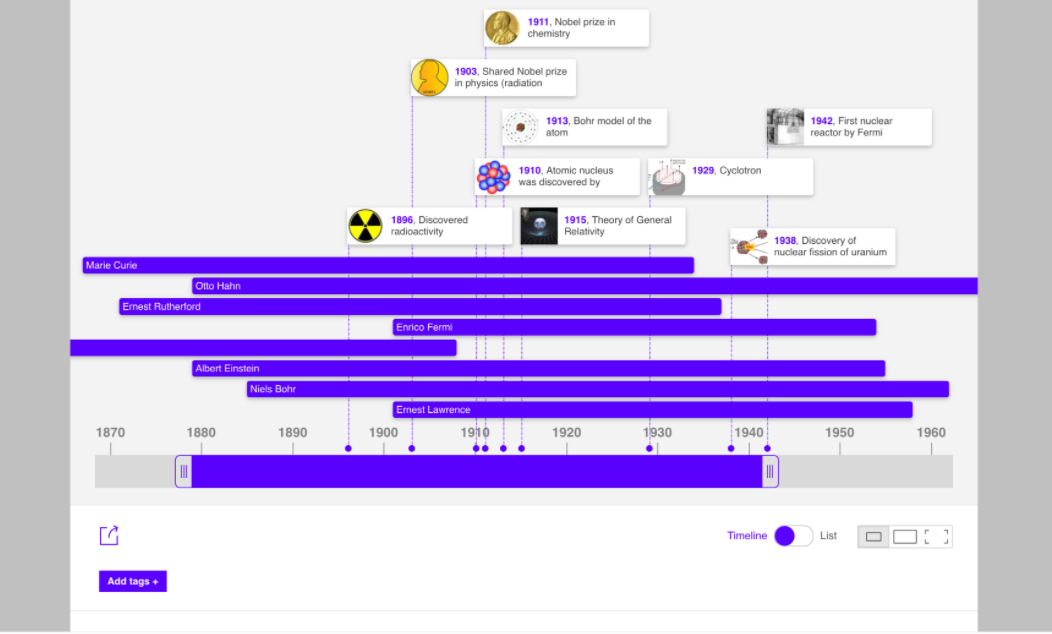
Finally, they made, using Web 2.0 tools, ebooks and timelines about great inventors of history. To do these results they had to learn how to use different tools. The methodology used was Cooperative Learning and they had, first, to research and after it, to create the ebooks and the timelines. The ebook presented here and the timeline are some of the ones made by the students. The first of them stands out because it was made as if it were a game, since the students tried to have their classmates guess what great scientist they were referring to.
Students' Workshop Reviving Scientific Discoveries
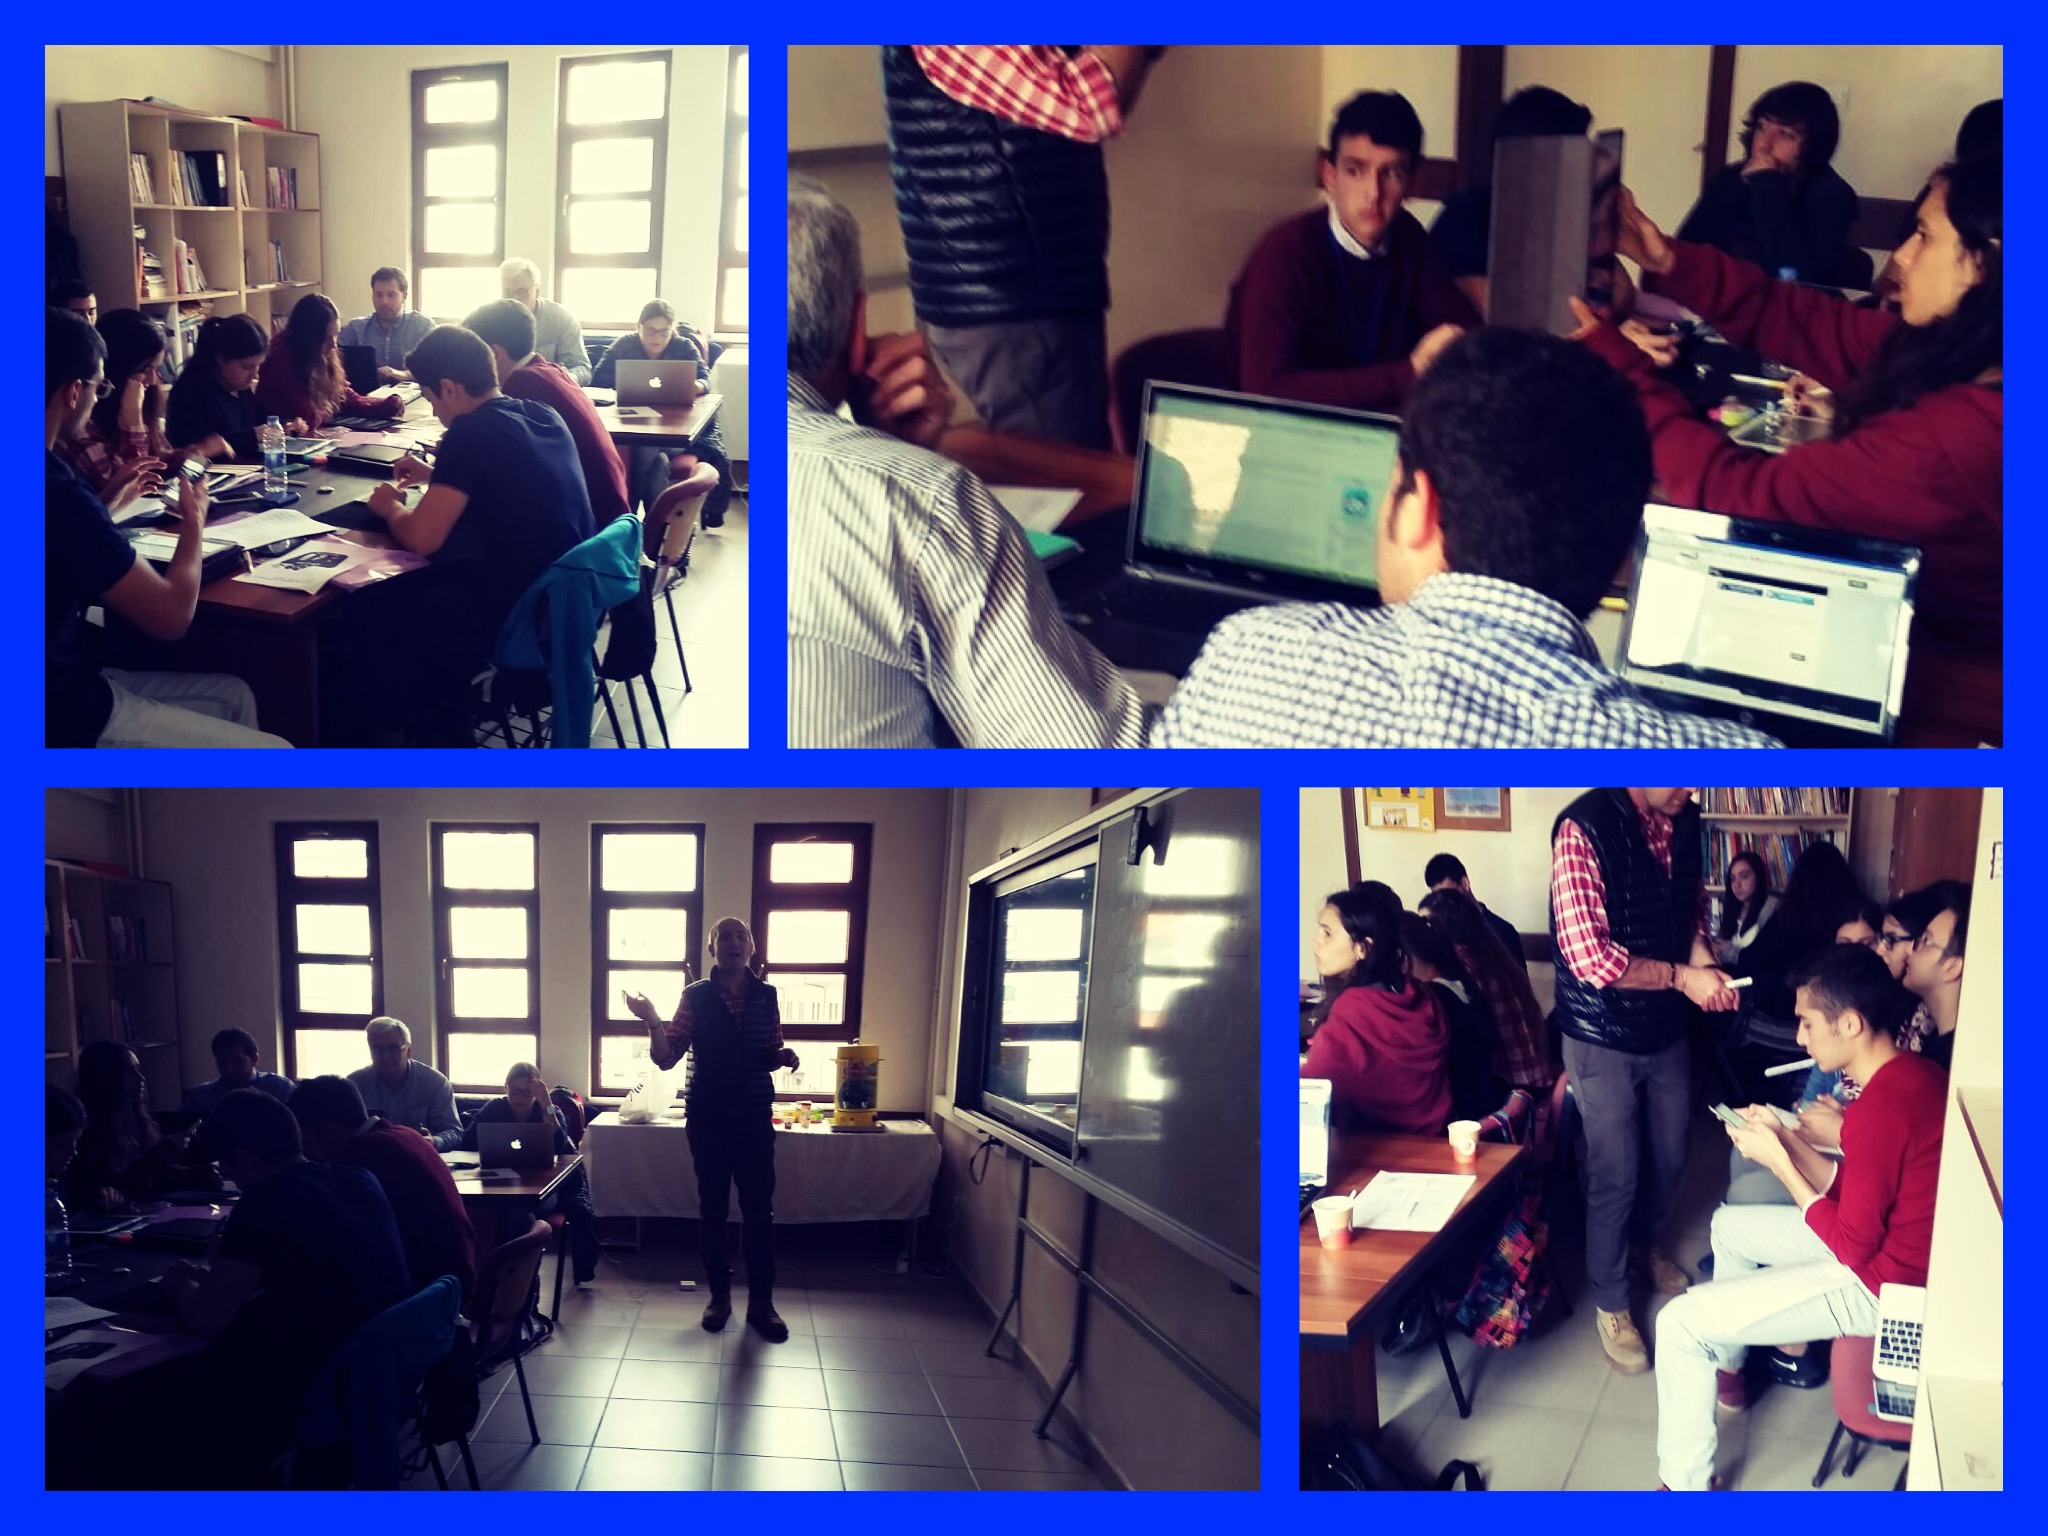
Photos of the Workshop
THEY are variously known as the Net Generation, Millennials, Generation Y or Digital Natives. But whatever you call this group of young people—roughly, those born between 1980 and 2000—there is a widespread consensus among educators, marketers and policymakers that digital technologies have given rise to a new generation of students, consumers, and citizens who see the world in a different way. Growing up with the internet, it is argued, has transformed their approach to education.
Discoveries for Digital Natives
Discoveries for Digital Natives by Slidely Slideshow
Reviewing Discovery Workshop
Lemons Make a Battery
Introduction
With this lab, pairs of middle or high school students work together to make a 2-cell battery using a paper clip, a penny, and a fresh lemon as each of the cells. The battery can power a digital LCD clock or timer that is normally powered by a 1.5-V button battery. The activity can be completed in 35 min or less.
Explanation
A lemon battery generates electricity (a flow of electrons) due to chemical reactions occurring at electrodes inside the lemon. The outer coating of zinc on a steel paper clip is oxidized, and the paper clip becomes a negatively charged anode. The electrons that are released flow from the zinc through a wire to a copper penny, which channels the electrons to the positive hydrogen ions, H+ in the lemon’s acidic juice. The hydrogen ions are reduced to neutral hydrogen atoms, which pair to form hydrogen gas, H2. The penny becomes a positively charged cathode as the electrons are funneled away. Both reactions are shown below, along with the net reaction.
| The paper clip, zinc electrode (anode) |
Oxidation: |
Zn → Zn2+ + 2e– |
| The penny, copper electrode (cathode) |
Reduction: |
2H+ + 2e– → H2 |
| |
Net reaction: |
Zn + 2H+ → Zn2+ + H2 |
One misconception that students may have is that the lemons themselves are the batteries producing the current. The lemons provide the liquid electrolyte that completes the circuit. The source of current (the electron flow) is the zinc atoms of the paper clip.
Content standards
Grades 5–8
Science as Inquiry
- Abilities necessary to do scientific inquiry
- Understandings about scientific inquiry
Physical Science
- Properties and changes of properties in matter
- Transfer of energy
Grades 9–12
Science as Inquiry
- Abilities necessary to do scientific inquiry
- Understandings about scientific inquiry
Physical Science
- Structure and properties of matter
- Chemical reactions
- Interactions of energy and matter
Safety
Use safety goggles. Take care when making slits in the lemon with a knife. Keep the lemon batteries away from any heat or flame due to the small amount of flammable hydrogen gas that may escape at the penny electrode. Acidic lemon juice may cause minor skin irritation and possibly fade clothing. Dilute any spills with water.
Materials needed per student group
- 2 Fresh Lemons
- 3 Copper Wires with Alligator Clips
- 2 Jumbo or Standard Metal Paper Clips
- 2 Pennies
- Voltmeter or Multimeter
- Digital Clock or Timer
- Knife
- Paper Towels
Procedure
1-Cell battery (1 lemon)
- Applying some pressure, roll a lemon on a table to loosen the pulp inside.
- With a knife, carefully make 2 small slits an inch or 2 apart in the lemon rind.
- In 1 slit, insert a jumbo paper clip halfway into the lemon.
- In the other, insert a penny halfway into the lemon.
- Attach the alligator clip of 1 wire to the paper clip. This is the negative electrode.
- Attach the alligator clip of another wire to the penny. This is the positive electrode.
- Check the voltage by connecting the other ends of the wires to the positive and negative probes of a voltmeter or multimeter. (If the reading is negative, reverse the connections.) Record the voltage.
2-Cell battery (2 lemons connected in series)
-
- Repeat steps 1–4 above with a second lemon.
- Attach the other end of the wire connected to the penny of lemon #1 to the paper clip of lemon #2. This positive-to-negative connection is called connecting in a series.
- Attach a third wire to the penny of lemon #2. This wire is positive, while the wire from the paper clip of lemon #1 is negative.
- Check the voltage of this 2-cell battery by connecting the other ends of the wires to the positive and negative probes of the voltmeter or multimeter. Record the voltage.
") |
| 2-cell battery (2 lemons connected in series) |
- Remove the button battery from a digital timer or digital clock.
- Note the 2 wire contacts in the battery holder. The center one is the negative pole, and the side contact is the positive pole. You may have to bend the center contact up and the side contact out to attach the alligator clips of the wires.
- After attaching them to the contacts, do not allow the alligator clips to touch each other.
- Turn on the timer or observe the display of your digital clock. What do you see?
Multiple cells in series
You may want to have your student groups combine their cells with those of other groups and connect 4 or more lemons in series. Or, students may cut the lemons in halves or quarters to make more cells (the voltage output for each cell will remain the same). For each additional lemon or partial lemon, add a wire connecting a penny of one (+) to the paper clip (–) of another. Four lemons in series will power a 1.7-V LED. Remind your students that the short leg of the LED is the negative pole and the long leg, the positive; the LED will illuminate only if connected properly. LEDs can be purchased from local electronics suppliers or online.
Great Scientests
lalla