Help: Making a TwinSpace webpage
If you are reading this you are in the TwinSpace!
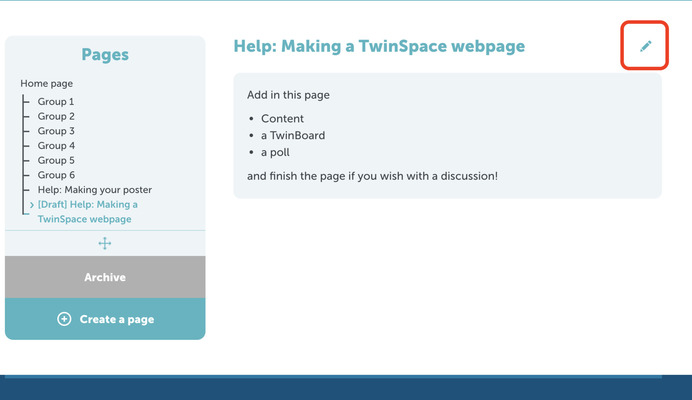
When you first go into a page in the TwinSpace for which you have editing rights you should see a pencil in the top-right corner. (See below)
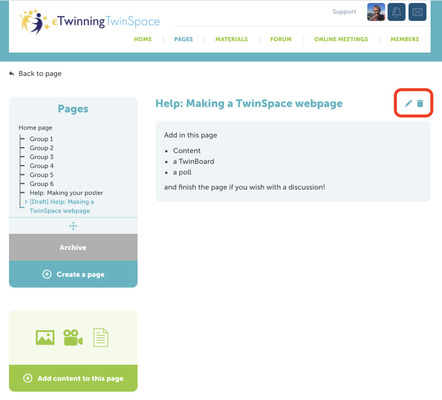
Click on that...and you will think that nothing has happened. Actually the only change you will probably see is that there is now a dustbin (trashcan) next to the pencil. But...scroll down and you will see some new green sections below the pages. You use these to add the page content. (See below)
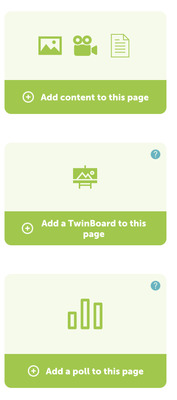
The first of these green sections is the most useful. Click on this to enter the text editor. Here you can add text, images, videos and files. Before you can add them though you have to upload them. More on this later.
The second green box allows you to add a TwinBoard. This is a pinboard for posting various materials. There was one of these on the homepage you visited before this page. We used it to share a range of Pala images, videos, links etc.
Finally you can add a poll. I haven't tried this, but feel free!
The text editor
You will know most of the tools from word processing but I have marked a few on the screenshot below for those who have never made a webpage before.
Remember to "Submit" your work regularly (button at the bottom) so that you don't get automatically logged out and lose everything you have done. After you have saved, use the pencil icon to edit again.
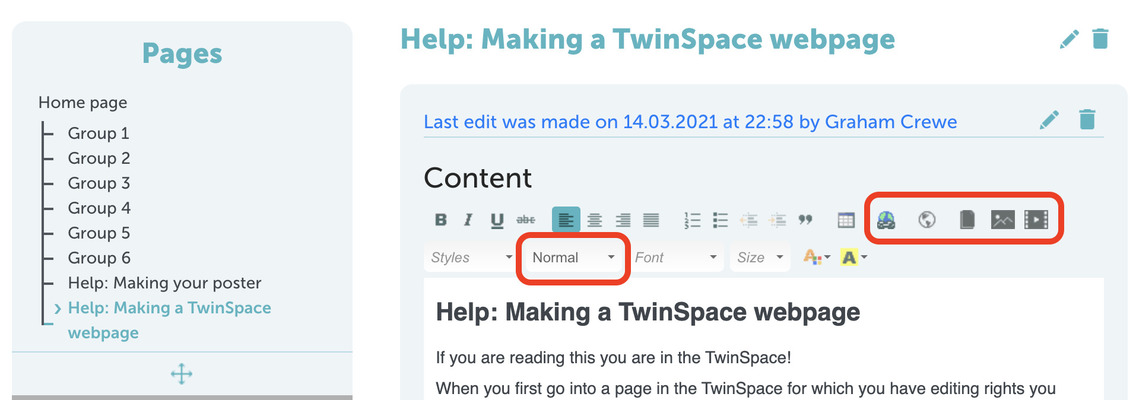
To add a link, an IFrame, a file, an image or a video, use the buttons on the top row on the right. Some notes:
Add link: Just paste the link into the "URL" field.
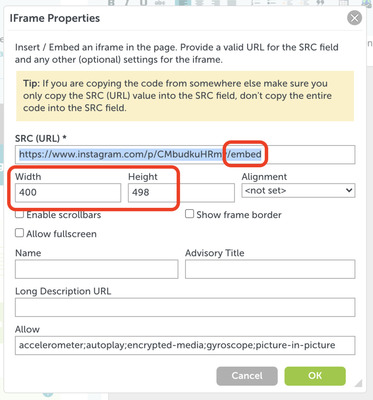
Add IFrame: This is "an inline frame is used to embed another document within the current HTML document." If you have read a newspaper article with a Twitter or Instagram post inserted then you have seen it before. i.e. the Instagram post below:
You just need to paste the URL of the Instagram post into the SRC field and end the code with "/embed". Then change the Width/Height to 400/498. It will magically appear when you submit the page.
Add file: Use this to add a file to the webpage for the user to download. You will first need to upload the file using Drag and Drop. You will then find it in "Materials" at the top of the page if you want to delete it. This feature was used on the "Help: Making your poster" page to share a PowerPoint file with you.
Add image: Use this to add an image to the webpage. You will first need to upload the image you want to use using Drag and Drop. (Again, you will find it in "Materials" if you want to delete it.)
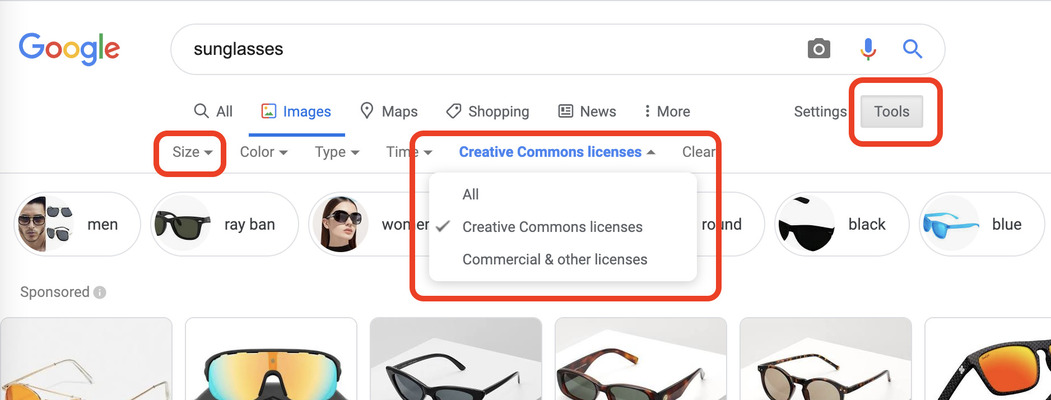
Make sure that you are allowed to use the image: in Google Image Search you can search only for images that have a "Creative Commons" license.
Pro tip: Also select "Size: Large" to ensure that your images will be high quality on your poster.
Video: You will first need to save the video in YouTube or Vimeo. Mr Crewe can do this for you if you can't - but you'll need a way to get it to him! Then add the video's link to Materials and select it using the video button in the editor.
Finally, on the second row of the editor's tools there is the paragraph styles button. Use this to choose whether you want text to be a heading or normal text. Be aware that how the webpage looks actually depends on the user's browser as well as your settings. For example I used Heading 1 for the heading at the top of this page and Heading 3 for the "The text editor" heading. They look very different in edit mode, but when I view the webpage as a user they look almost the same!
That's it. If you need any more help, just ask!
Again, remember to "Submit" your work regularly (button at the bottom) so that you don't get automatically logged out and lose everything you have done. After you have saved, use the pencil icon to edit again.