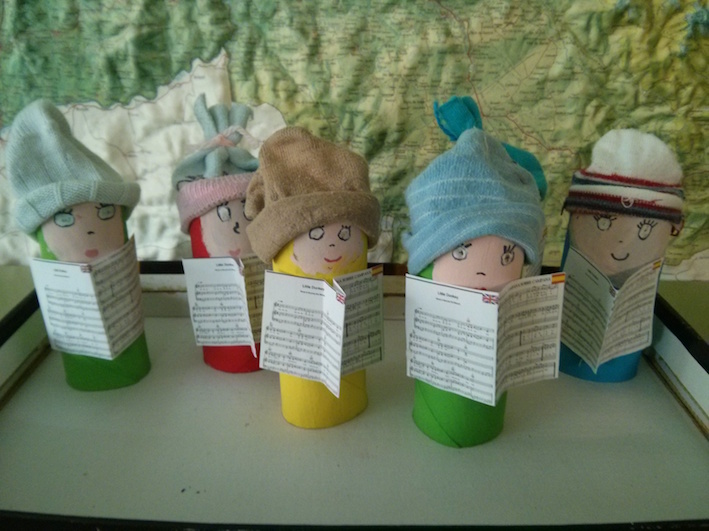
At C.E.I.P Manuel Vidal Portela,in Pontevedra,Spain, we´ve prepared instructions for our carol singers
We´ve finished instructions for our craft. Watch this video to learn how to do it .
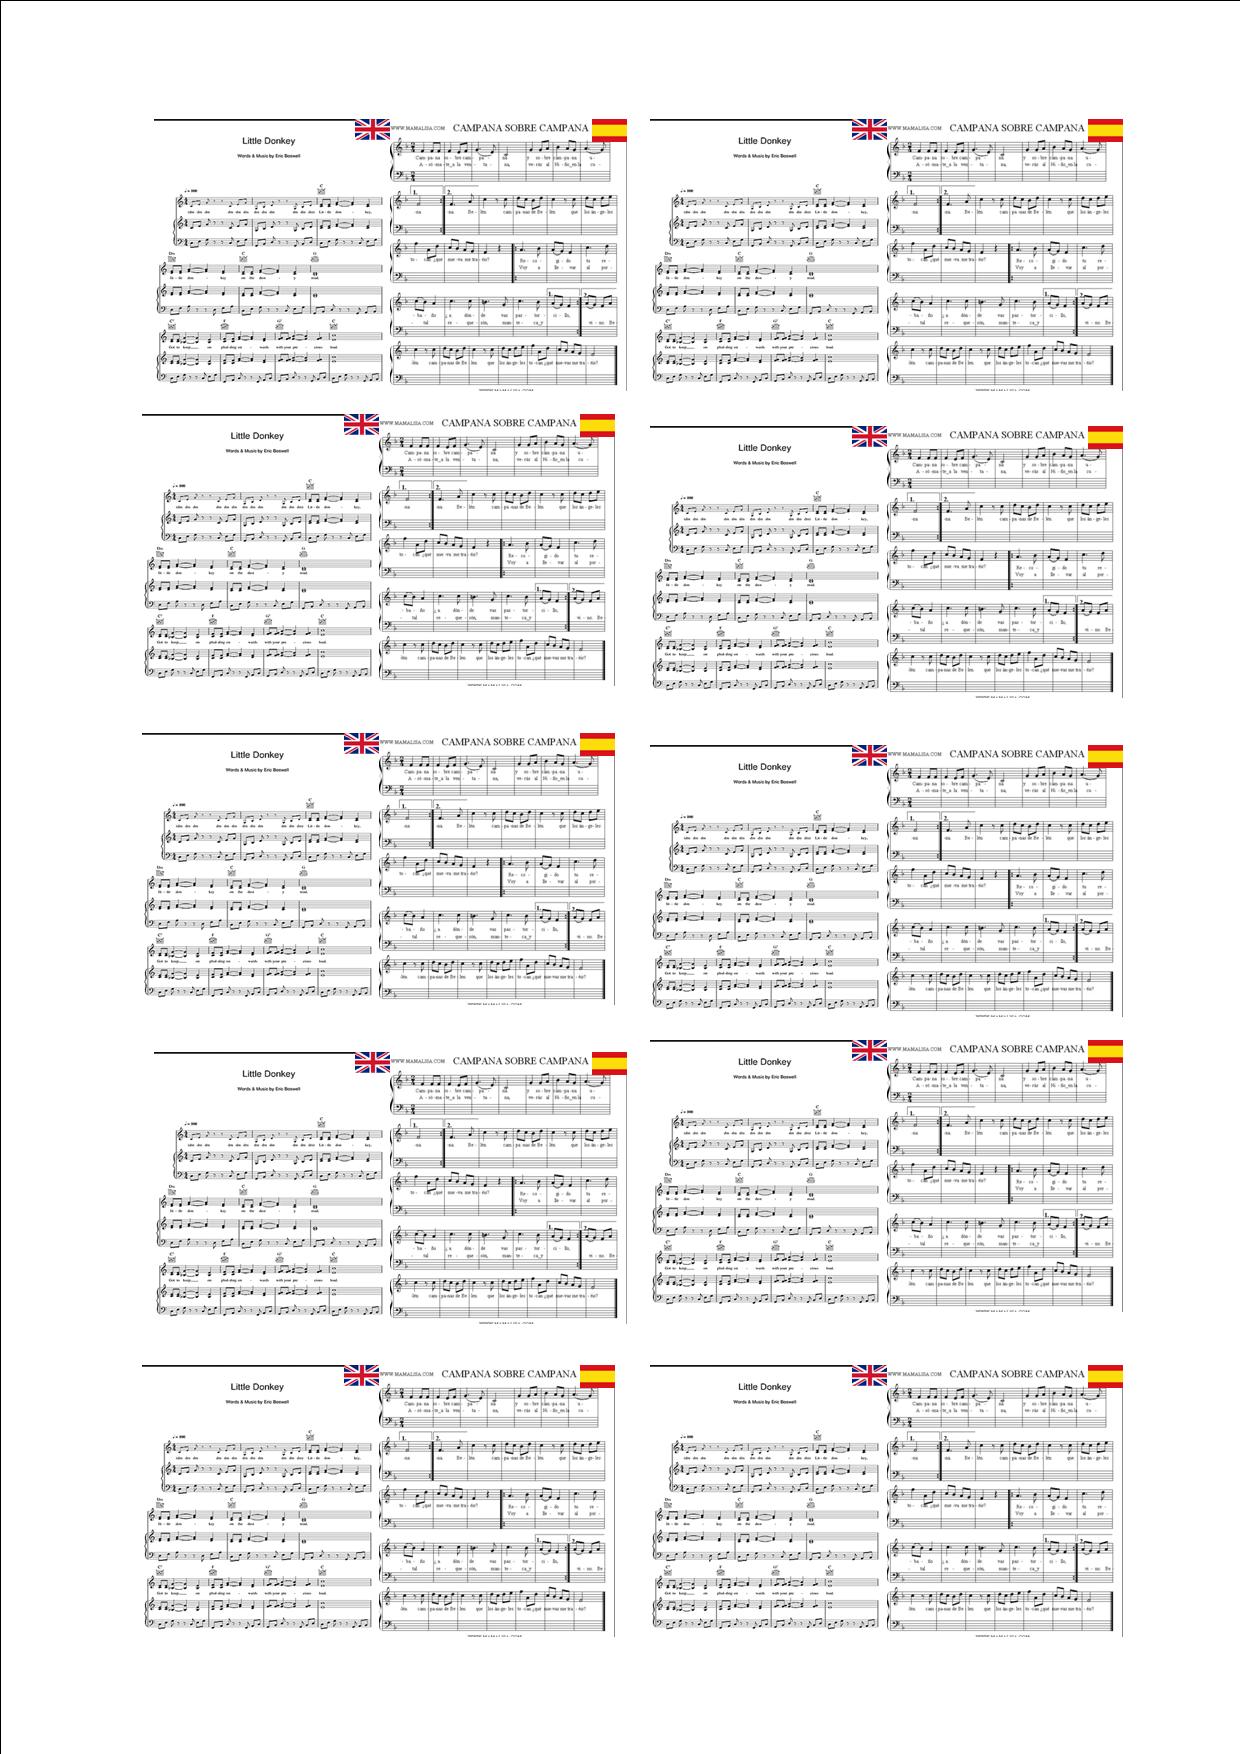
You can print the song lyrics from this image (these are the songs we are sharing with our partners)
We made these houses for our carol singers.
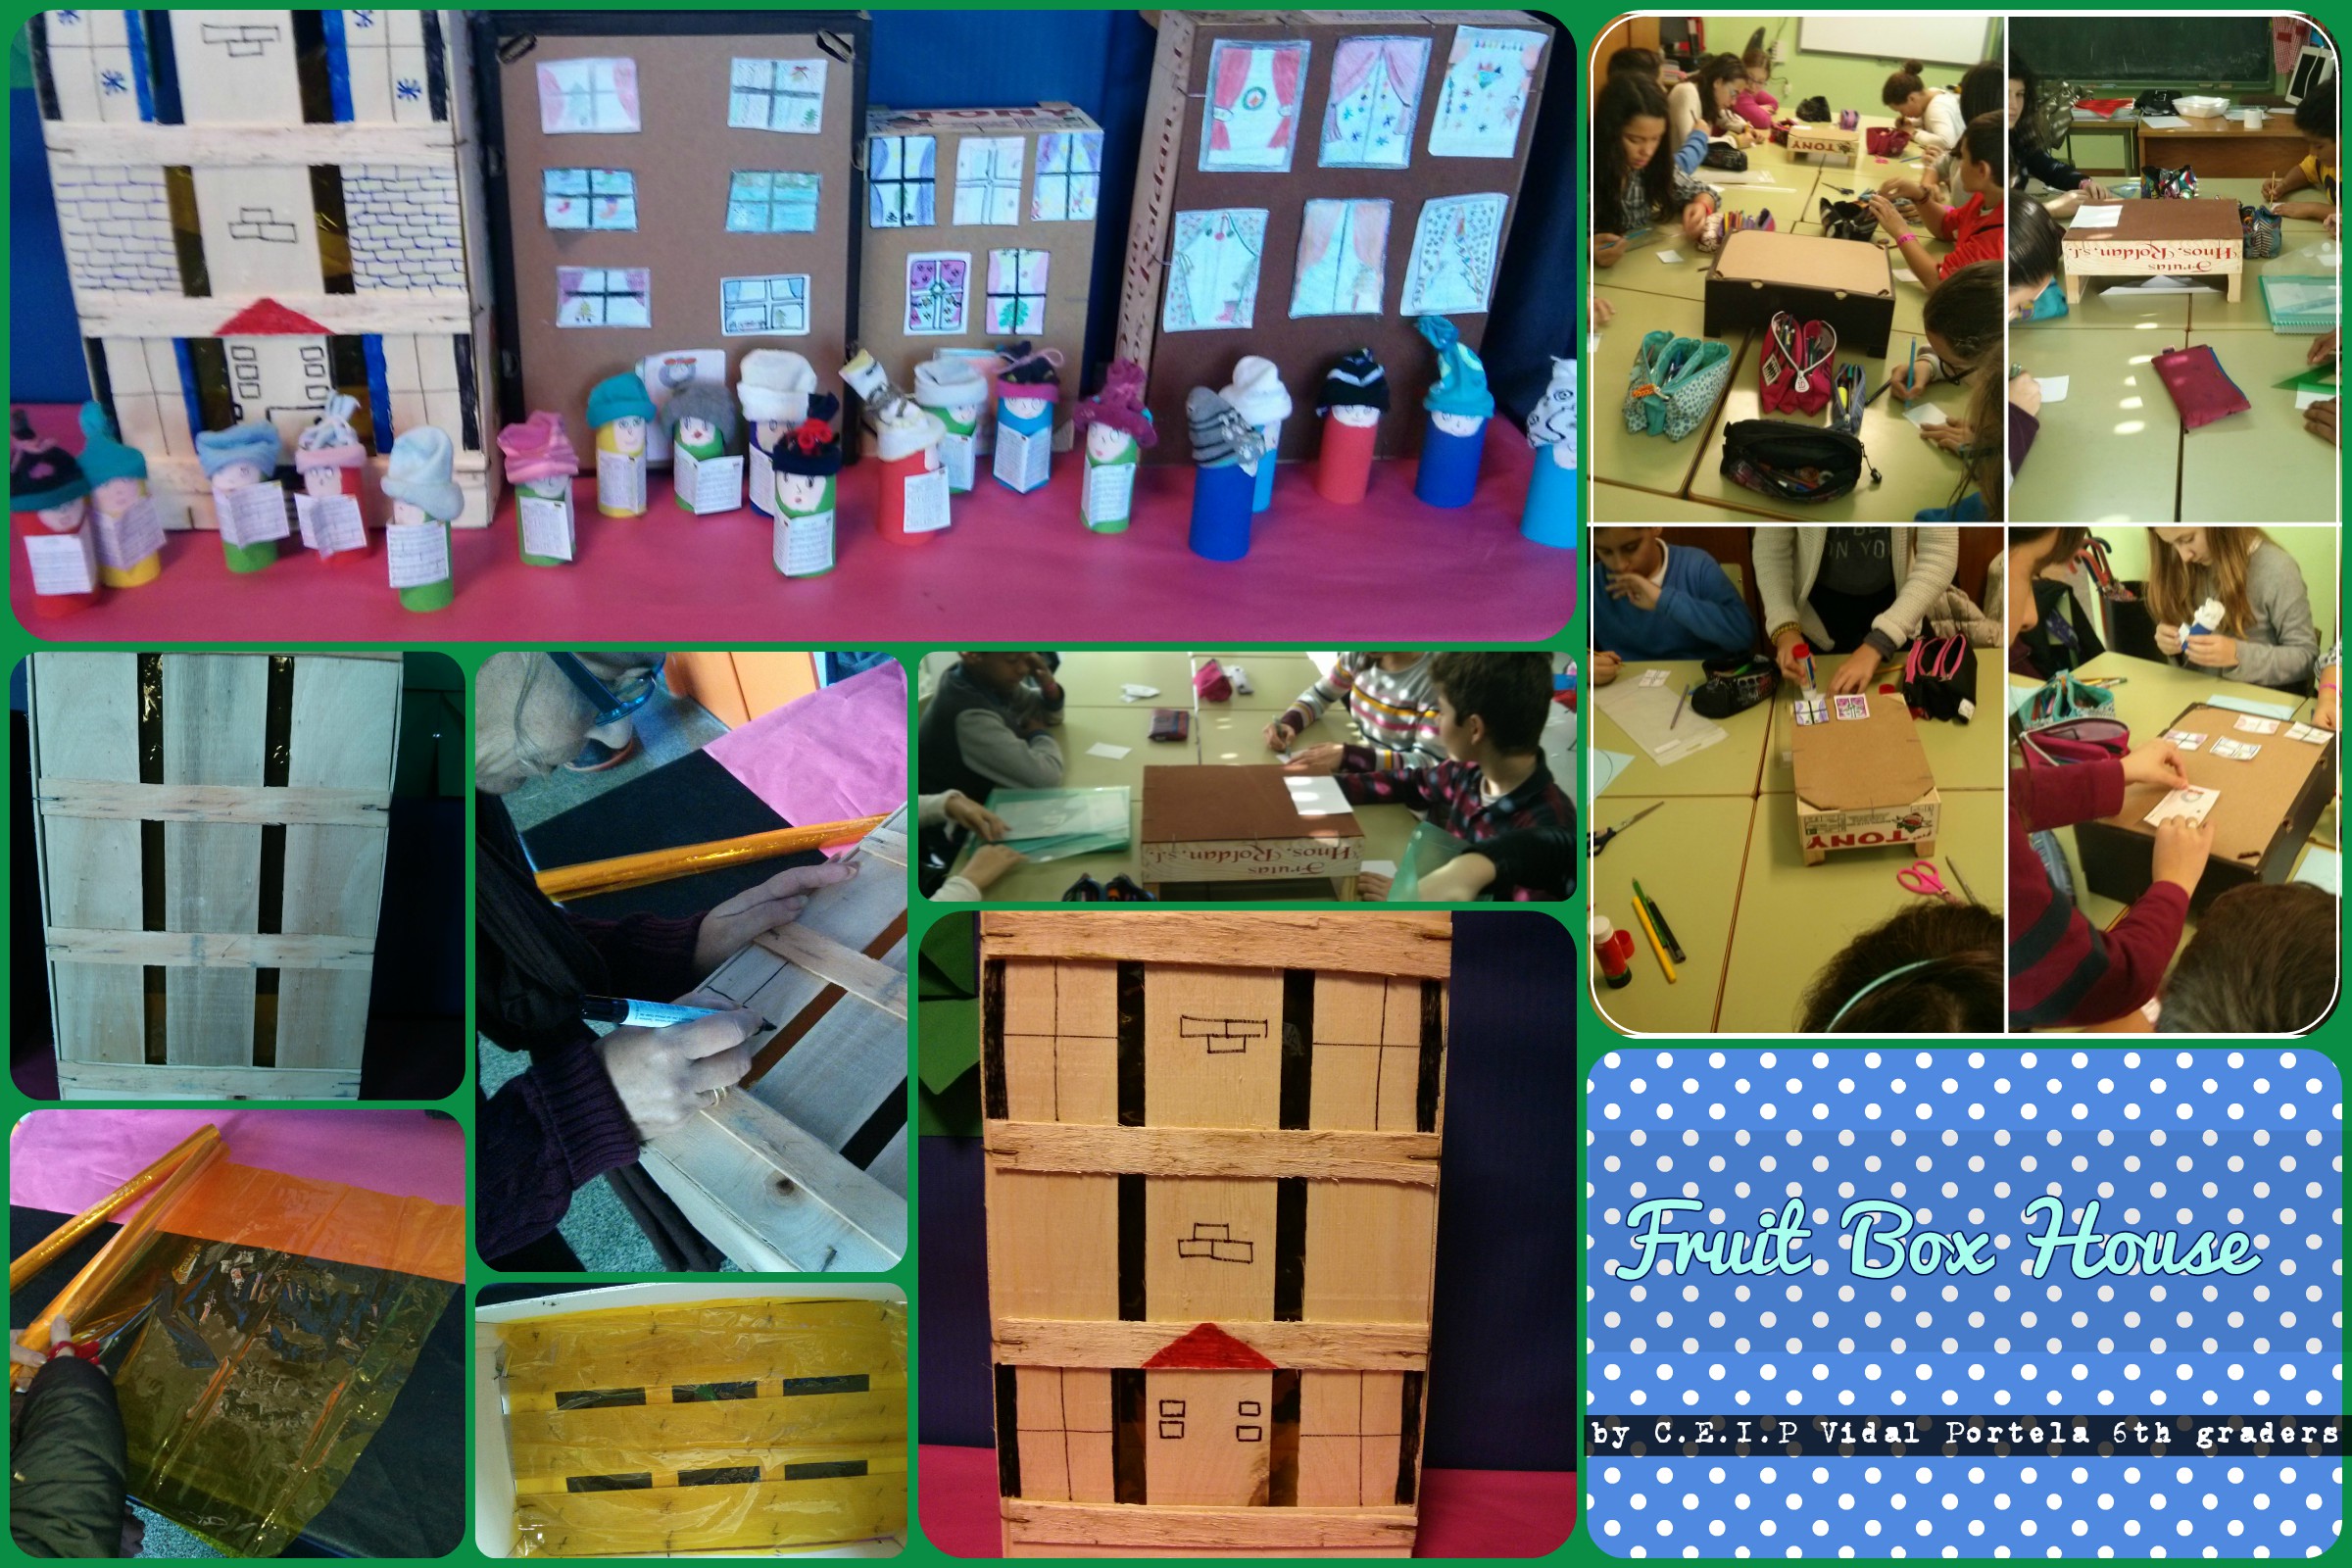
What you need:
An empty box fruit .
A piece of yellow cellophane (for wood houses)
scissors
Markers in different colours
glue and pieces of white paper
Instructions:
-
For the wood house
1- Cut out a piece of yellow cellophane the size of the box.
2-Stick it into the box.
3-Colour the windows, door...etc using markers in different colours.
-
For the carton house
1. Colour little pieces of paper drawing windows and door.
2. Stick them onto the house
We´ve also made Santa´s reindeers and Santa´s little helpers for the Polish origami Santa.
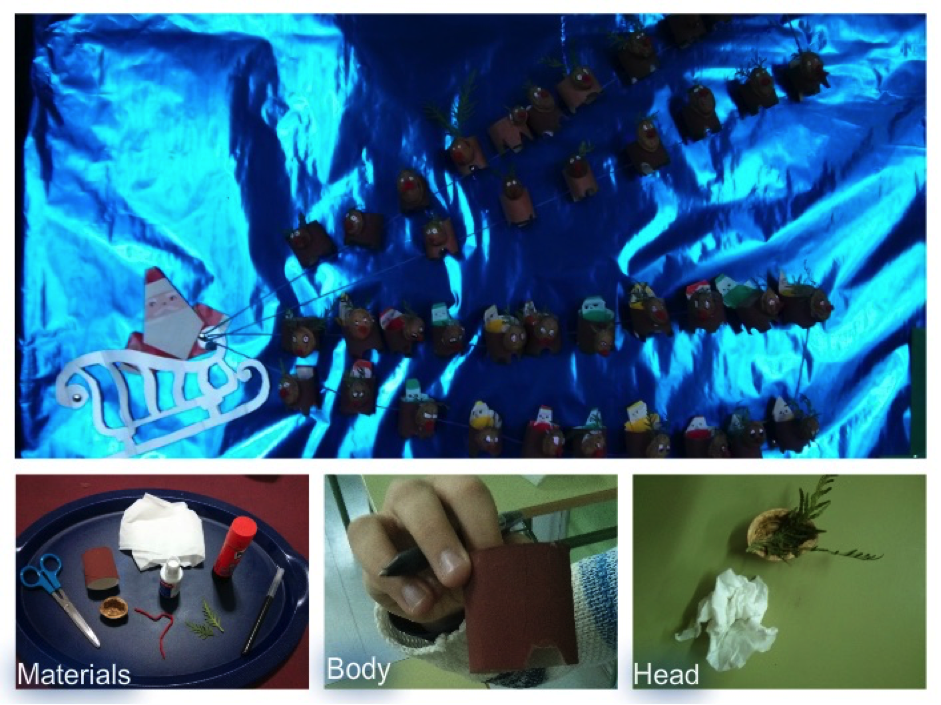
What you need:
½ toilet paper roll coloured in brown(for the body)
A nut shell (for the head)
A little piece of white tissue/toilet paper or plasticine (for the head)
A little string of red wool (for the nose).
Two little leaves.
Scissors, Typex, glue and black marker.
Instructions:
1- Cut out 4 curve pieces at the bottom of the body (for the legs) .
2- Colour the paws in black.
3-Put two little leaves on a nut shell back (for the horns).
4. Stick a little piece of tisue to fill the nut.
5. Colour the eyes and mouth using typex and black marker.
6. Make a little ball with the red wool to make the nose and stick it on the face.
In Chernivtsi school #22, Ukraine, the pupils started working on the Christmas decorations, too.
Christmas crafts and greetings from Nadia Kondria's pupils
Christmas wreath from Yulia Dariichuk's pupils
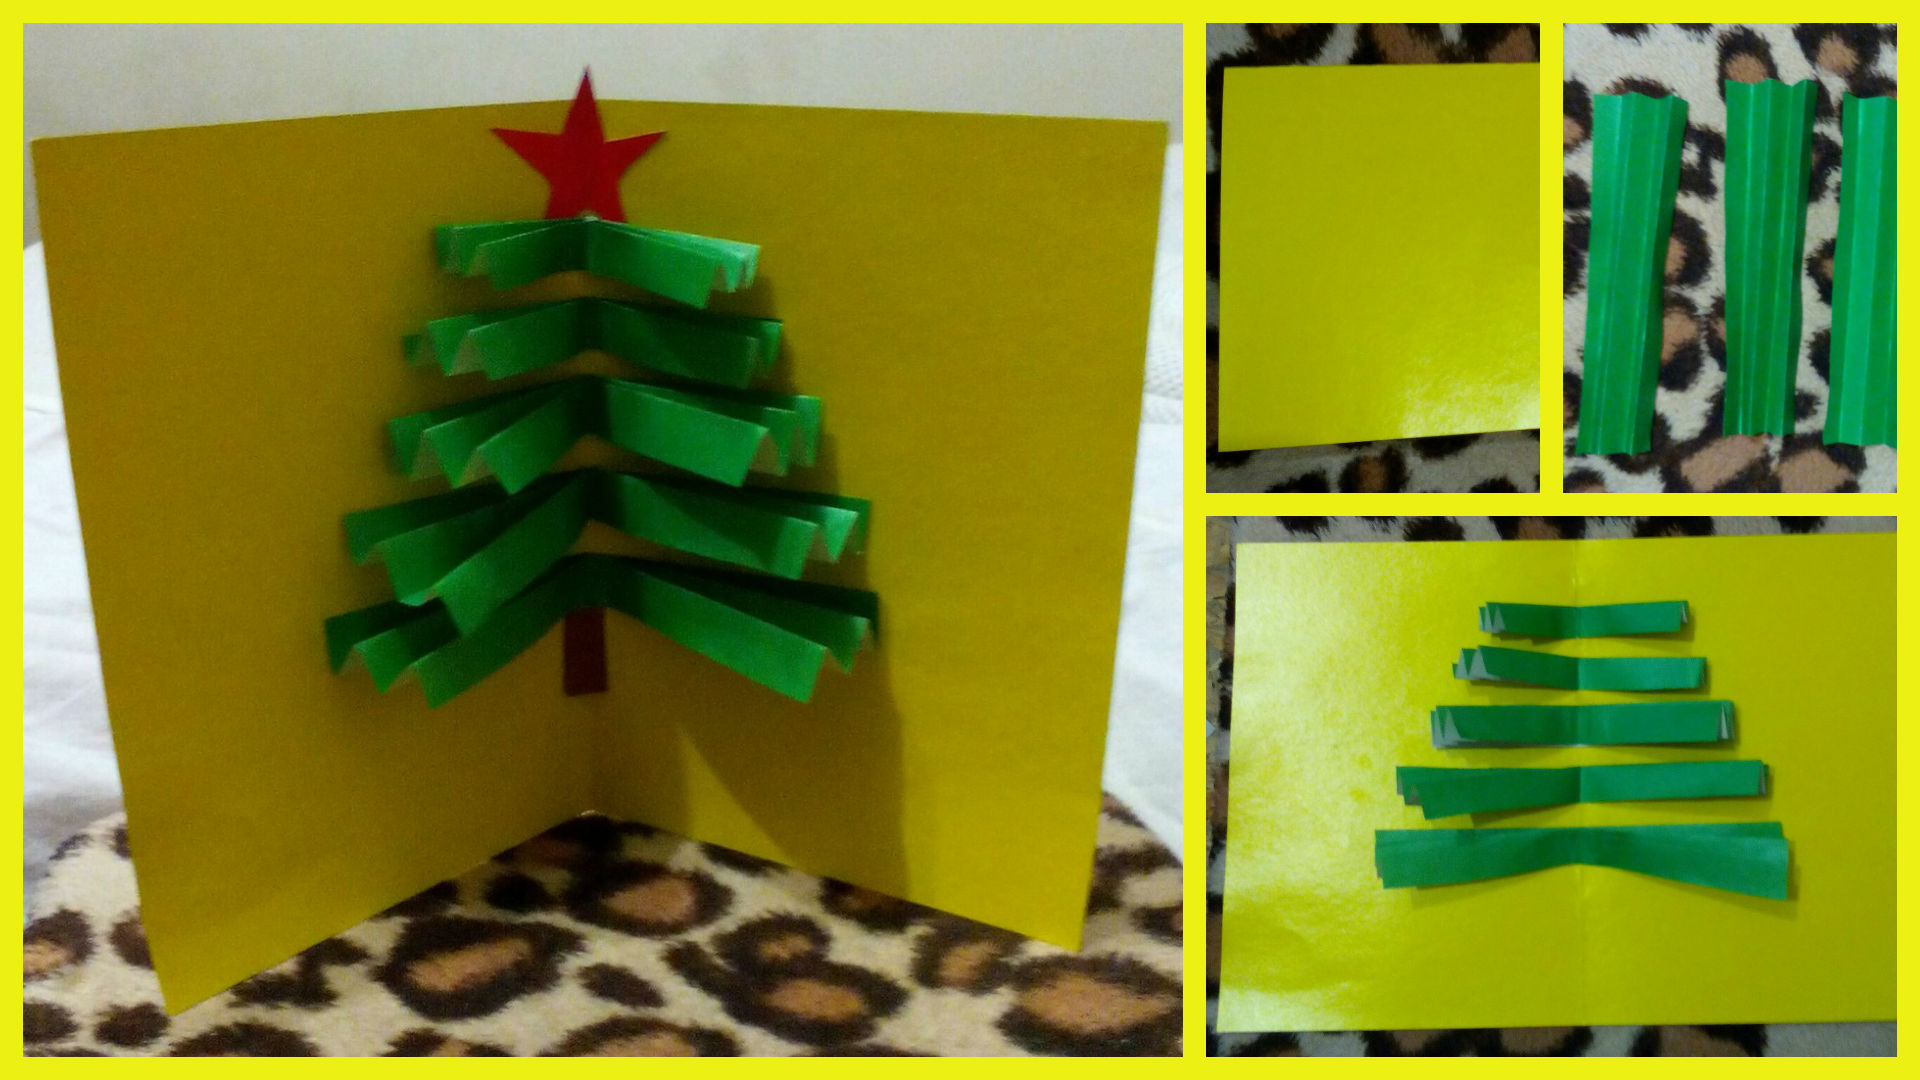
Christmas tree and greetings from Hanna Horditsa's pupils
Beautiful snowflake ballerinas from one of Uliana Ivaniuk's pupils:
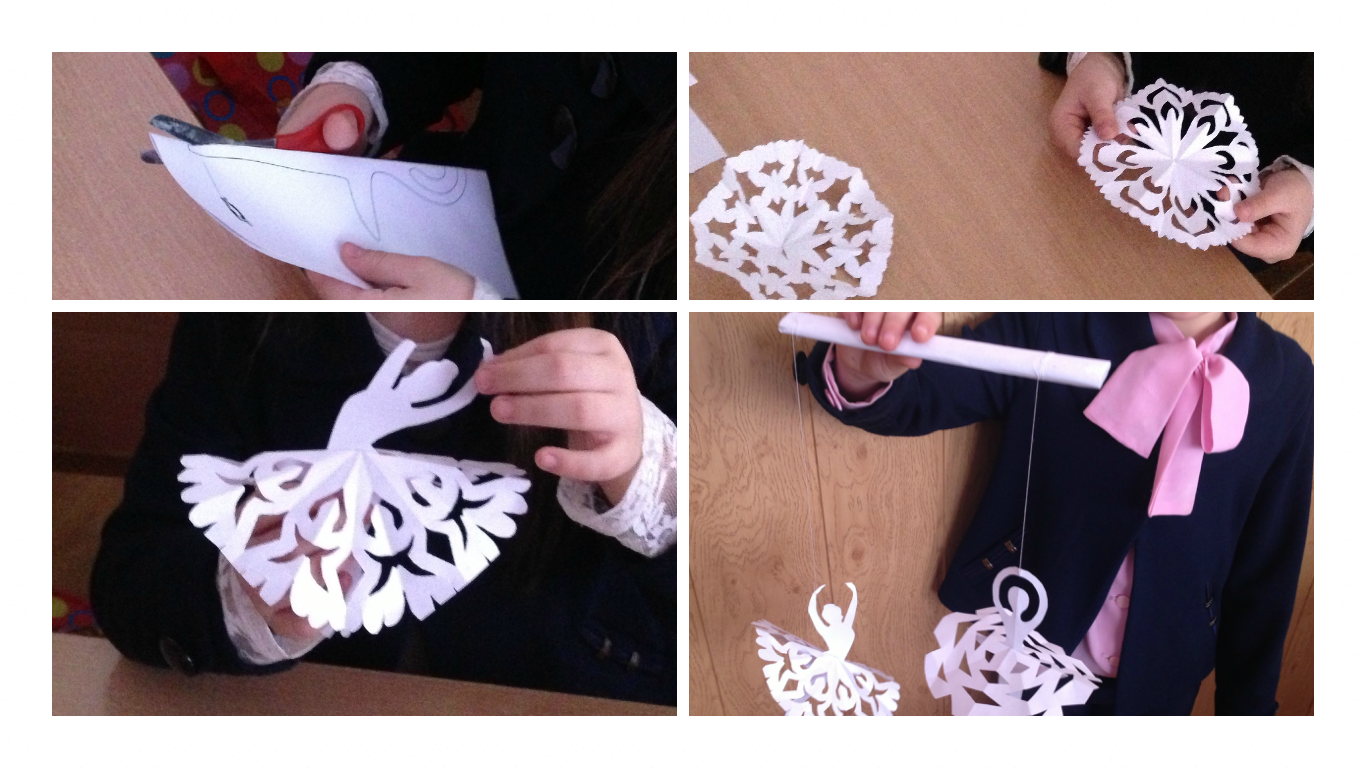
Christmas Ballerinas Instructions
Step 1. First cut out the figures of two ballerinas.
Step 2. Then cut out two beautiful snowflakes.
Step 3. Next make a paper stick and prepare two threads.
Step 4. At the end hang up the ballerinas on the stick with the help of threads.
Enjoy this wonderful Christmas decoration!
Iryna Z., Form 2 A, School 22, Chernivtsi
Another Christmas tree from one of Tetiana Ivaniuk's pupils and his mom

Tetiana Ivaniuk's pupil shared this creation with us
Christmas wreath from one of Yulia Fedyk's pupils
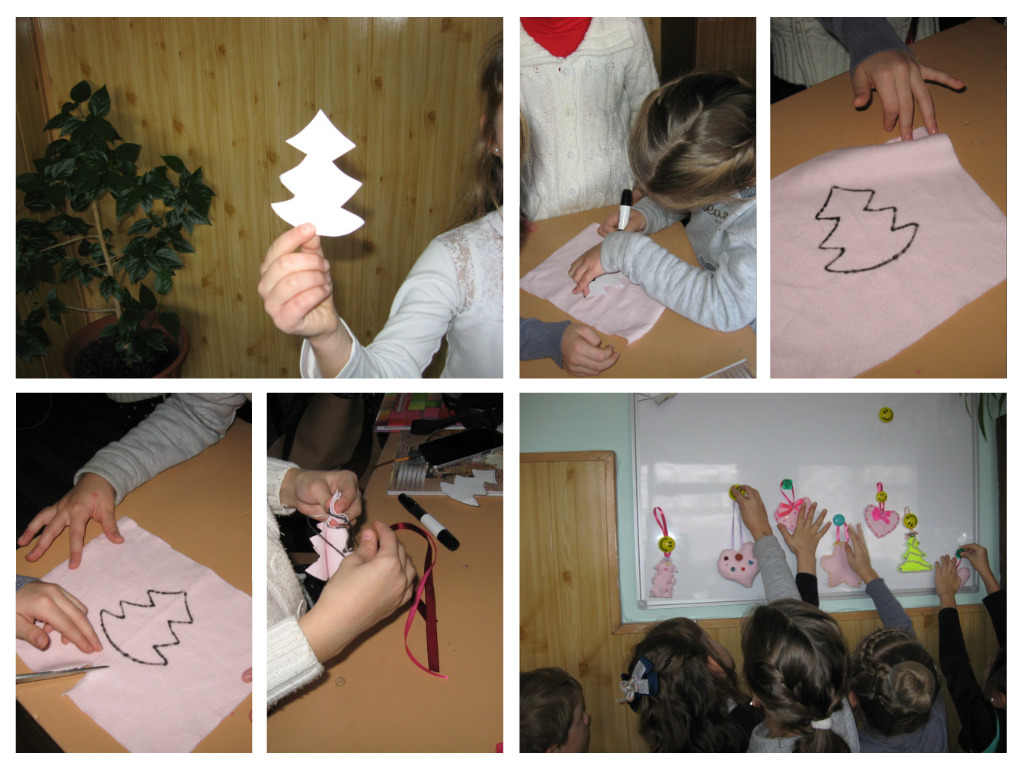
Here are soft Christmas decorations from Alina Stangret's pupils
Instructions.
1. Make a paper shape.( a house, a star, a heart)
2. Take any cloth you like. Cut out 2 pieces of the paper shape.
3. Sew them together.
4. Put some cotton inside.
5. Sew some ribbons and beads on.
6. Attach a loop to hang it on a tree
7. Your decoration is ready!
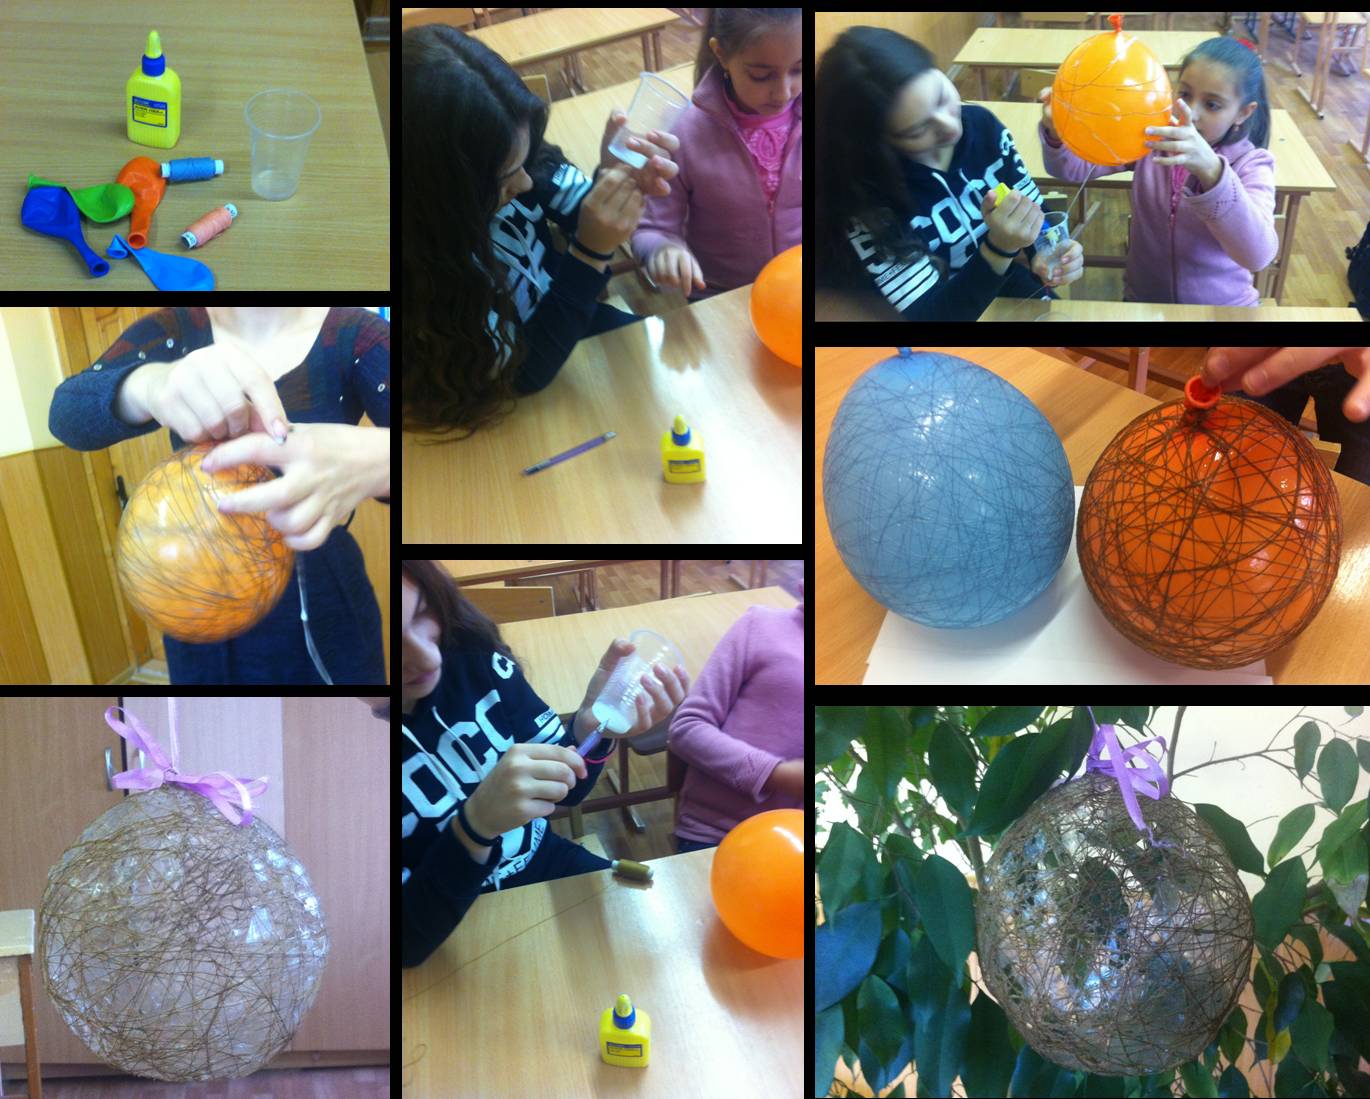
Here are the web-like baubles from Maryna Muntian's pupils.
Instructions
For this decoration you need a balloon, a plastic glass, some glue and thread.
Step I: Blow up the balloon.
Step II: Make a hole in the plastic glass and push the thread through the hole.
Step III: Pour the glue in the glass and pull the thread.
Step IV: Wind randomly the thread round the balloon.
Step V: Let it dry. (for about 24 hours)
Step VI: Burst the balloon and take it out carefully. The decoration is ready.
!!!! It's important. Make sure that the thread isn't too thin .
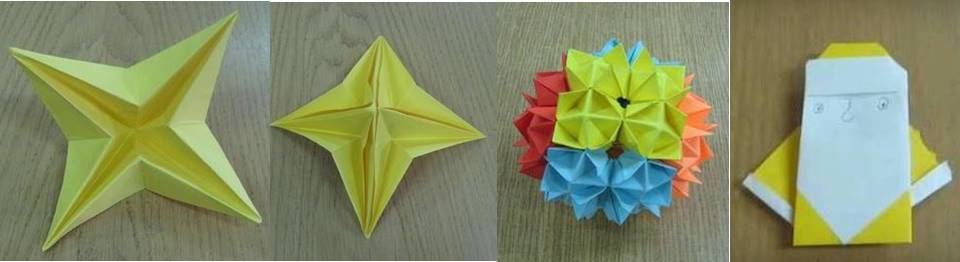
In Poland in Dzierżoniów we make paper decorations:
In Germany, we are going to make snowflakes to hang in our classroom window. This video shows you how:
Snowmen from Year 3 at Eastburn School:
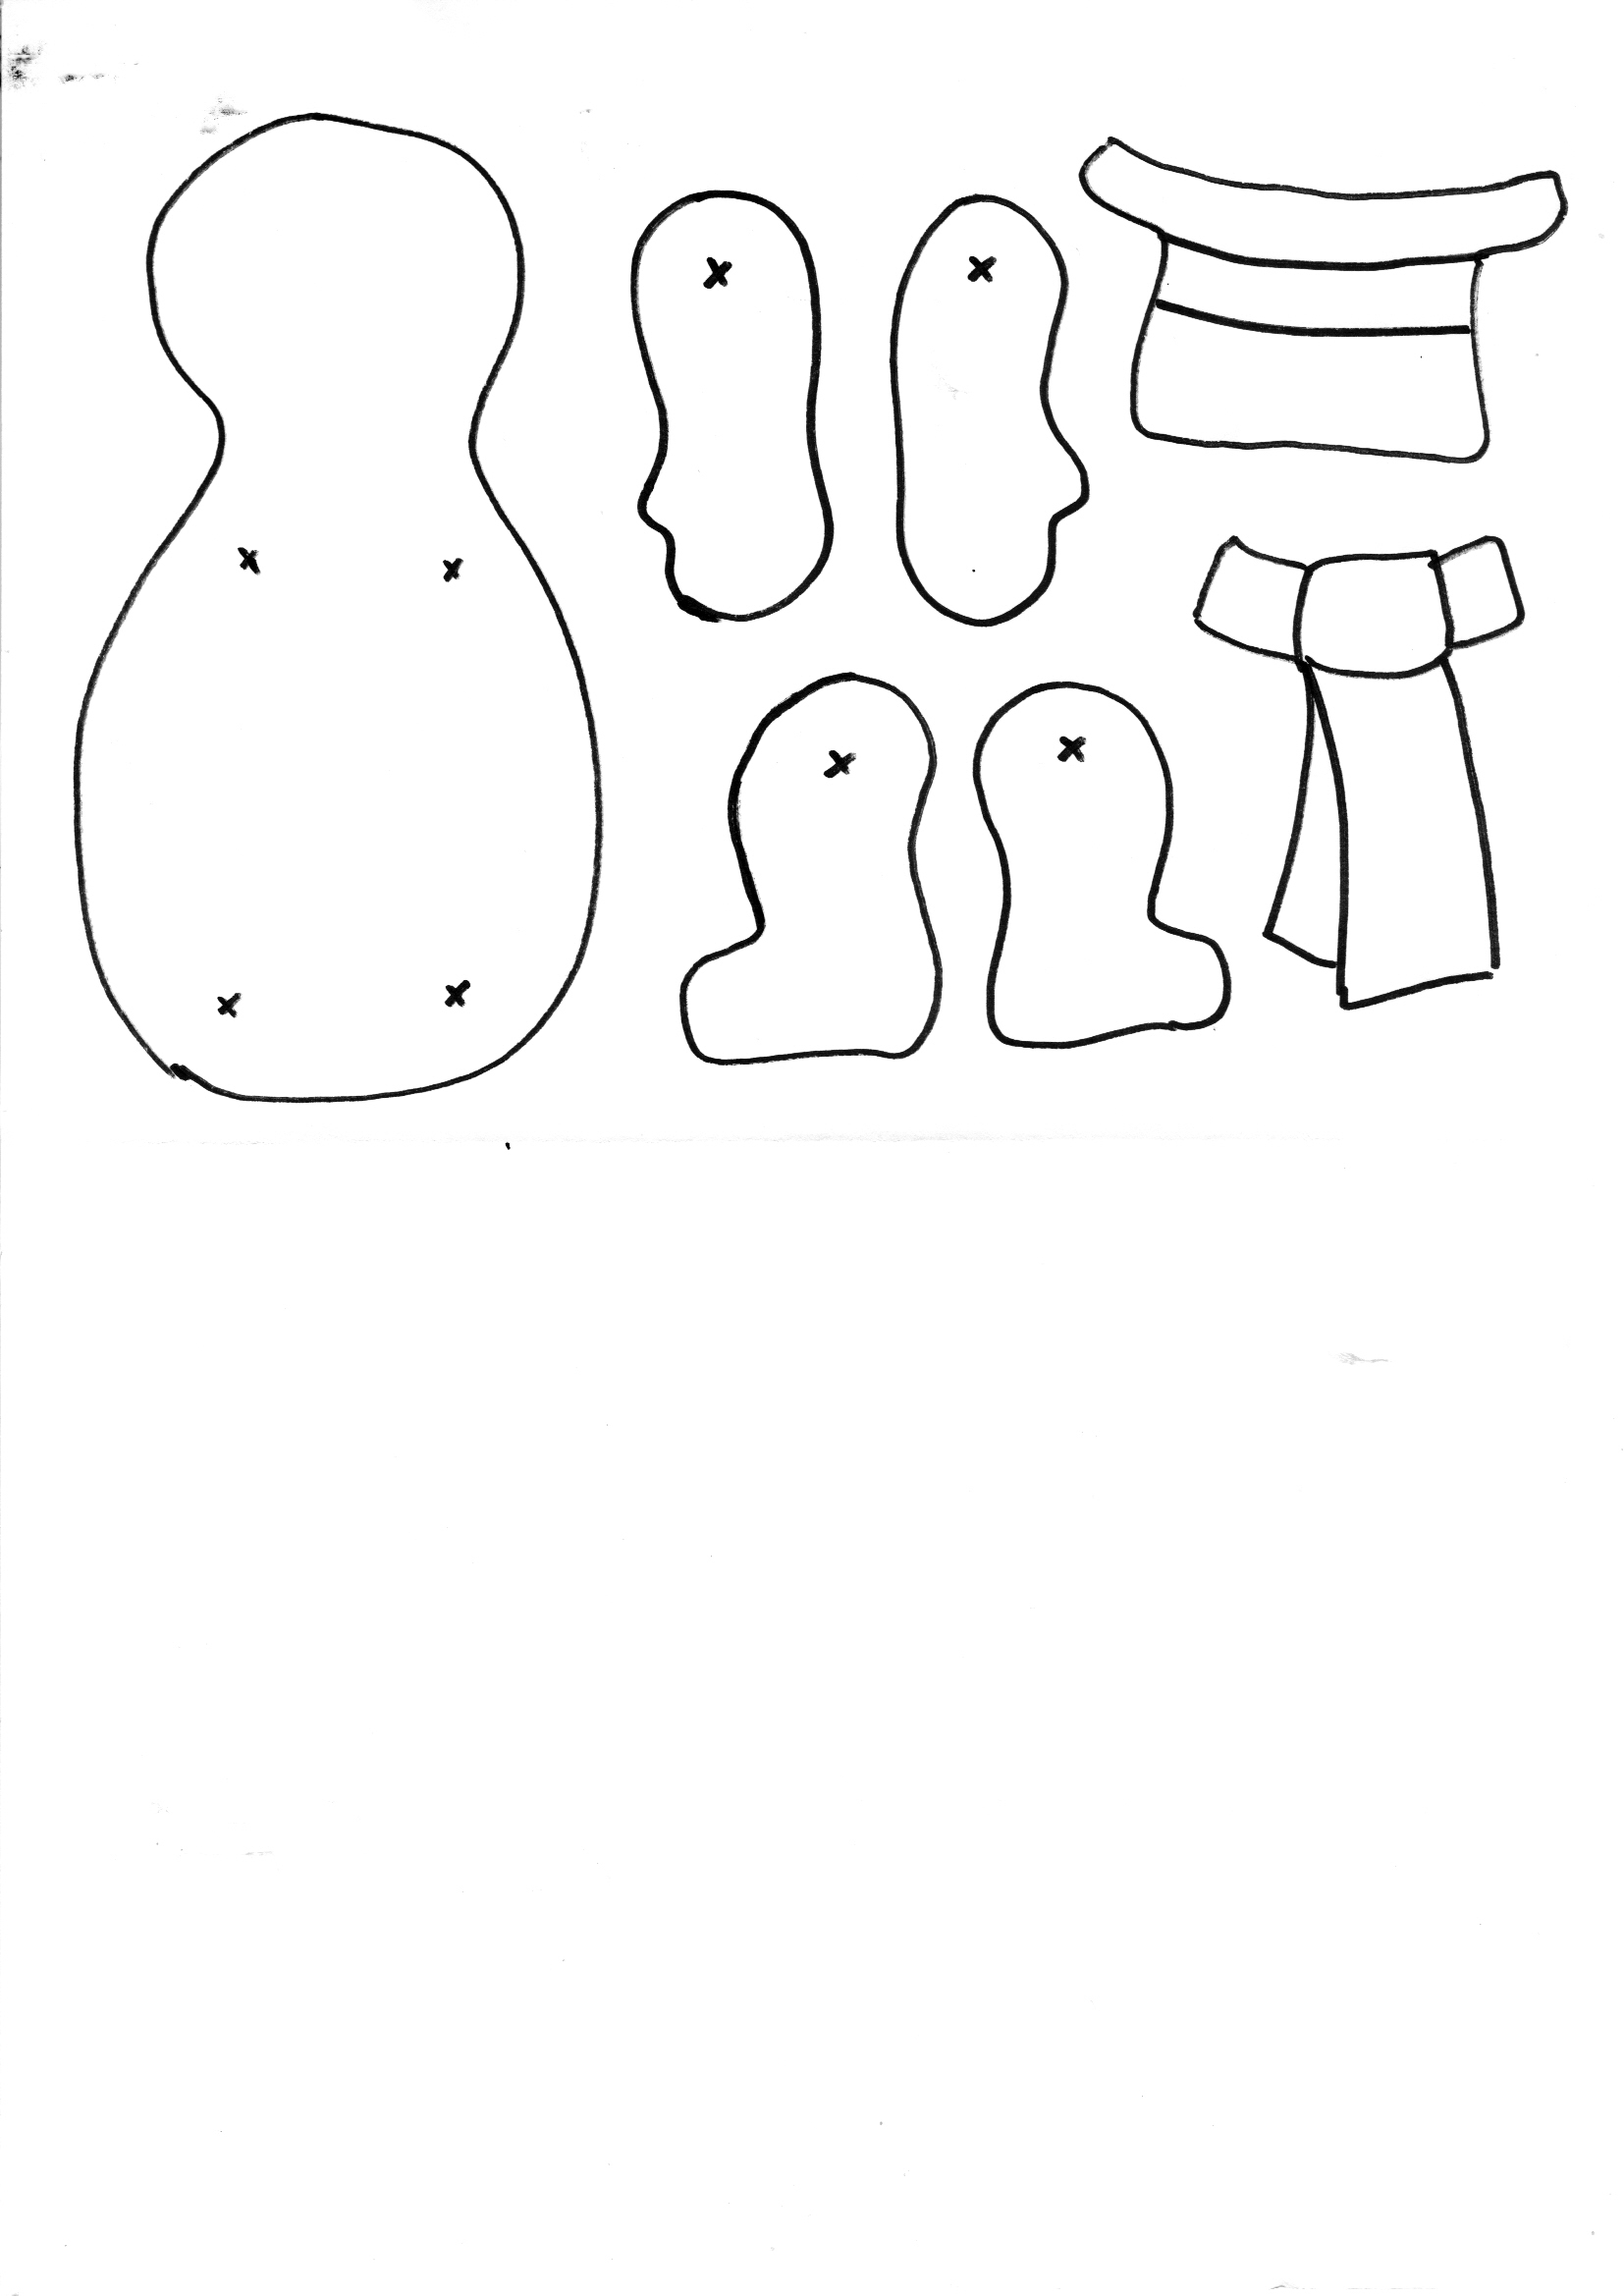
Instructions:
You will need:
Snowman template (copied onto thin card), split pins, ribbon, sticky tape, coloured pencils
Method:
Cut out the parts of the snowman.
Colour the parts.
Stick on the hat and scarf.
Draw on the face.
Attach the arms and legs using split pins.
Attach a ribbon with sticky tape to the back of the snowman's head.
Angel Decorations from Steeton School Year 3/4
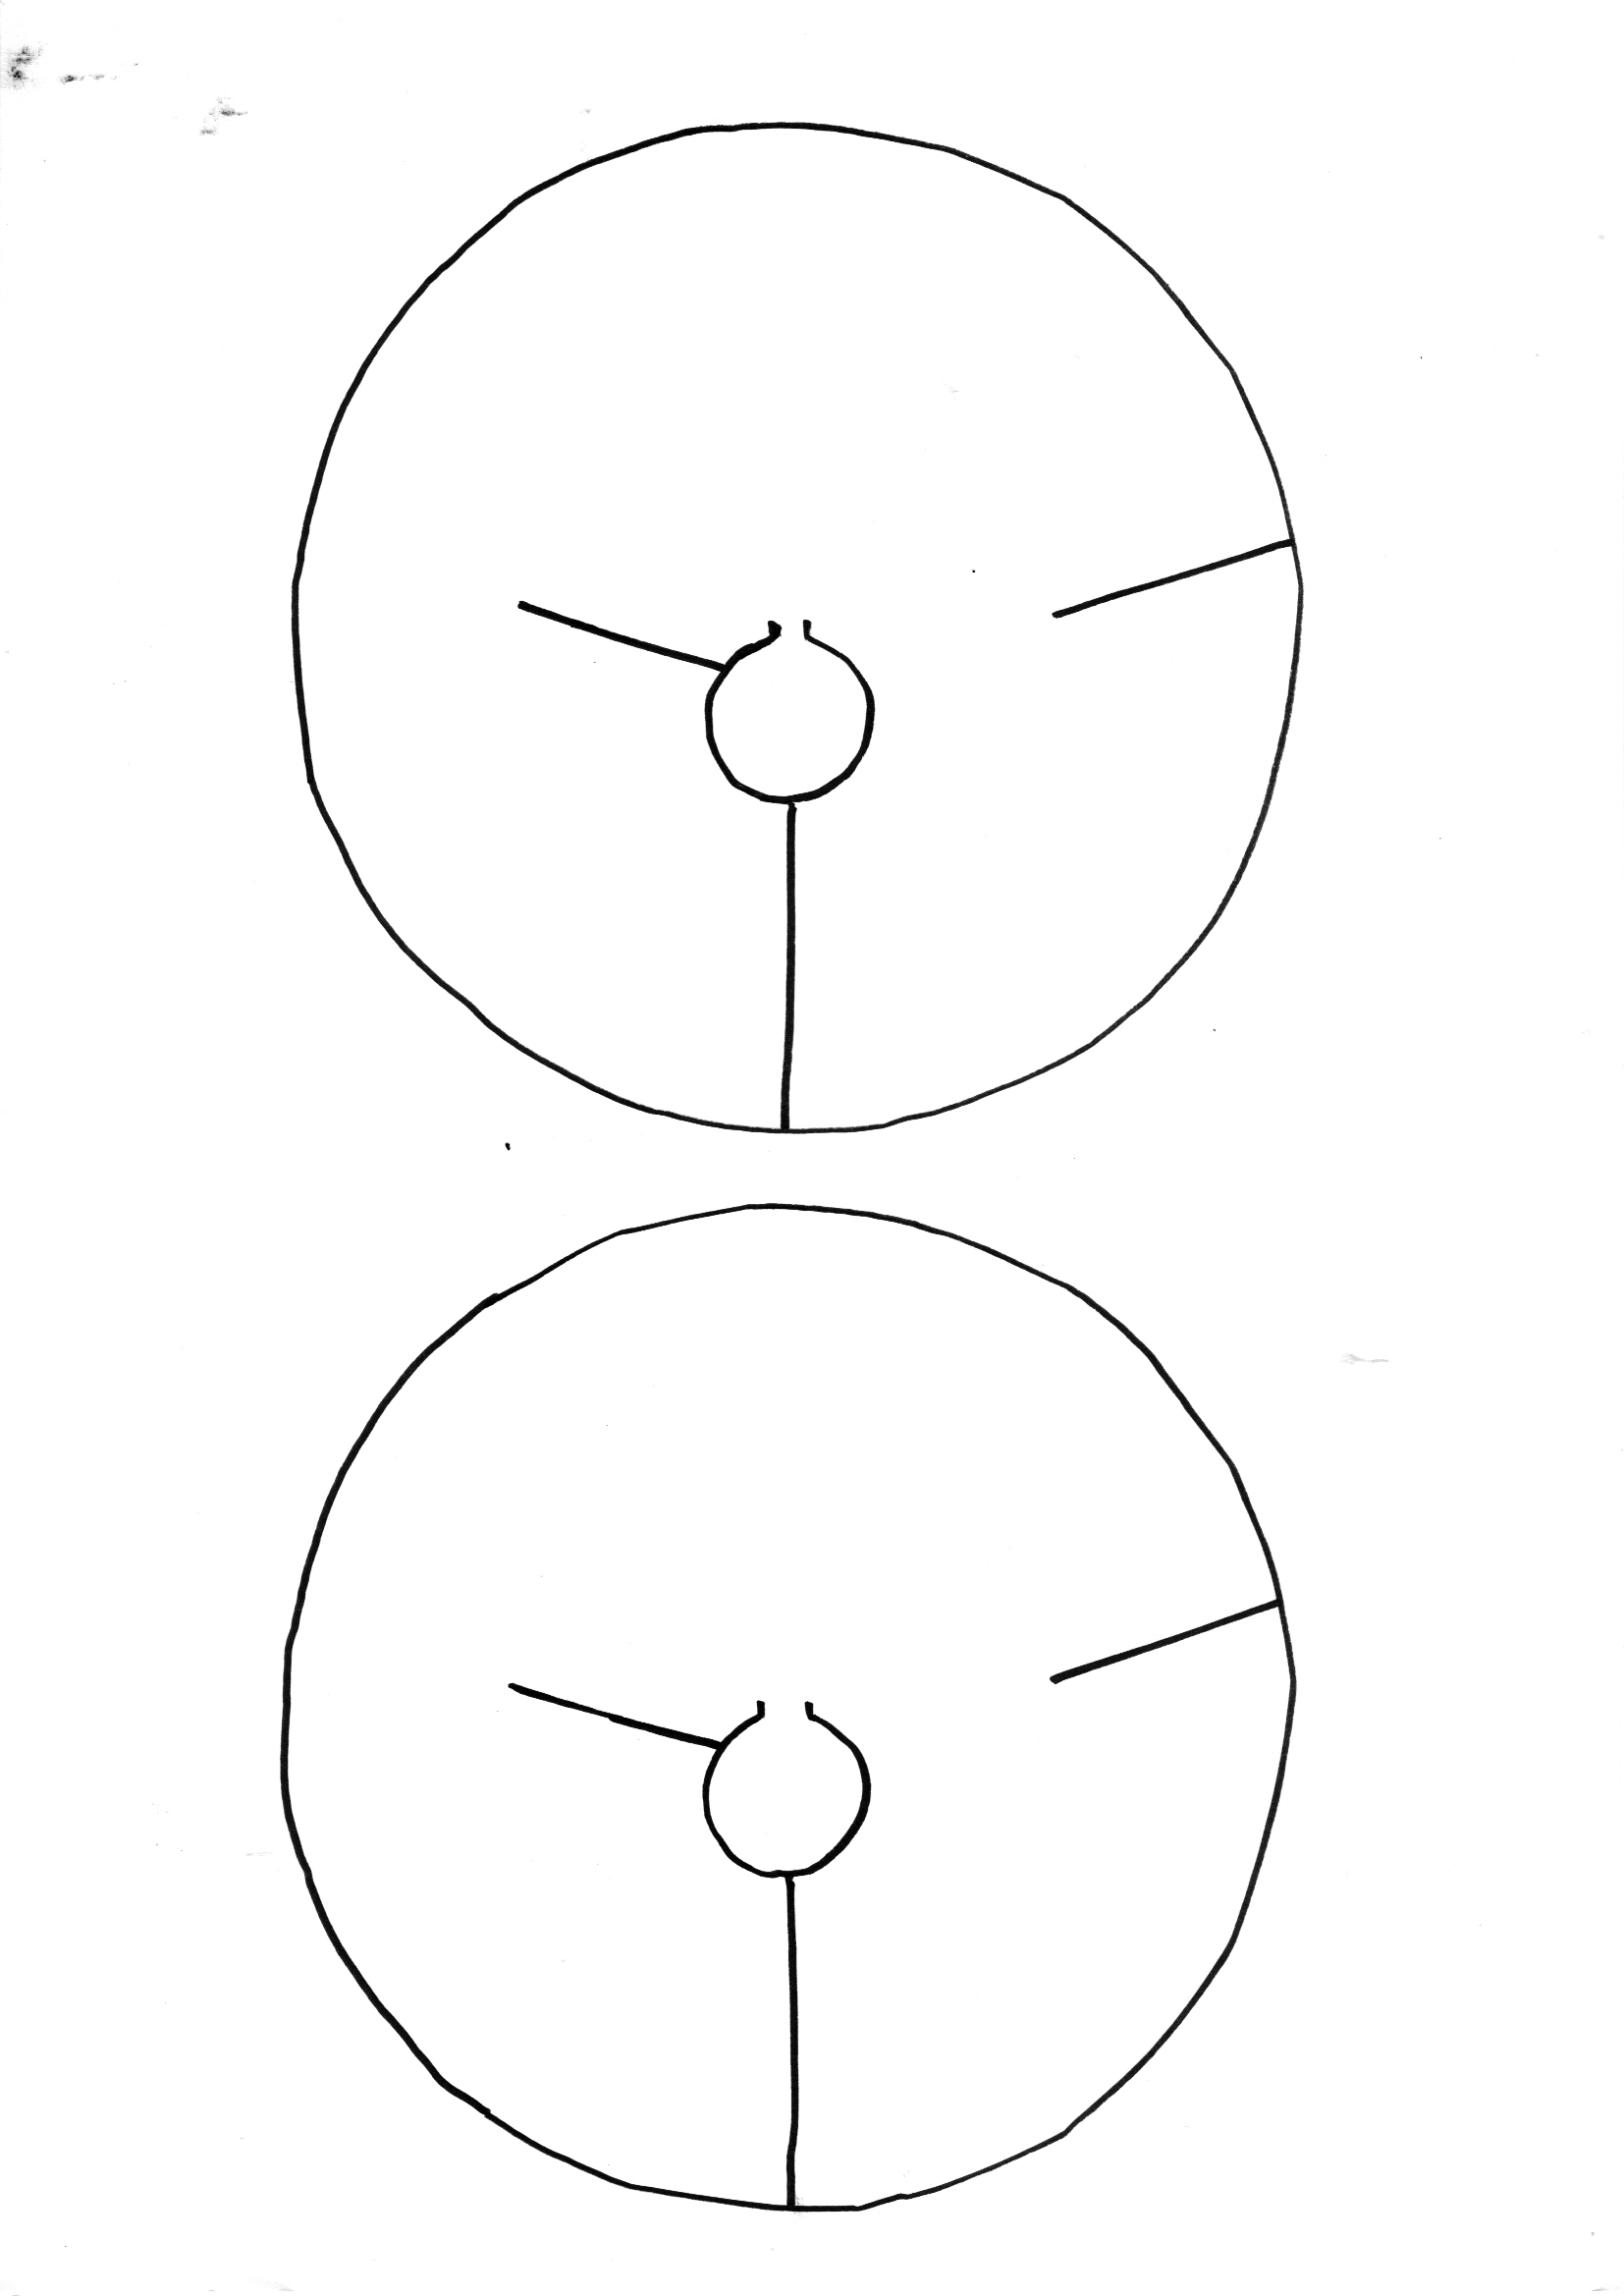
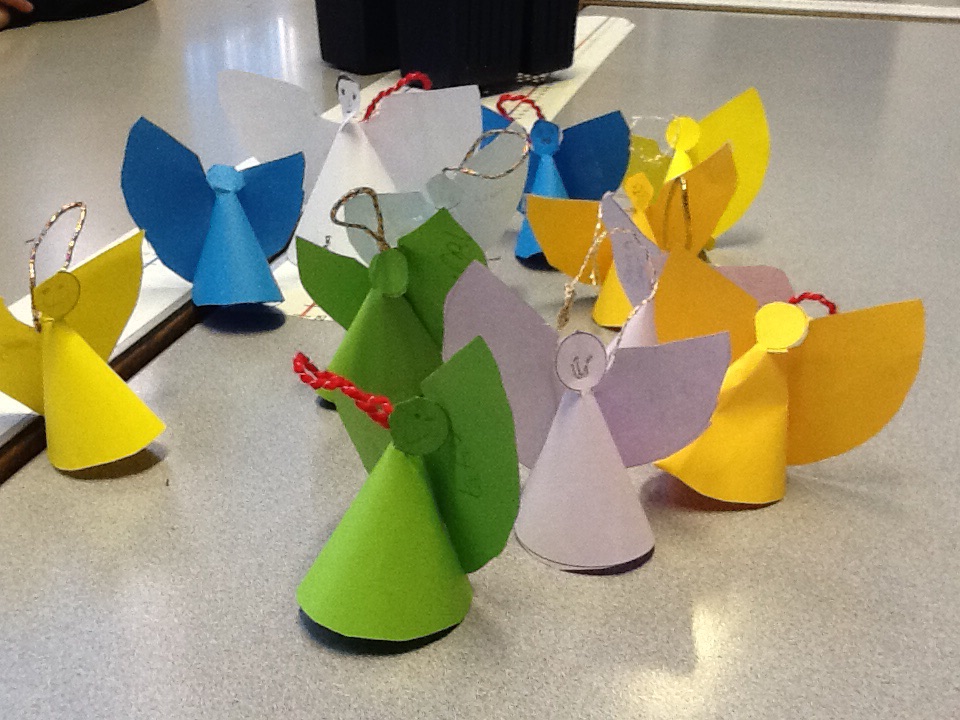
Instructions
What you need:
scissors, paper template (on different colours), ribbon and sticky tape.
Method:
1 First, cut out the circle.
2 Next, cut on the lines.
3 After that, make it into a cone.
4 Then, twist and slot it together.
5 Finally, attach the ribbon.
At Steeton School (England), the Reception classes (ages 4-5) have been making reindeer decorations from handprints:
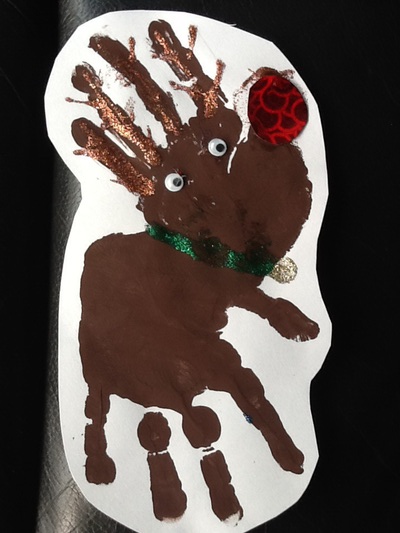
Just add a circle of shiny red paper for the nose and some glitter to make the antlers and collar.
Add two googly eyes and it's finished!
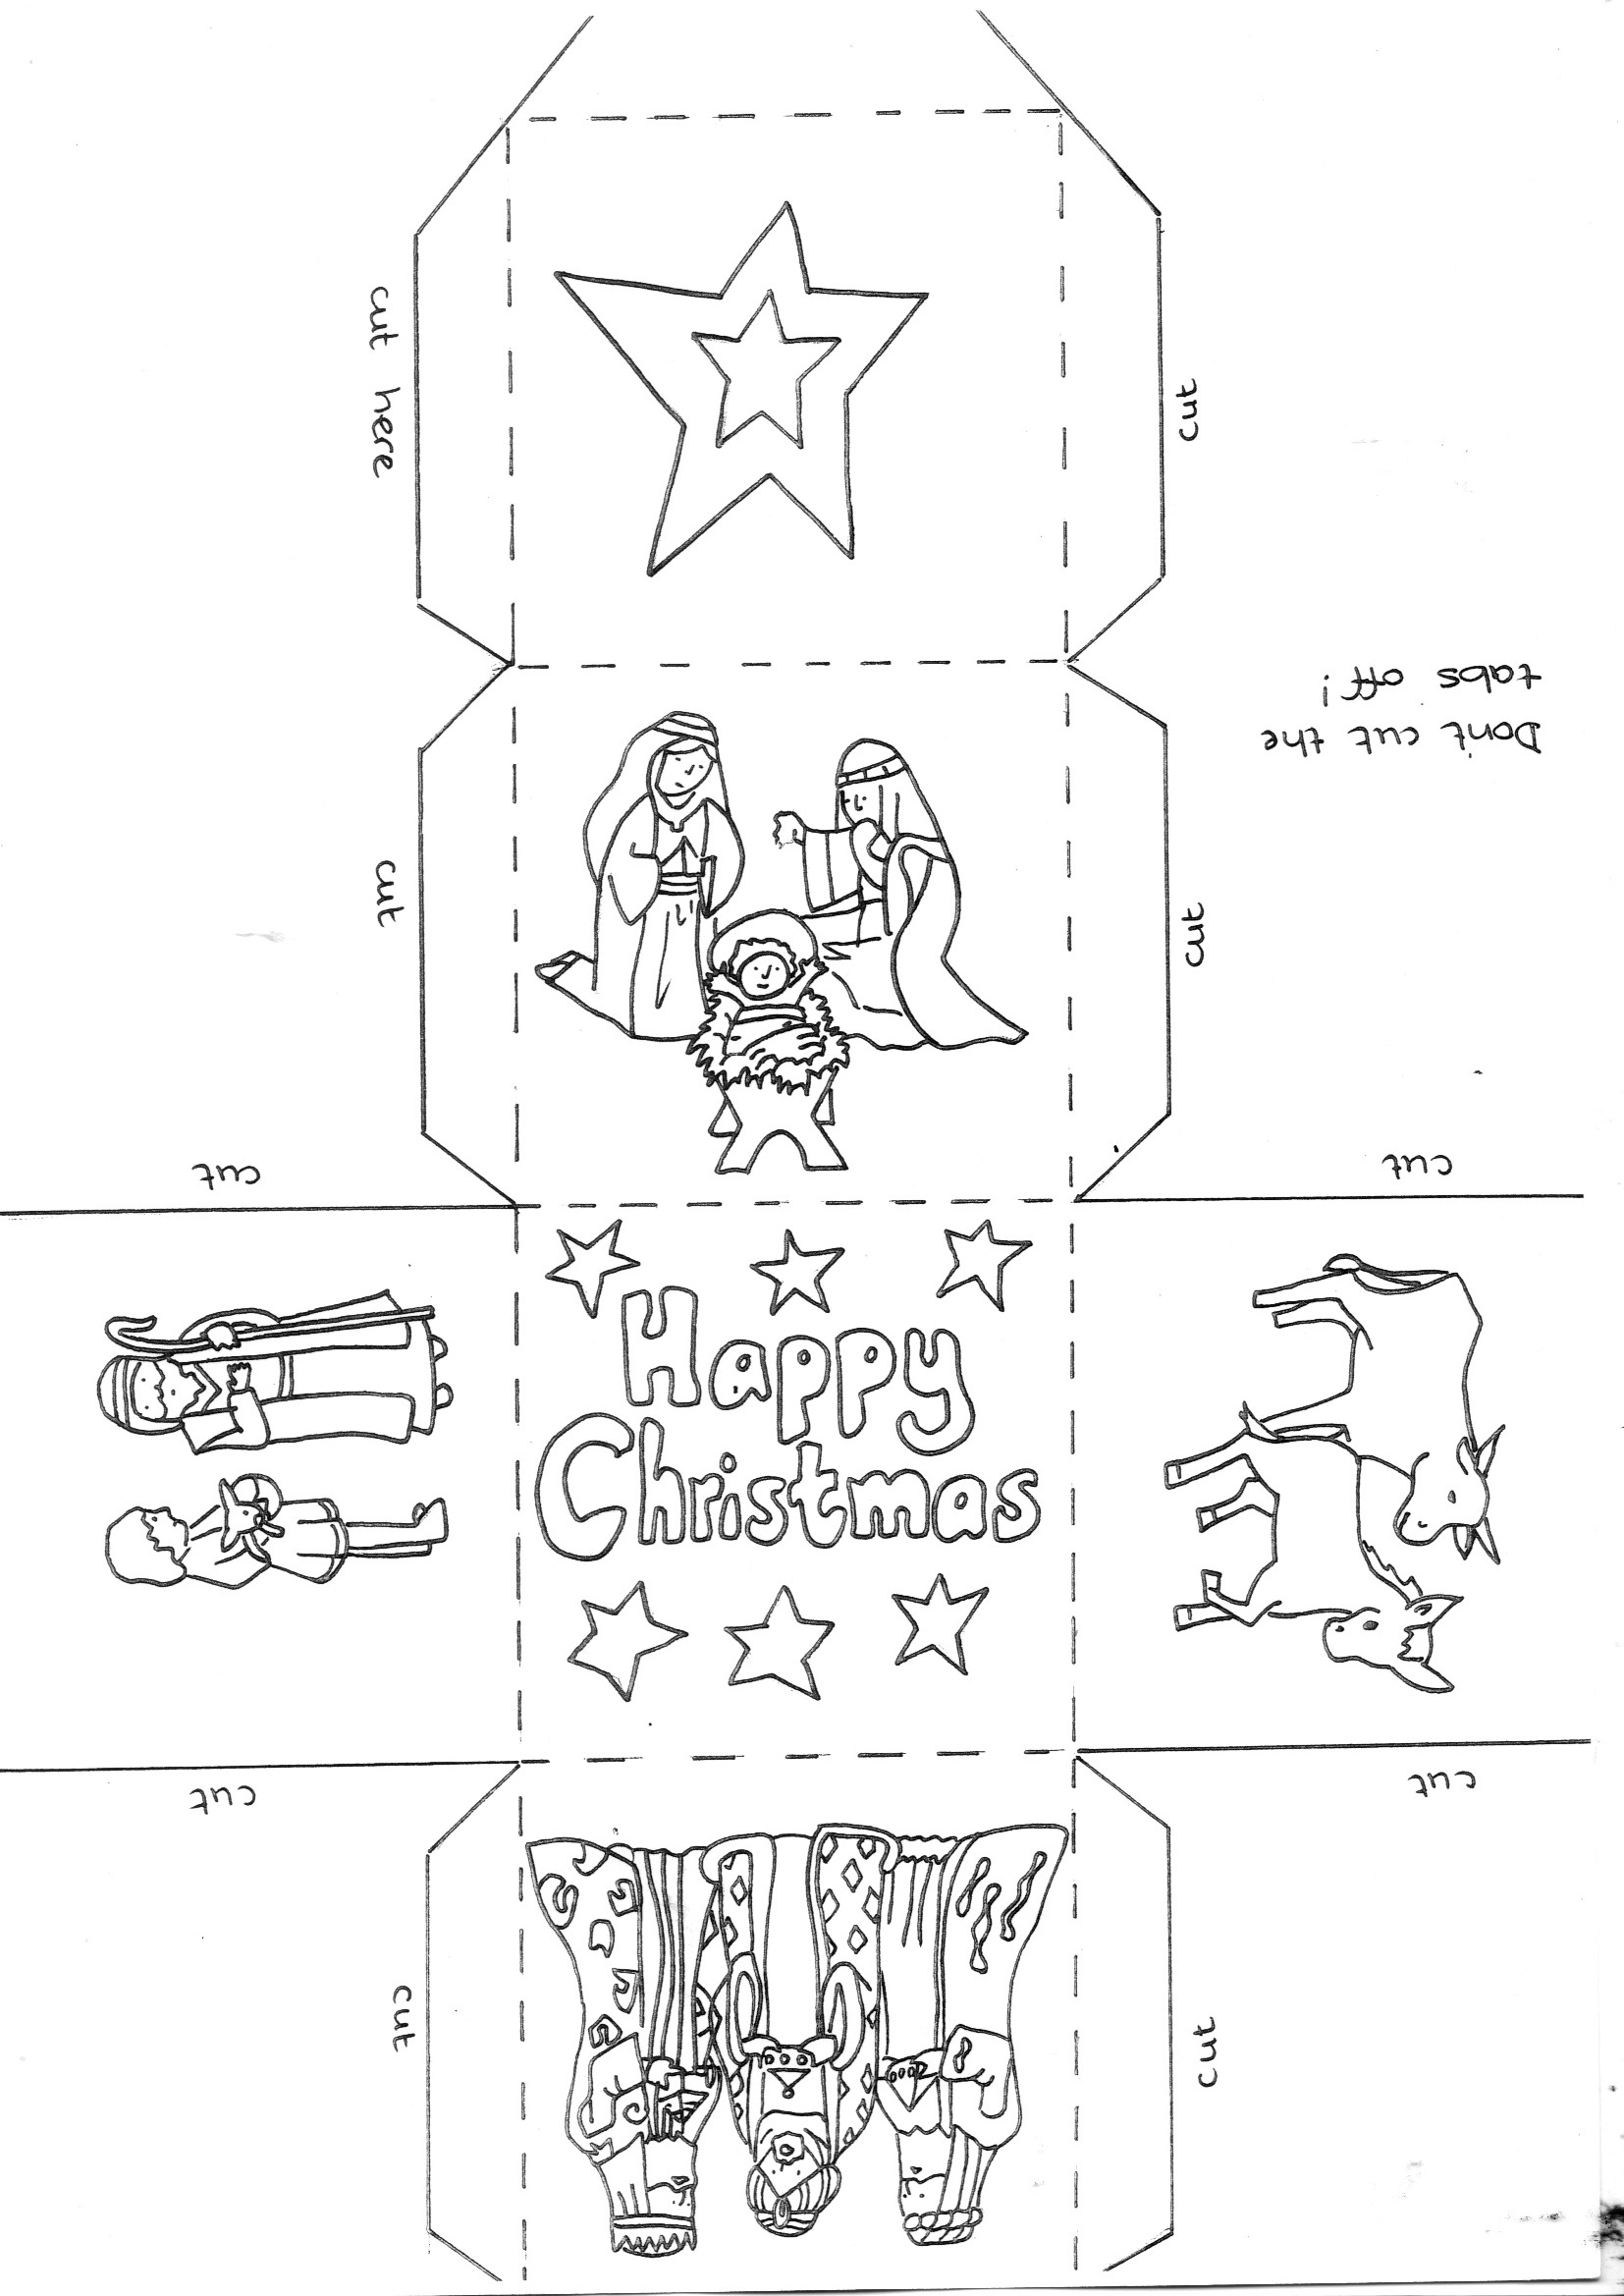
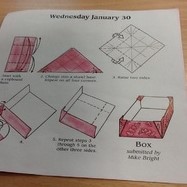
Eastburn Year 3 have made some Christmas cube decorations:
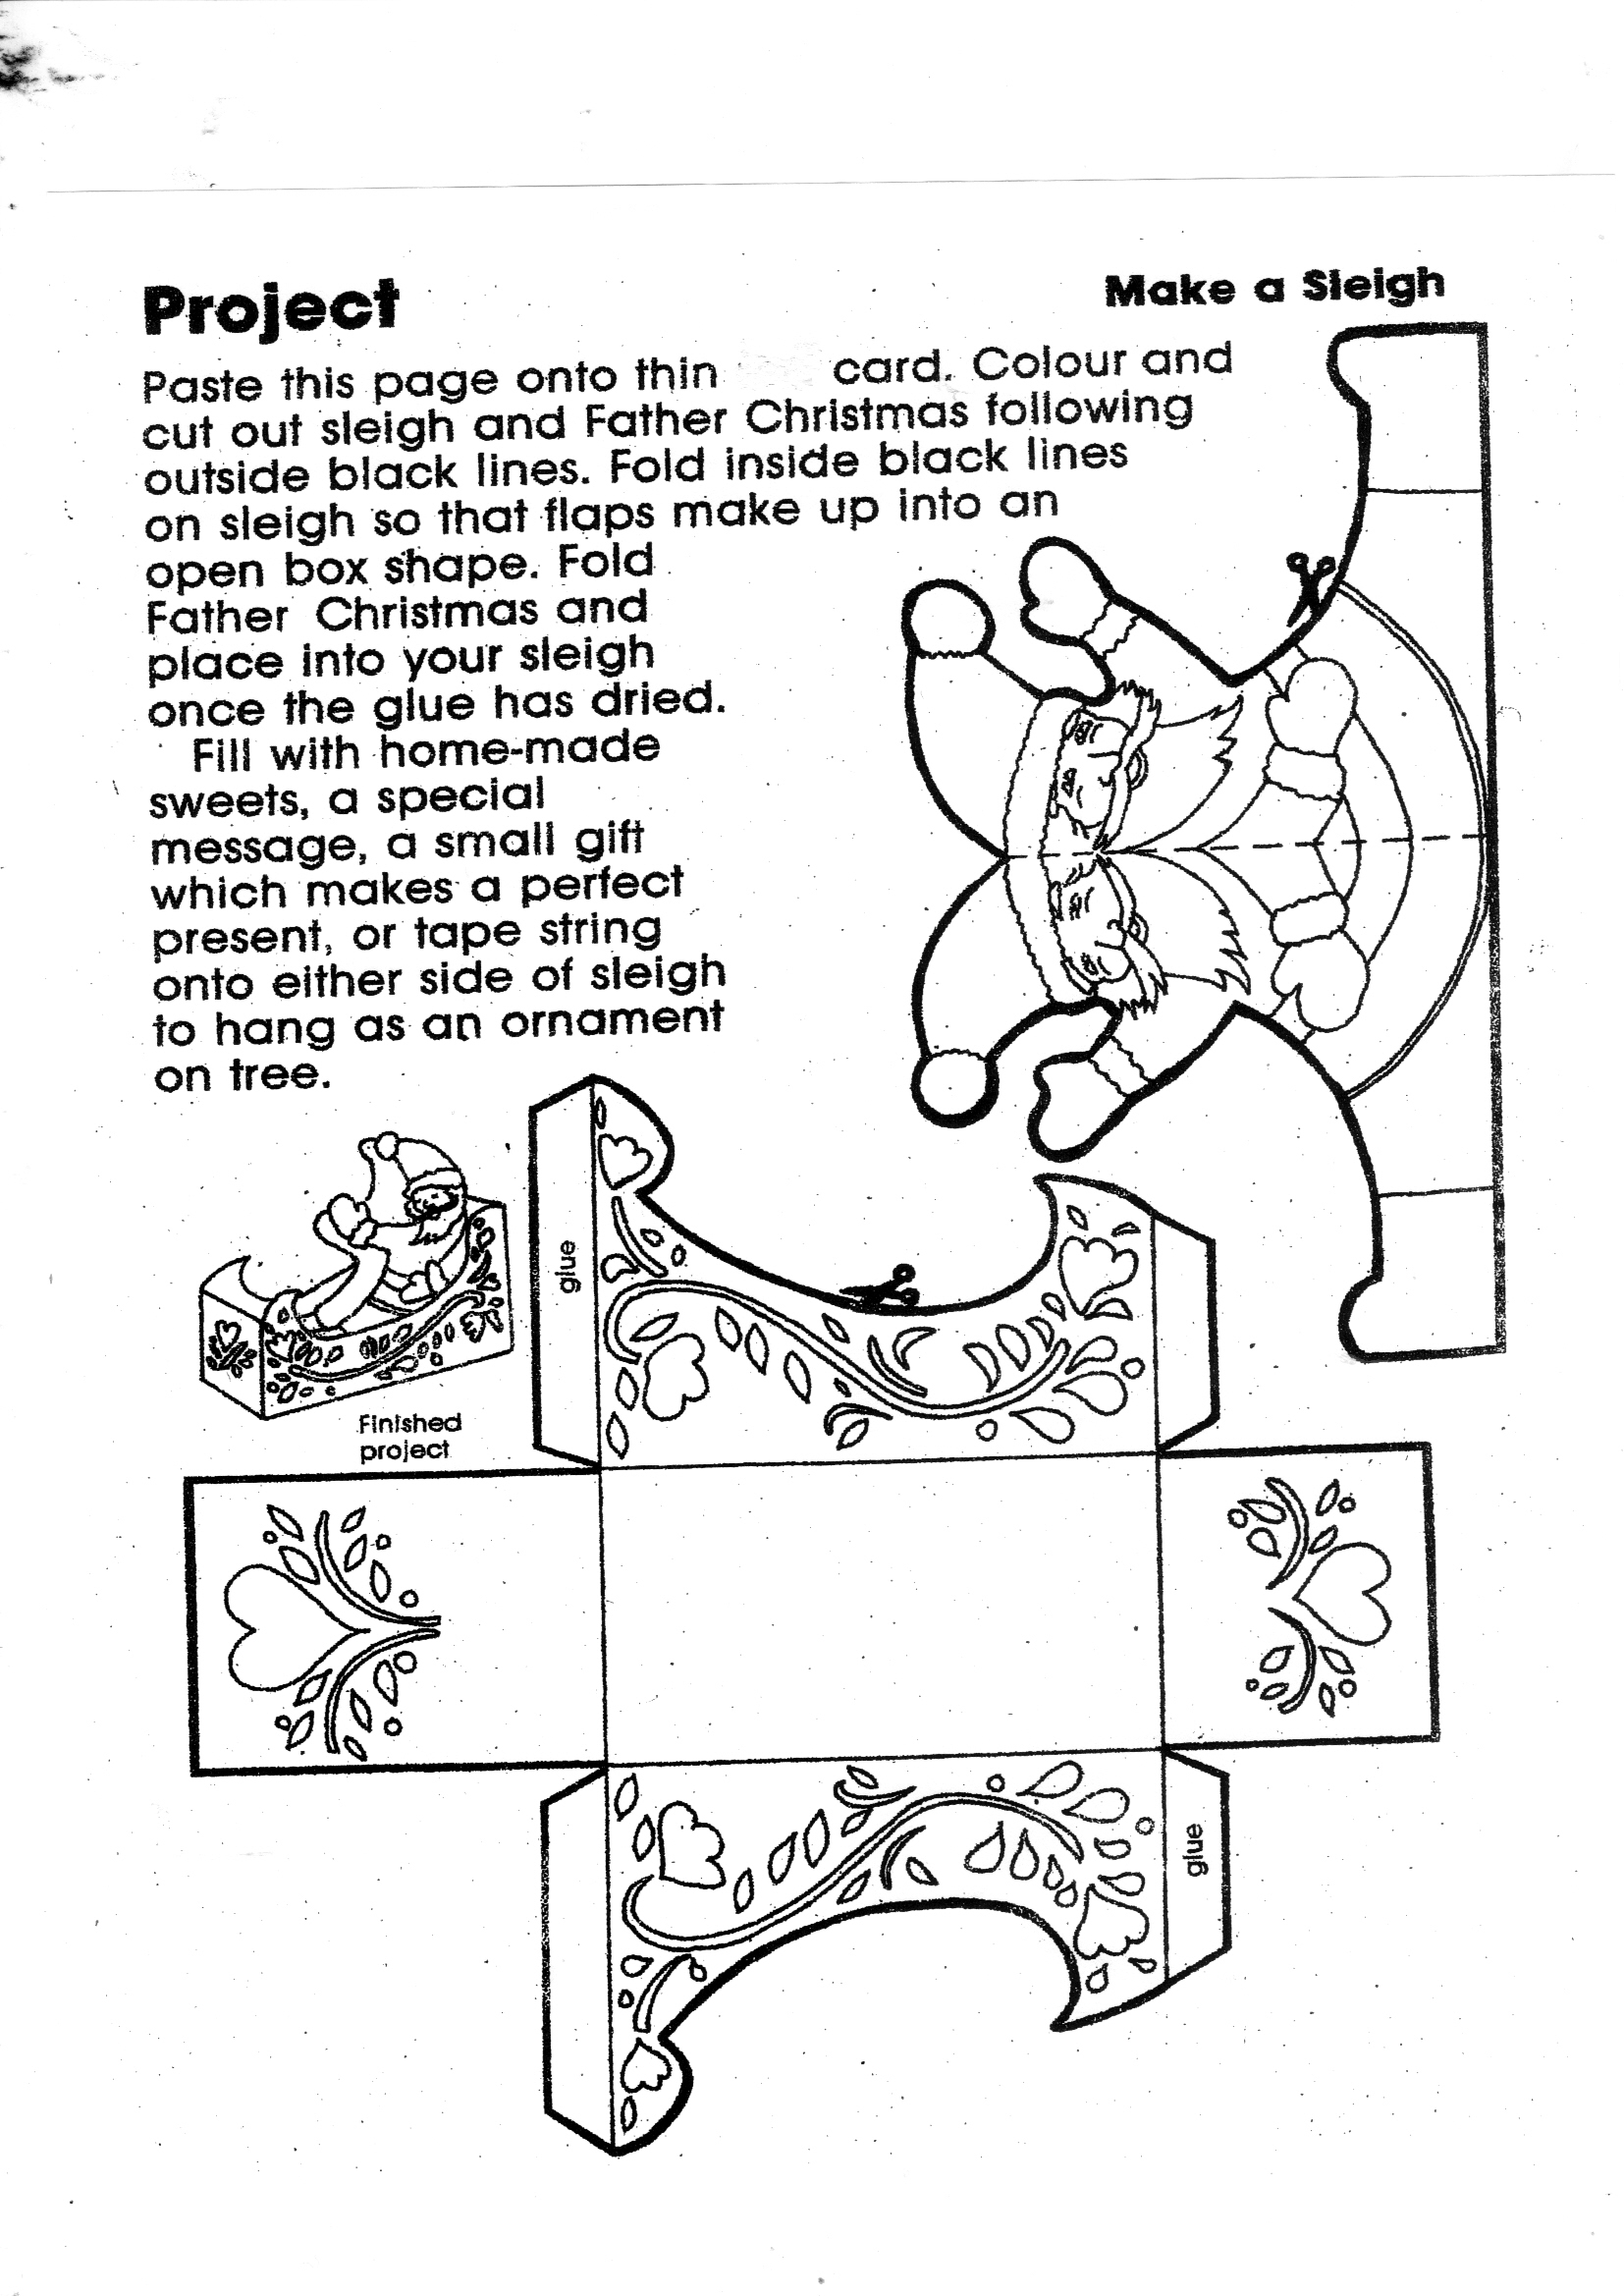
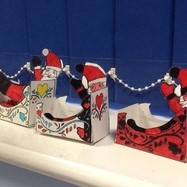
Year 5/6 at Steeton made Santa's sleigh:
Here is a decoration brought in by one of our Year 5 pupils at Steeton:
Here are some decorations from Rome: