This page shows the process and the products of the students at Irain Eskola Publikoa in Lesaka (Navarre, Spain) along the project. The main purpose of the page is to document the activities we have carried out, which will help our students realise all they have achieved and will serve us all when we assess the project towards the end. Also, it will be a helpful guide if we want to repeat some activities in forthcoming eTwinning projects.
Two groups of students have taken part in the eTwinning project, together with their two English teachers and their ICTs teacher:
- Year 5 students (aged 10-11): 13 students altogether
- Year 6 students (aged 11-12): 15 students altogether
- Year 5 English teacher: Miren Askasibar
- Year 6 English teacher: Edurne Aramburu
- ICTs teacher: Juanjo Garrantxo
Taking into account that the Year 6 English teacher is also the school's headteacher, and the Year 5 English teacher is in charge of the eTwinning programme at the school, it was agreed that the Year 5 teacher would take care of designing the activities, uploading materials to the TwinSpace, communicating with other partners, etc., while the Year 6 teacher would primarily take care of developing the activities with the Year 6 group of students.
We have joined the project when it was already registered, and the TwinSpace was created. Besides the aims that the co-founders set for the project, we have also defined some pedagogical objectives regarding English learning and cross-curricular aspects, in order to integrate the eTwinning project in the syllabus for Year 5 and Year 6, thus ensuring that curricular integration was met. Taking into account that we will continue to take part in eTwinning projects next year, we also took into account the skills our students need to develop in order to successfully to cooperate in developing activities with students in other countries using ICTs. These are the additional aims we set for the project:
- To interact orally communicating with other students
- To practice writing skills on three types of texts: descriptions, postcards, emails
- To improve strategic skills to plan and produce texts, following models
- To acknowledge that cultural heritage is part of our everyday life
- To raise awareness on the cultural heritage of our town, Lesaka
- To promote the use of G Suite tools in class, particularly Google Classroom
- To explore Web 2.0 tools to co-edit documents: Google Docs, Google Slides
- To use Web 2.0 tools to create graphic artifacts: Canva
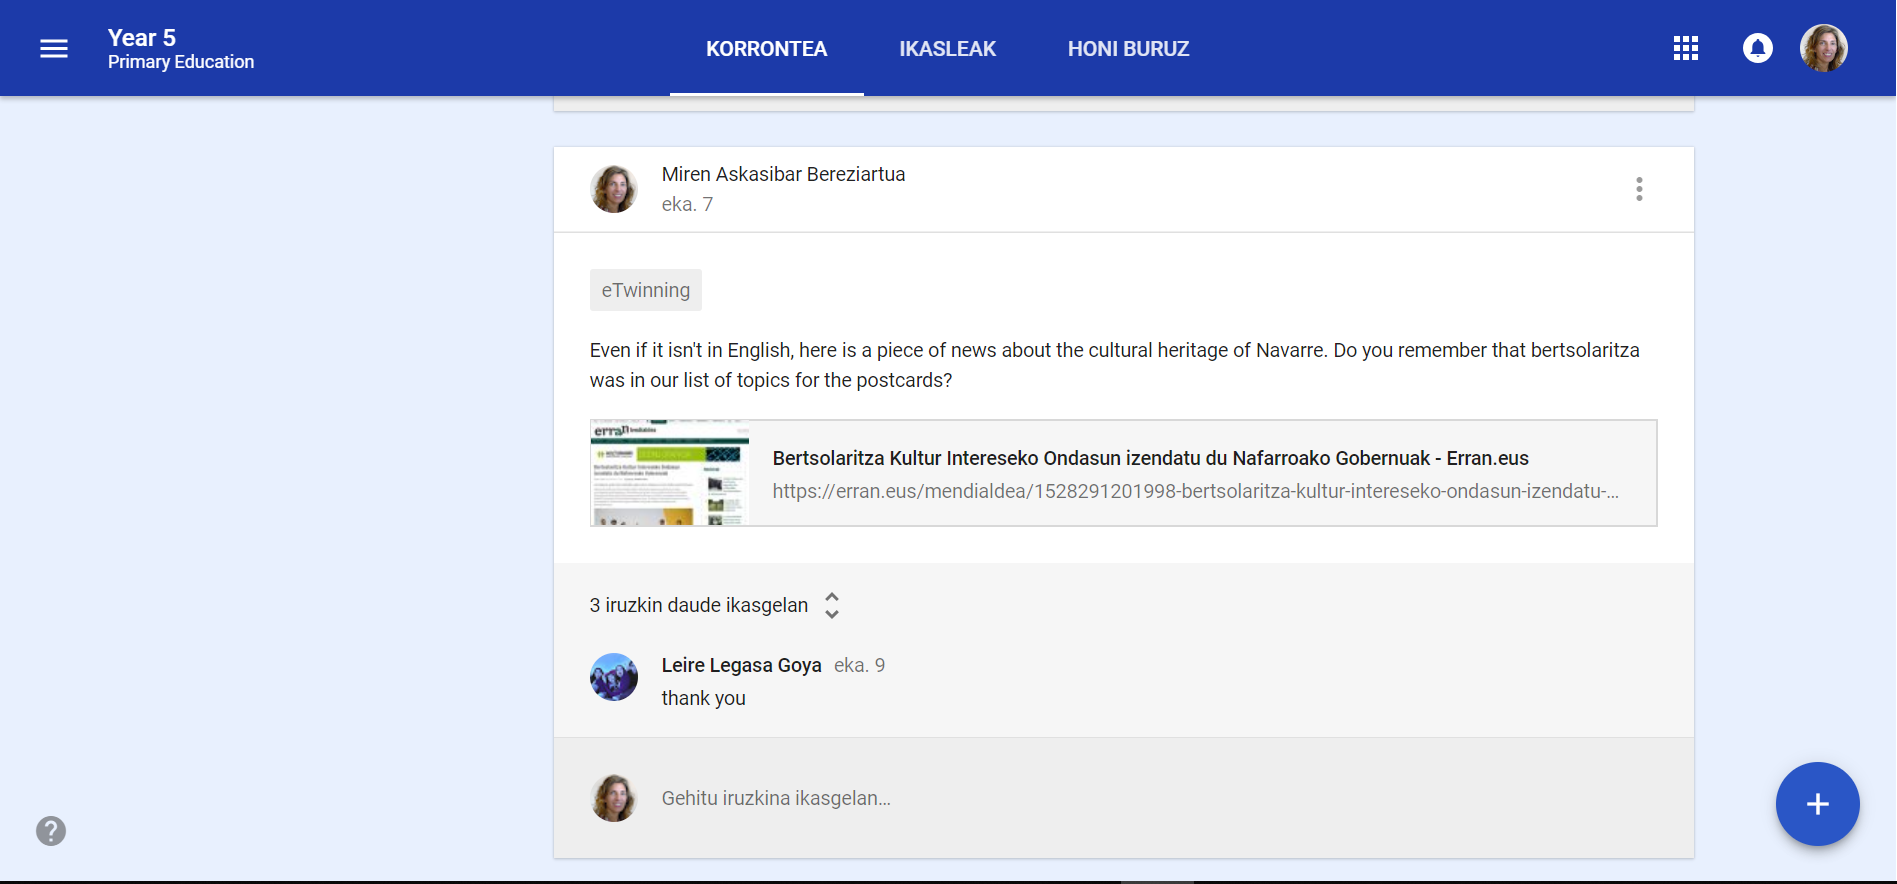
Since our students could not be added as members to the TwinSpace, and we wanted to use ICTs to do the activities, we have integrated the activities of the eTwinning project in our English Google Classroom, which we use regularly. In Navarre, all schools are integrated in Google's G Suite for Education, and our students use all its tools from Year 3 onwards. Here is an example of what our Google Classroom has looked like during the project:
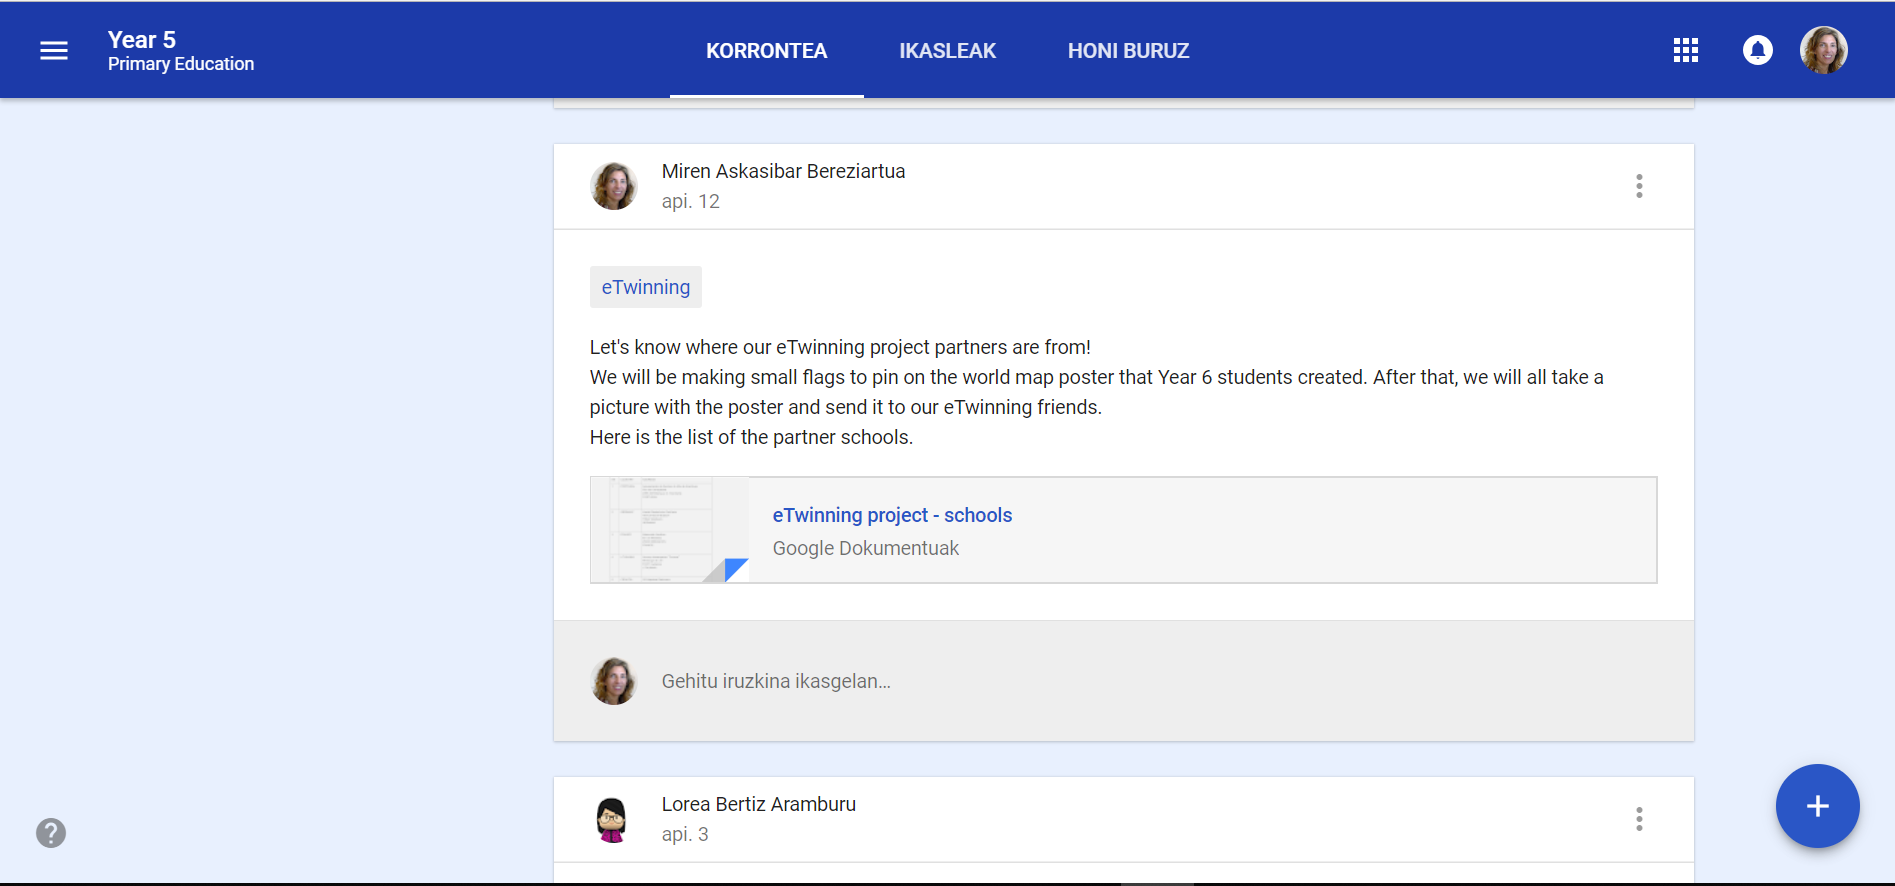
We have also used Google Classroom to share news related to the project with the students:
The G Suite for Education accounts for students and teachers are managed by the Department of Education of the Government of Navarre. This guarantees that many e-safety aspects are taken into account: websites considered not appropriate for educational uses and for our students' ages are not allowed access, the Adblock Plus app cannot be removed from Google Chrome by users, etc.
Next, we will explain the activities we have developed, in chronological order.
1. Let's locate our partners on a map
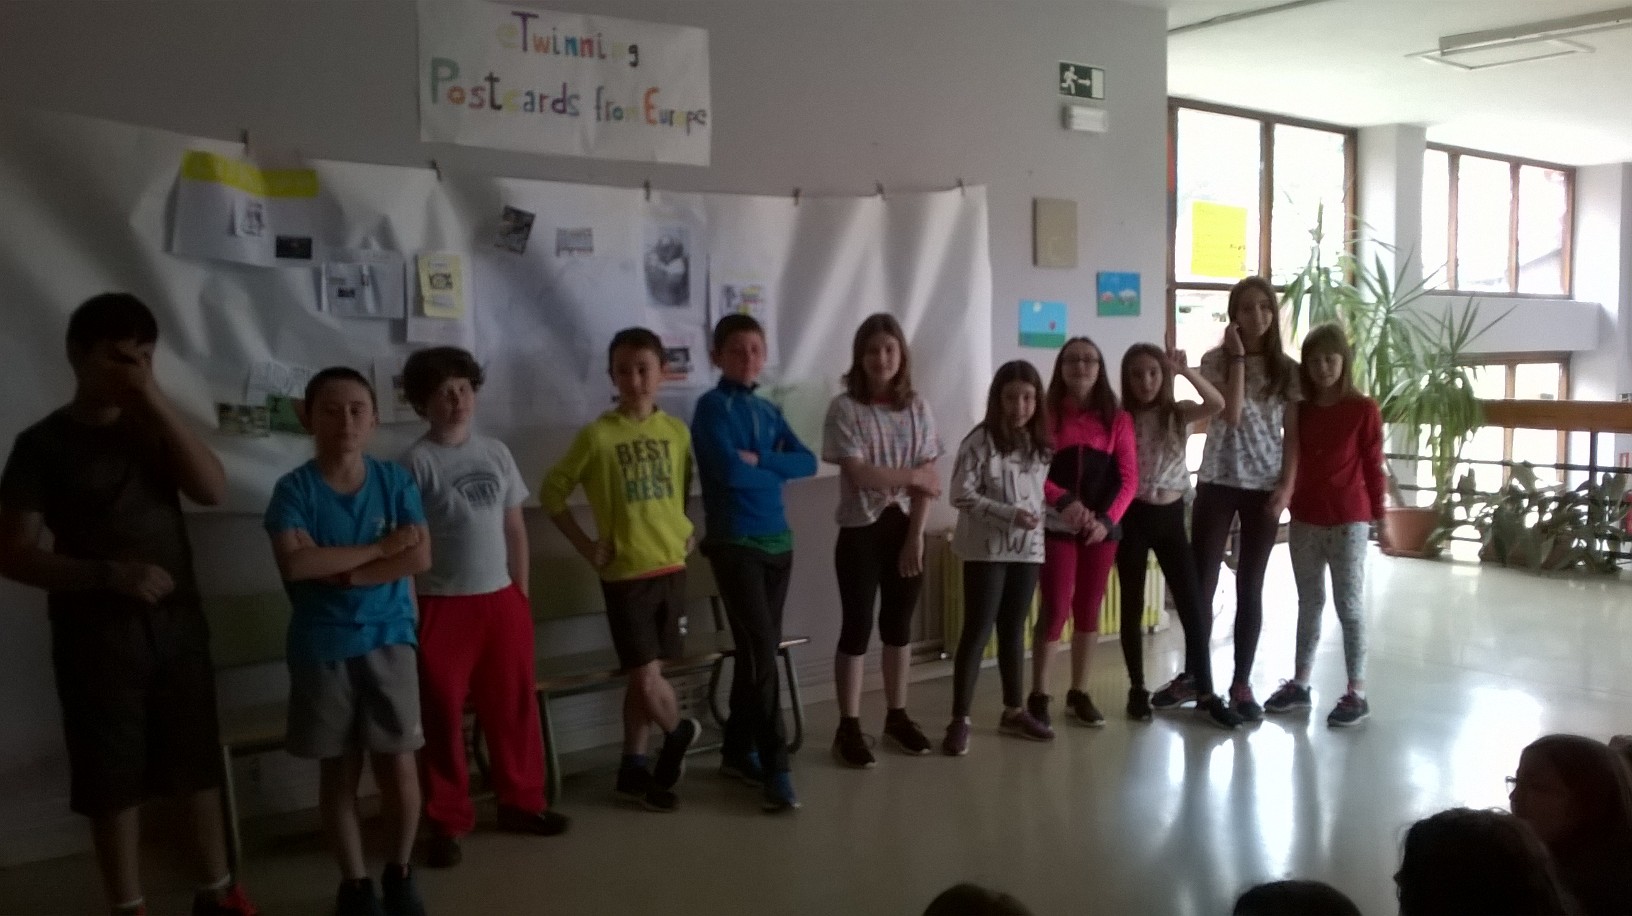
On our first activity on the project we have read the introductions written by the teachers about each partner, on the "Hello Europe - Tell us something about yourself!" page. We have done this in a big group, since only the teachers have been added as members to the TwinSpace of the project. Realising that so many schools were taking part in the project, and from countries our students had not heard of at times, has led us to wanting to locate them on a map. Year 6 students have prepared a large map, which we have pinned on a wall of our floor's large hall. After that, Year 5 students have used the computers to locate the countries and check the spelling in English, in order to make small flags that could be pinned on the map. Here is the result:
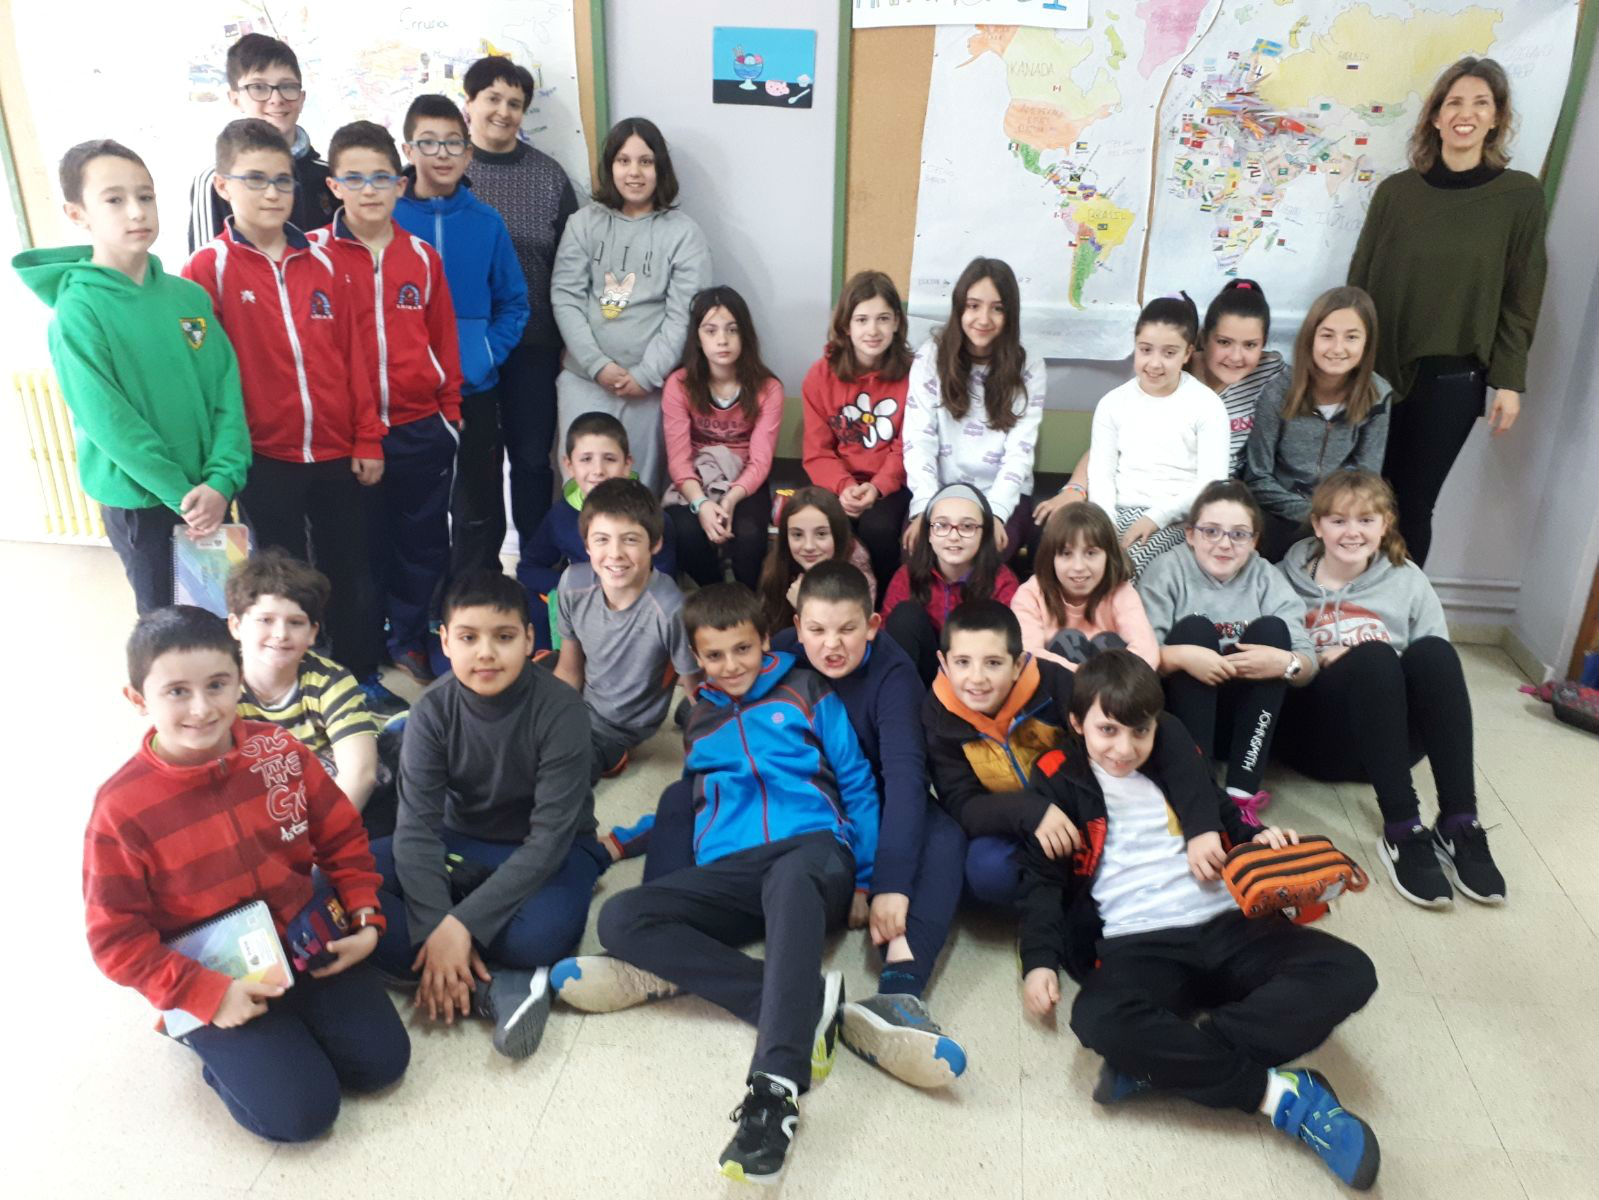
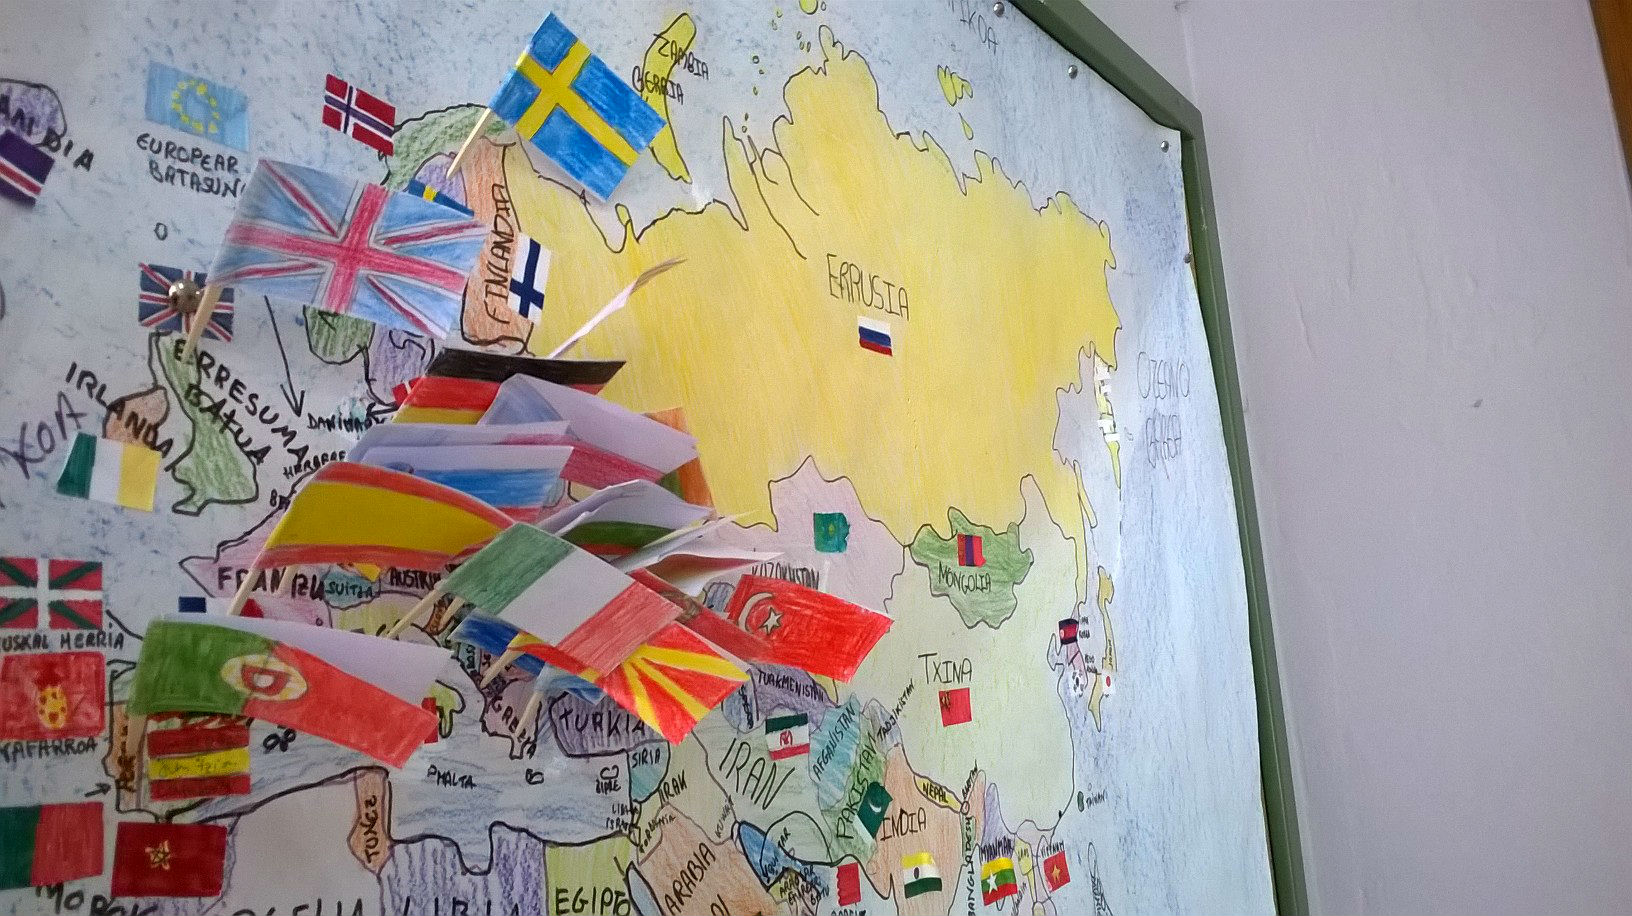 Next, we have taken a picture of all the students taking part in the project, so we could post it on the Project Journal. You can see our big map with the small flags pinned on it in the background:
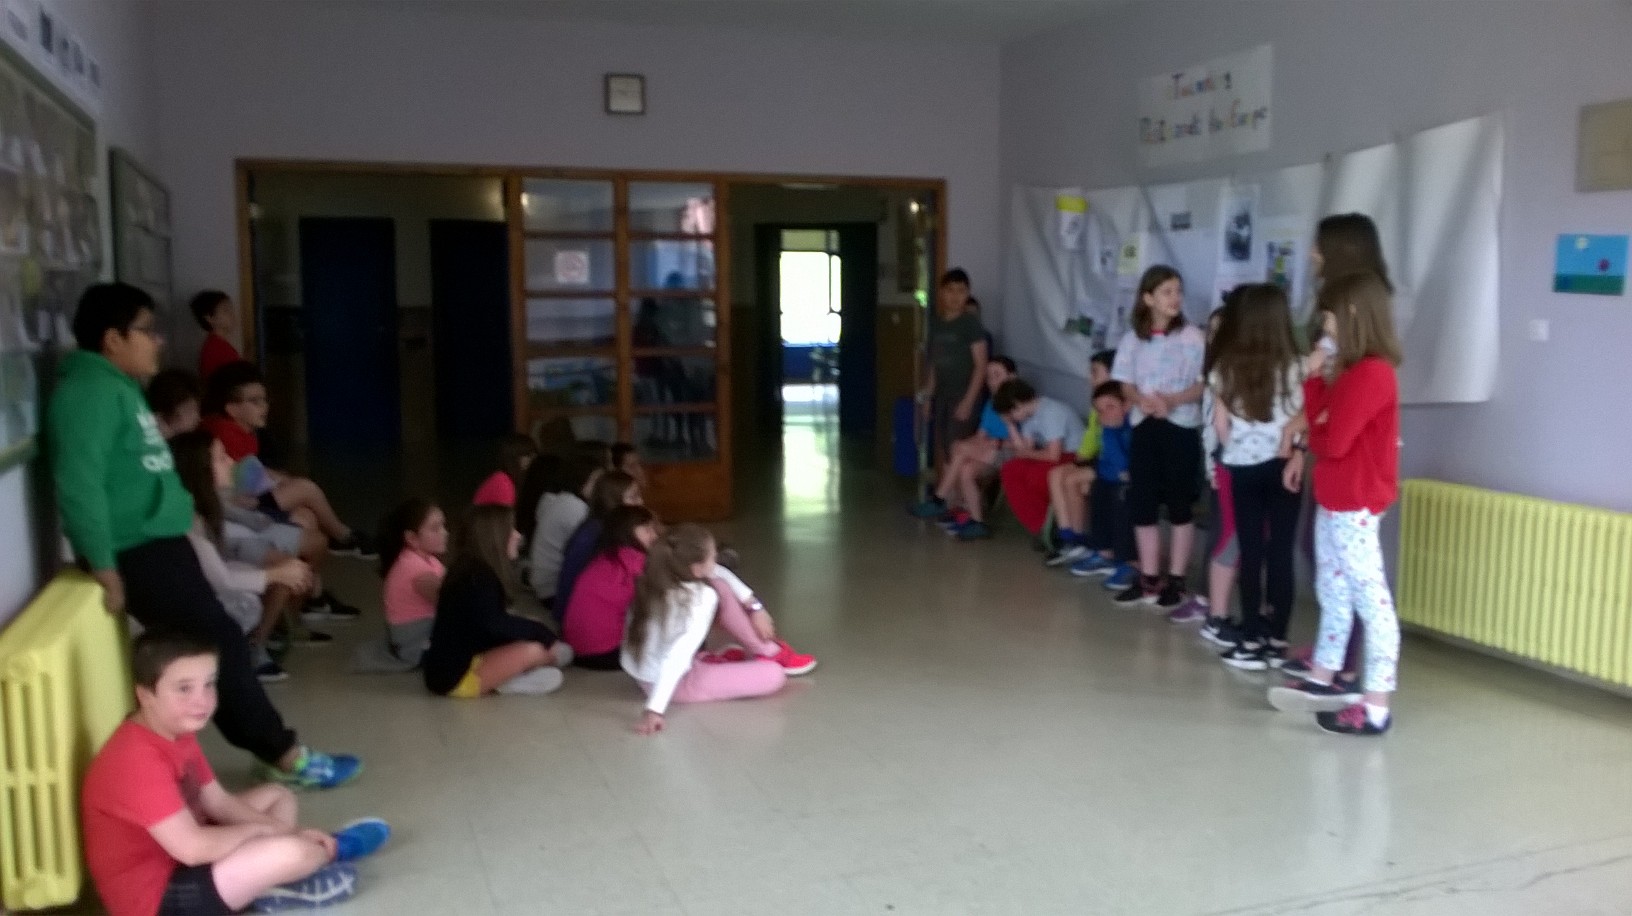
2. Where will we display the postcards we receive?
Knowing that we will be recieving postcards from our partners, we have discussed in English class about how we could display them. Finally, we have decided to set up a large poster in front of the map with the flags, where we will display the postcards, for all students and teachers to see. We have also decided that glueing them was not a good idea, in case anybody wanted to read them, so we will be sticking them with blu-tack instead. This is the poster we have made:

3. What's cultural heritage, and what our postcards will be about
Once we have a fair idea of who is taking part in the project, and what we will do with the posrtcards we receive, it's time to think about the postcards we will send. First, we have held an open discussion in our English class about cultural heritage, as an initial assessment on what we know about the general topic of the project. Our Year 5 students have had difficulties defining the concept at first, but along the discussion we have been able to outline a general idea about what cultural heritage is. Also, and this has been a deliberate proposal coming from the teachers, we have agreed on making our postcards about the cultural heritage of Lesaka, our town. The teachers have proposed to work on the local cultural heritage, because we wanted our students to realise that cultural heritage is part of our lives, and it's not only about big important monuments.
The two English teachers have created a document on Google Docs to compile the list for the postcard topics. The students have contributed with items on the list, and after that each student has chosen a topic of their interest to make one postcard each. This is a PDF of the final list of topics:

4. Making the postcards
After choosing the topic of their postcards, the students could start preparing their postcards. The English teachers have agreed to propose a different technique to each class, so the results would be more diverse: Year 5 students were to use Canva, and Year 6 students would make their postcards on cardboard, drawing on them or doing a collage. In both cases, the teachers have prepared a model of the postcard and shown it to the class.
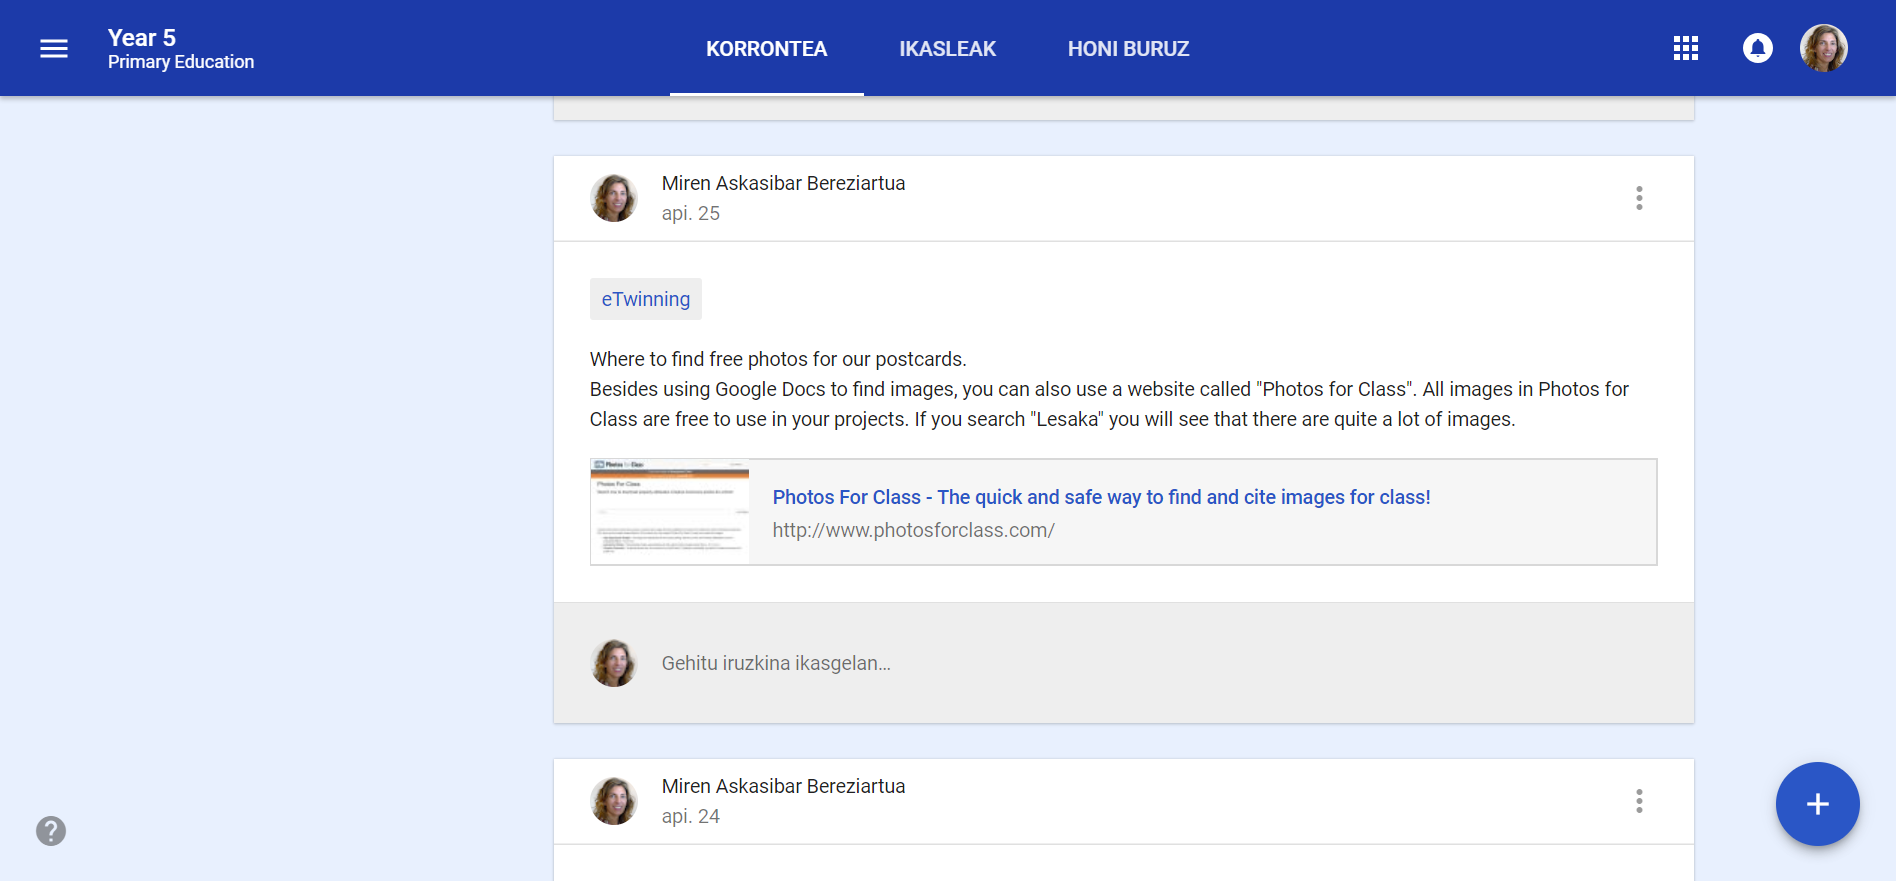
Year 5 students have started by choosing an image from free sources (using the search tool in Google Docs, in Photos for Class and other sources), uploading it to their Google Drive, and writing the text on GoogleDocs, so they could benefit from its built-in spellcheck. Students have also searched for photographs about their postcard topics at home, or have taken photographs themselves, if none were available on the Internet free to use. After having done this, they have logged-in on Canva, chosen a template for their postcard, and pasted both the image and the text. All this has taken 3-4 English lessons.
Here is an example of how we introduced sources of free images in Google Classroom:
Year 6 students have written a draft of the text for their postcards on a piece of paper, checked the spelling with the help of their teacher, and after that they have copied the text on a piece of cardboard prepared by the teacher. After that, they have either drawn the front of the postcard, or applied a collage technique to create it. Some students have even used photographs showing them or members of their family taking part in the cultural heritage topic explained in the postcard.
When the postcards were finished on Canva, the students have downloaded them onto their Chromebooks and uploaded them to Google Classroom:
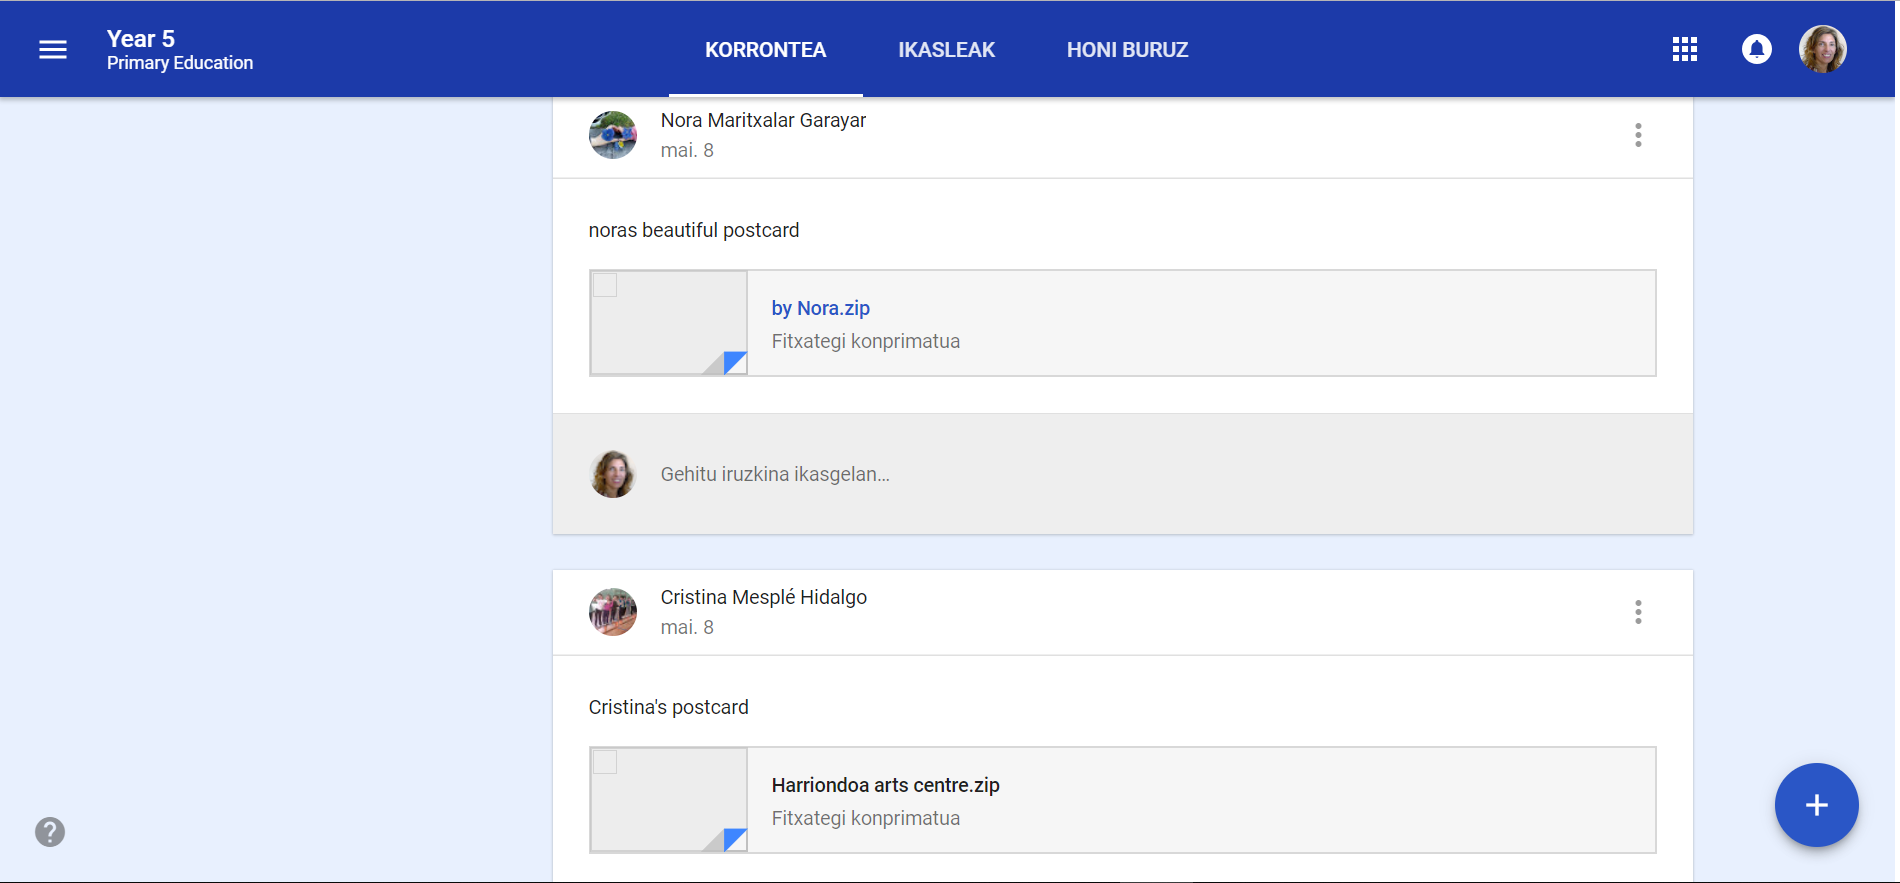
All postcards have been compiled in a booklet published in Issuu by the Year 5 teacher:
This is how we have made the booklet: the English teacher has prepared a document on Google Slides, she has shared it with the Year 5 students, and each student has inserted the PNGs of their Canva postcards on the slides. That way, the document has been prepared with everybody's contribution. Then, the teacher has downloaded it as a PDF and published it on Issuu.
5. New ideas arise: videos reading the postcards and QR codes
As the project unfolded, new ideas have come to our minds. On one hand, during the English lessons we have watched a video of our partners in Turkey where they introduced themselves on the TwinSpace, and we have decided that we would record ourselves reading our postcards, so all partners would be able to enjoy all our postcards, even if they only received one or two each.
The ICTs teacher of Year 5 and Year 6 has come up with an idea for the video recordings: producing a QR code that we could glue onto each postcard, with a link to the video of that particular postcard being read.
Thus, the students have taken some time to rehearse reading their postcards, and the English teachers have recorded the videos, uploaded them to YouTube, and shared them in the TwinSpace's Project Journal. After that, during their ICTs lessons, Year 5 students have created the QR codes linking to their videos.
Most of the students wanted their faces to be shown on the videos. To respect their privacy, the YouTube videos have been published as "Unlisted", so only those with the link will be able to watch them. This has been discussed in class (the students weren't happy about the videos not being public, because they wanted to get many likes) and it has also been explained in Google Classroom:
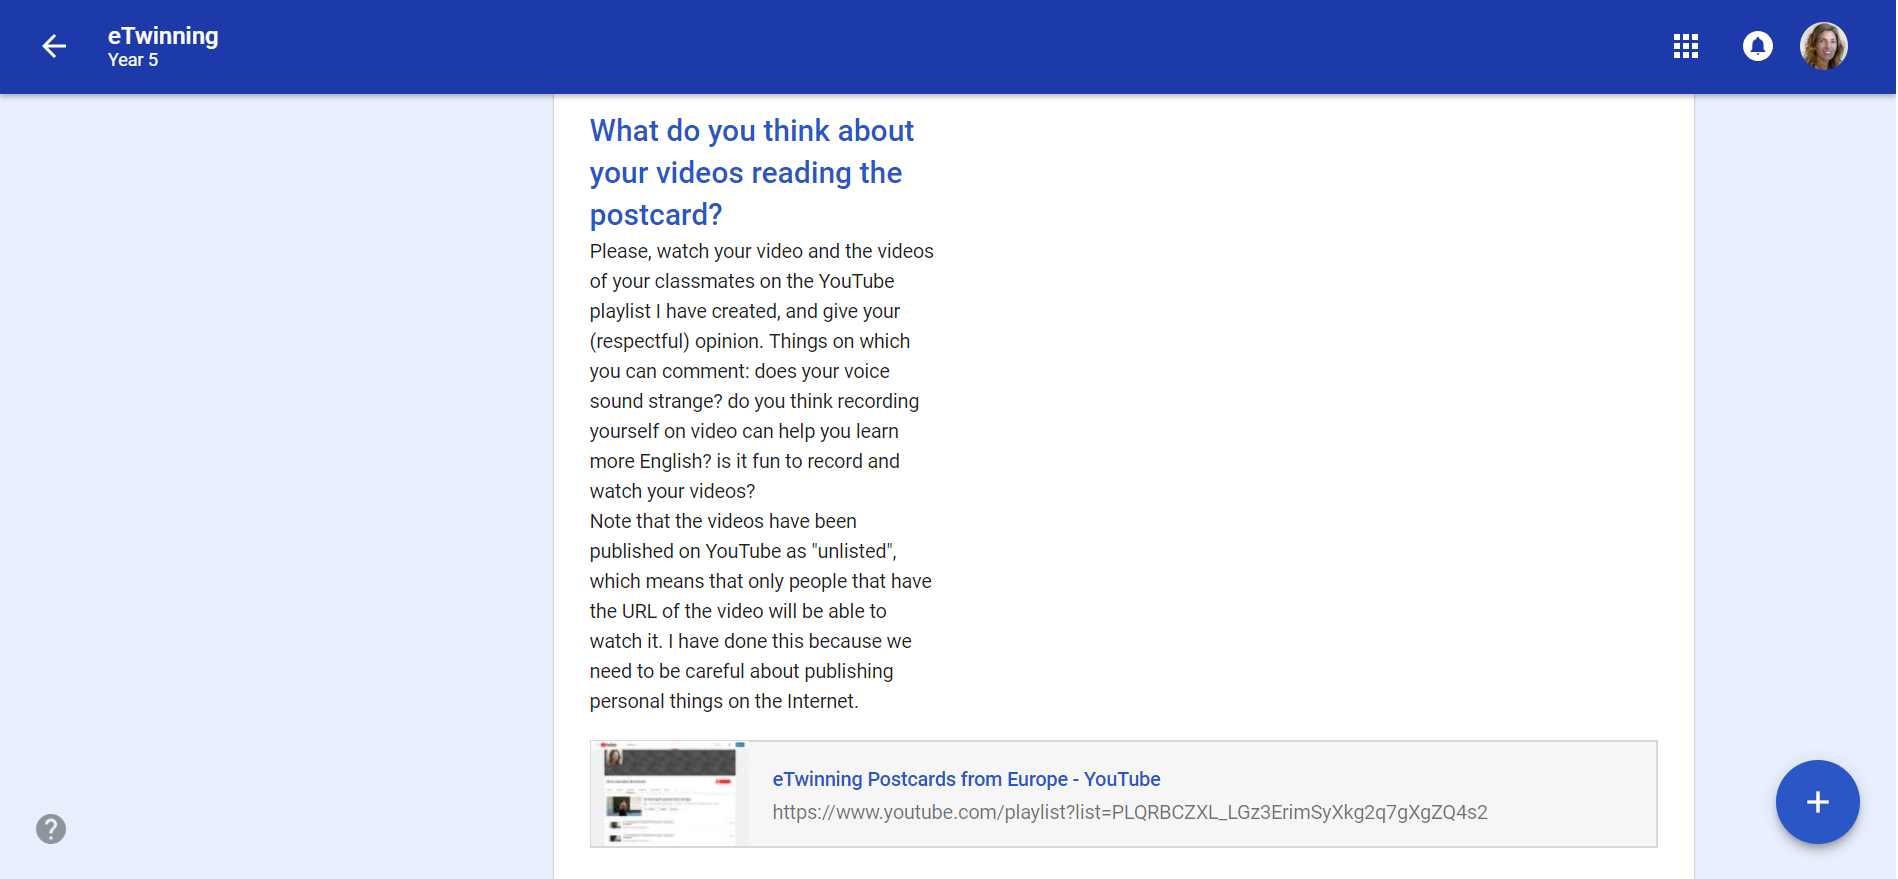
All Year 5 videos have been auploaded to the Materials page of this TwinSpace. Here is an example:
The videos of Year 6 students have been editted by the English teacher, so they are on a single video, which has also been uploaded to the TwinSpace :
6. Introducing a classmate
We have thought that it would be nice to introduce ourselves, so the rest of the students taking part in the project can get to know us better. Thus, the English teacher has created a task on our Google Classroom. In that taks, we have taken a selfie each and uploaded it to Google Classroom. Then, the students have organised themselves in pairs to choose which friend they would introduce, they have shared their selfies with each other, and they have written a description of their friend on a Google Docs document, adding the picture shared by their friend.
Unfortunately, some students have been sick when we did the activity, and they couldn't finish their introductions. Here is a padlet with the Year 5 students' introductions:
7. eTwinning Day celebrations
When the English teacher saw that this year's eTwinning Day was about the same topic as our project, she proposed an activity for Year 5 and Year 6 students. She also invited the rest of partners to celebrate and share their celebrations on the TwinSpace. The activities that our school has done can be seen on a separate page of this TwinSpace: https://twinspace.etwinning.net/62204/pages/page/396652
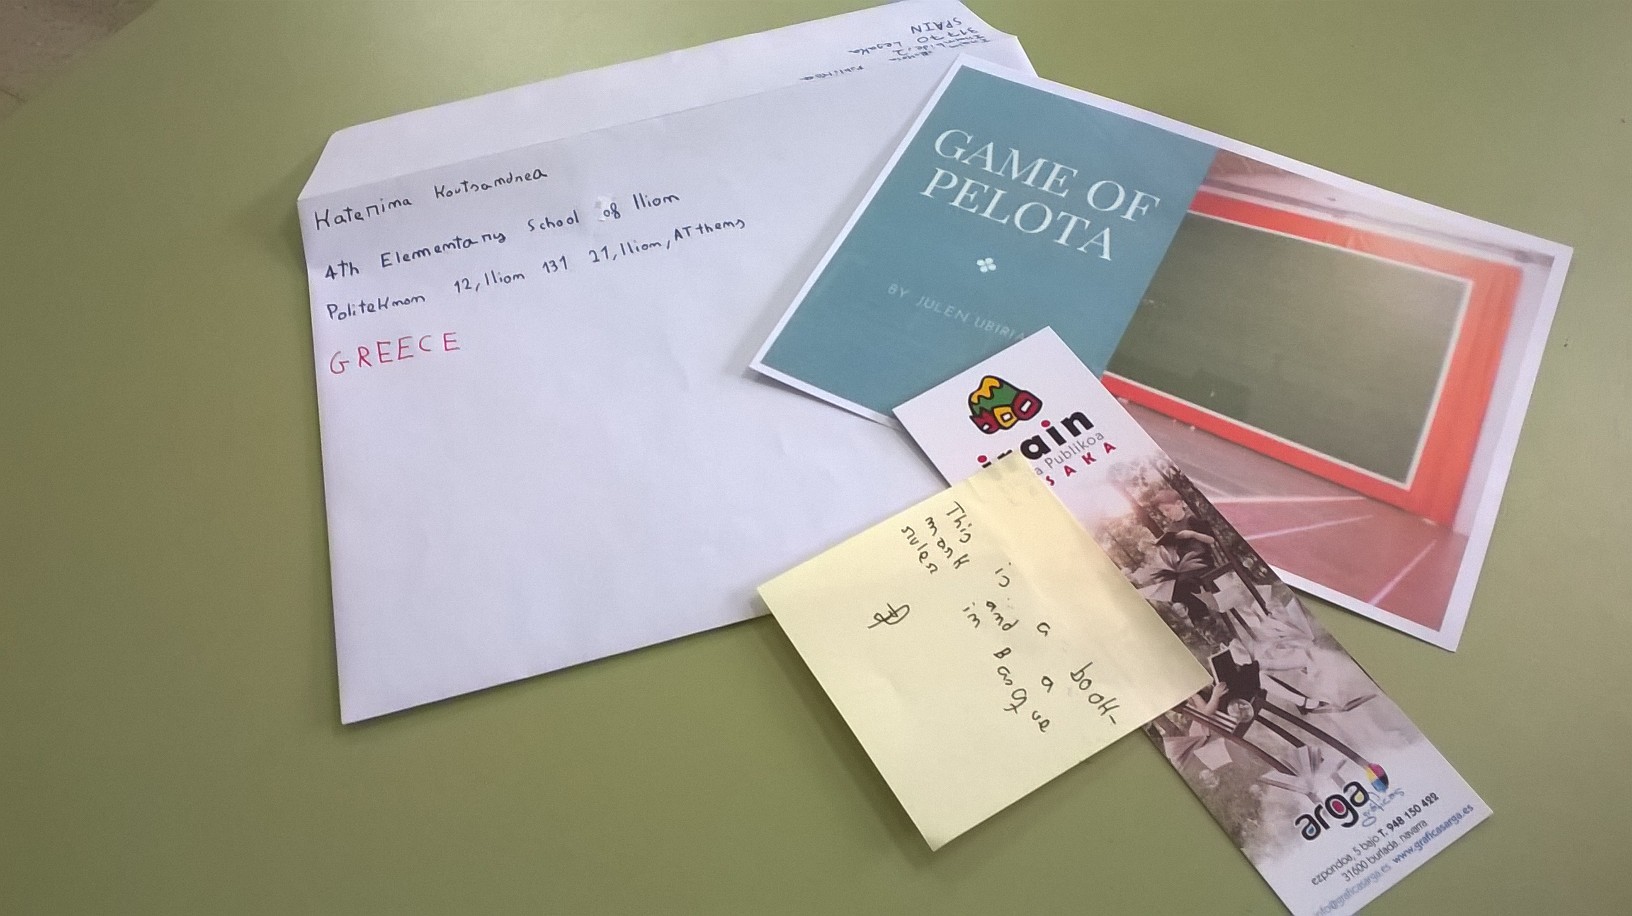
8. Sending our postcards
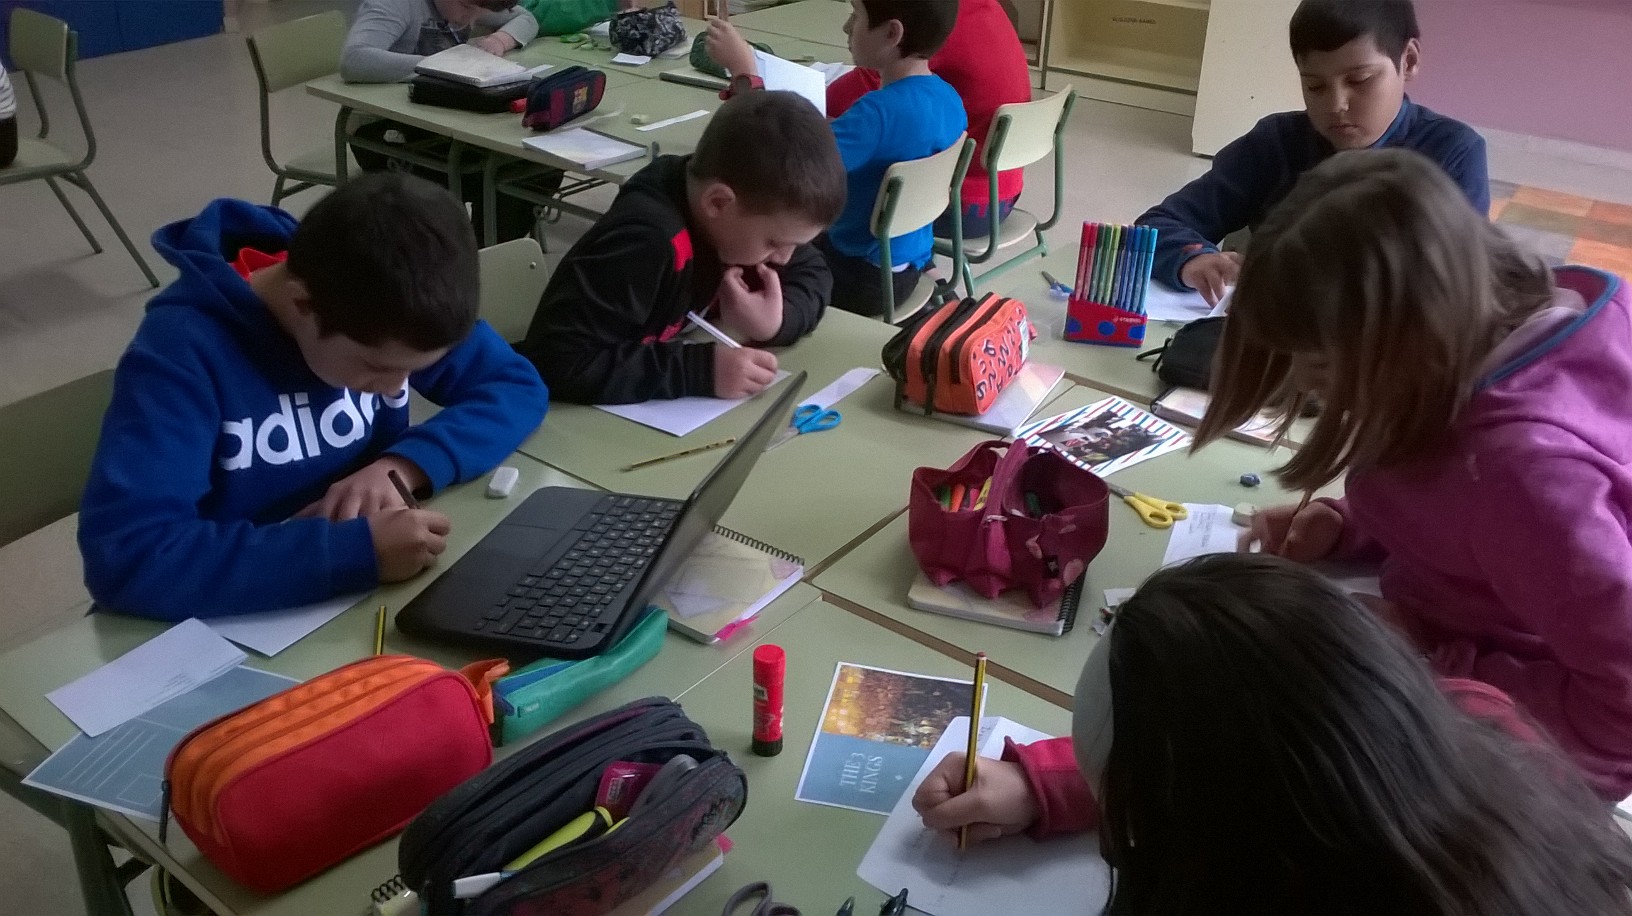
After having prepared the postcards and the QR codes, each student has prepared an envelope to send their postcard. The students have proposed to add something else in the envelope, besides the postcard, as some of our partners have done. The teachers have found some spare bookmarks that our school gives to the students together with their agenda, with the academic year printed on them. The students have also proposed to add a sticky note explaining what is on the bookmark and even when their birthday is. Here some pictures of Year 5 students preparing the envelopes:

So, this is what each student has sent:
9. Describing our town, Lesaka
After having co-editted a Google Slides document to create a booklet with our postcards, we have co-editted a Google Docs document to describe our town and shared that description on the TwinSpace's Project Journal, so the rest of partners could read it. We have prepared this short description during one of the Year 5 English lessons.
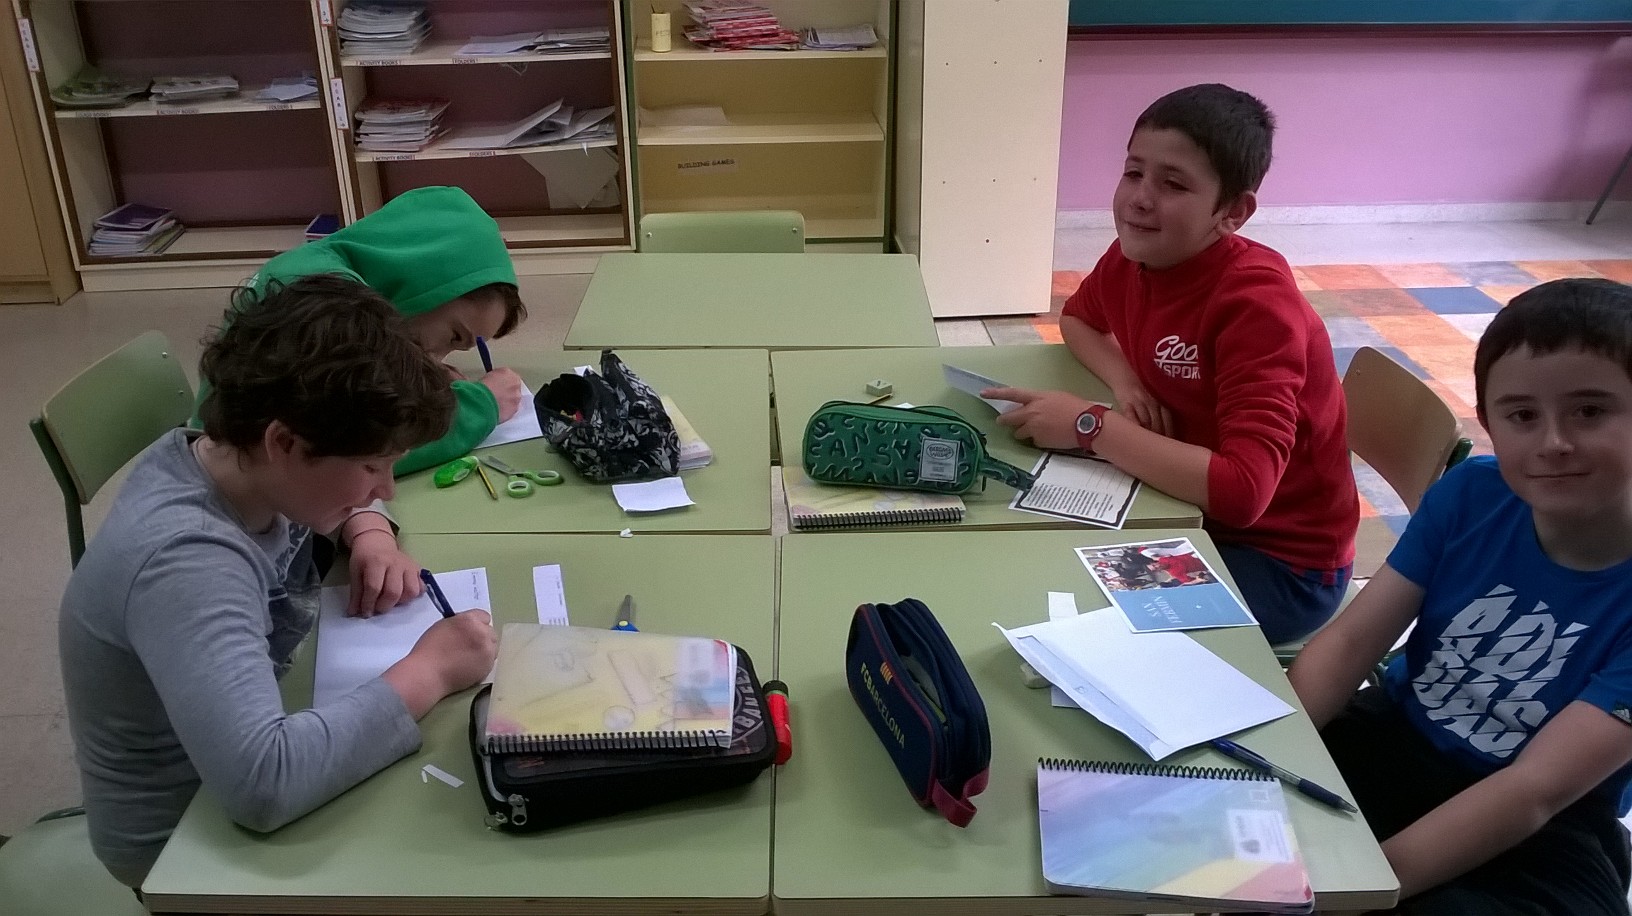
First, we have planned the contents of the document by brainstorming ideas and ordering them to give the text some structure, with the participation of all Year 5 students:
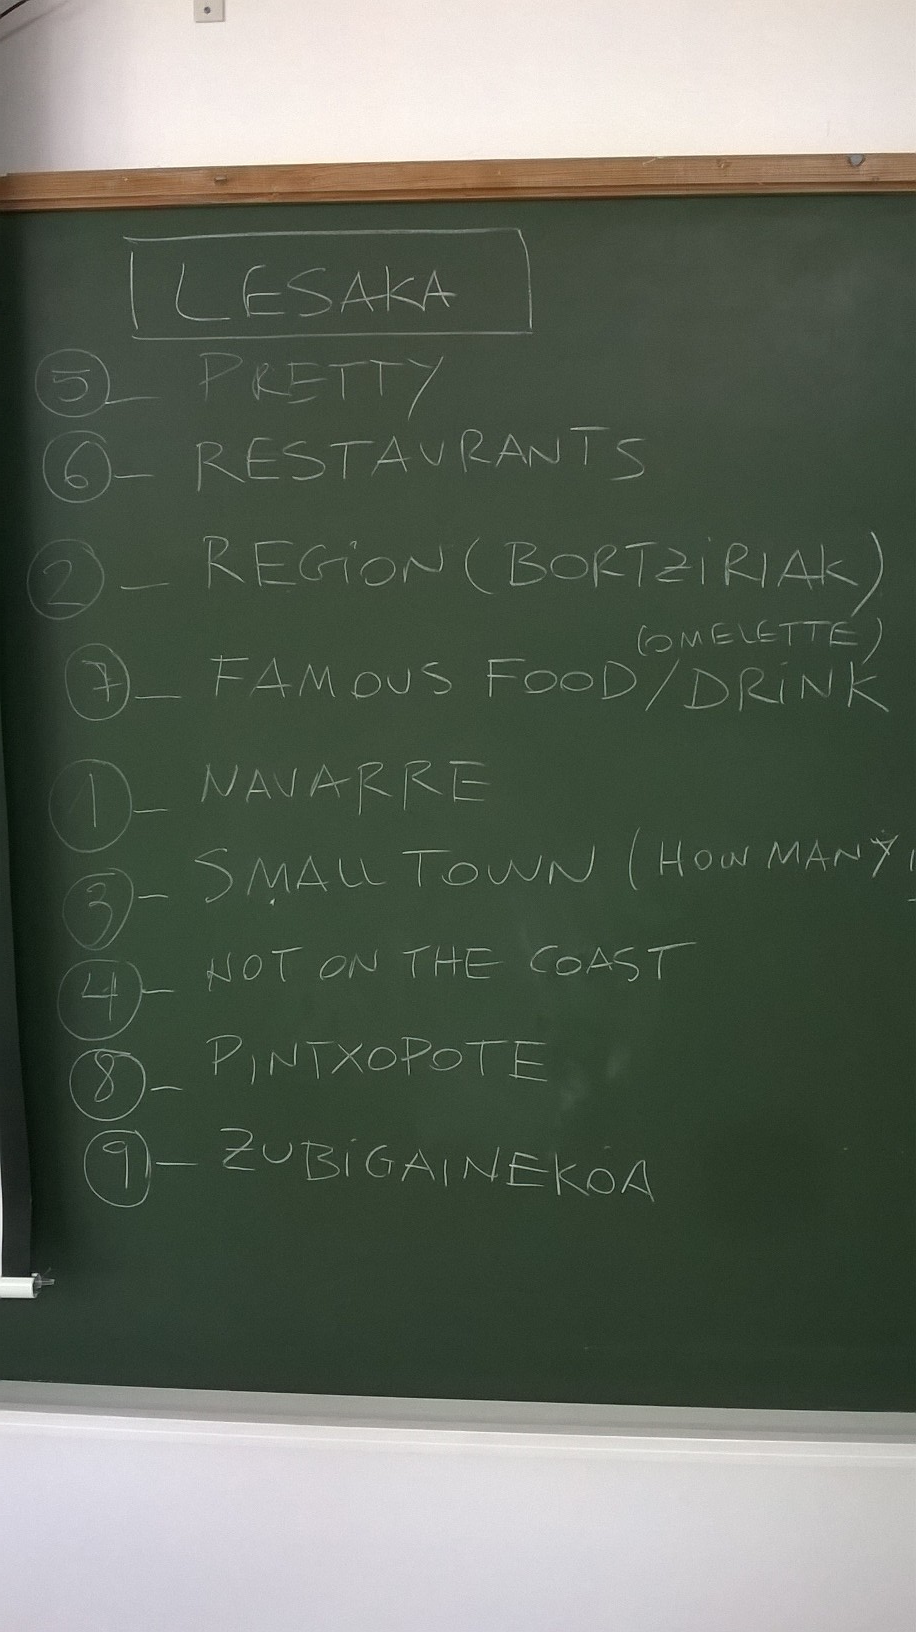
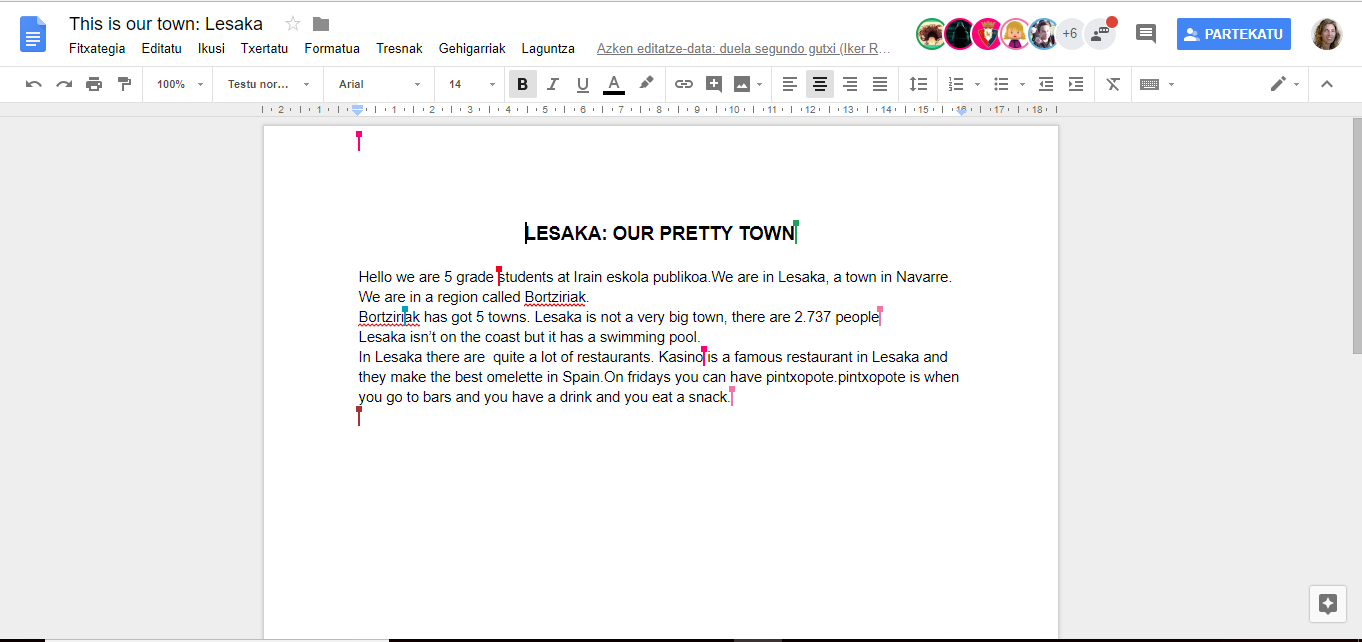
Then, the English teacher has created a blank Googe Docs document, and she has invited all students to edit it. We have decided what to write about each idea in the big group,and the students have taken turns to write each sentence. The students have been editting the document on their Chromebooks at the same time, as the document was projected on the classroom's large screen. It has been a lot of fun! This is what the document looked like with all students logged in to edit it:
The final result has been shared on the TwinSpace, like the rest of our productions.
10. Voting for our favourite postcard
Towards the end of the project and the academic year, we have voted on the best Year 5 postcard on Tricider. It would have been nice to vote on the postcards we received from our partners, but not all of them have arrived as the academic year was about to end.
11. Assessing the project
On our last activity we have assessed the project. We have done several things for that: an open discussion during an English lesson, as a face-to-face feedback activity about the project; a padlet where each student has written three things they liked, a couple of things to improve, something new they learned and ideas for future eTwinning projects; and an assessment session carried out by the two English teachers to discuss the project.
Before the assessment lesson, we have used this page of the TwinSpace to recall and review all the activities we have done. The students have recived the link to the public TwinSpace page via Google Classroom:
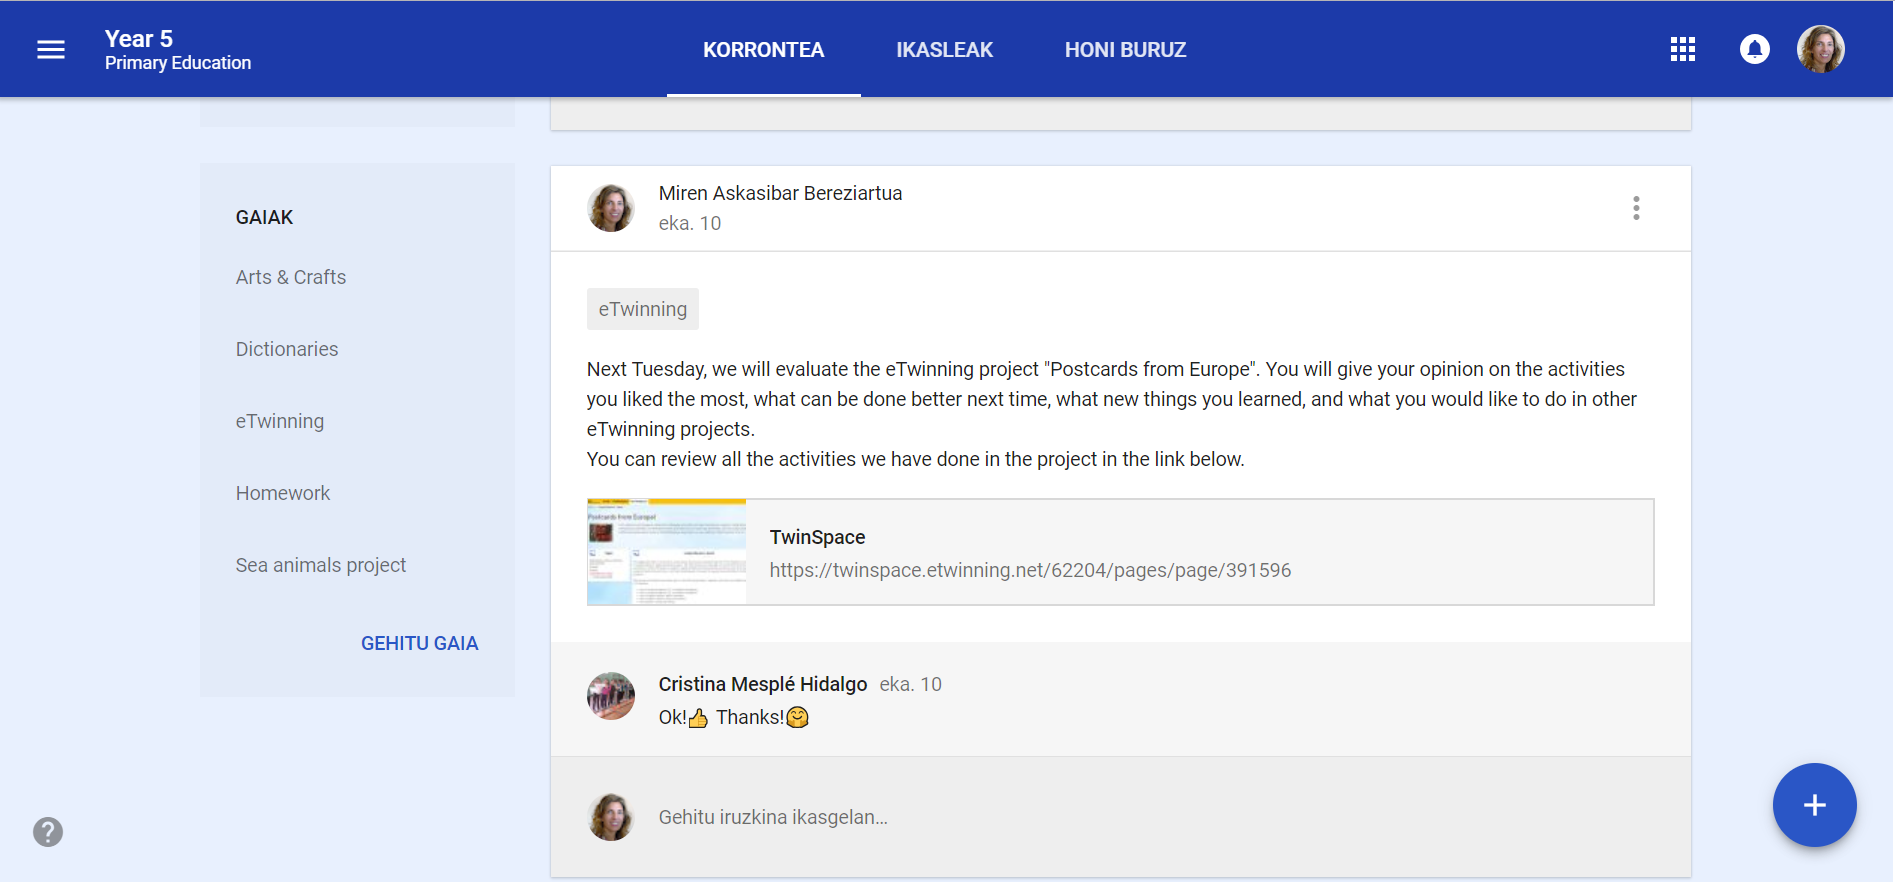
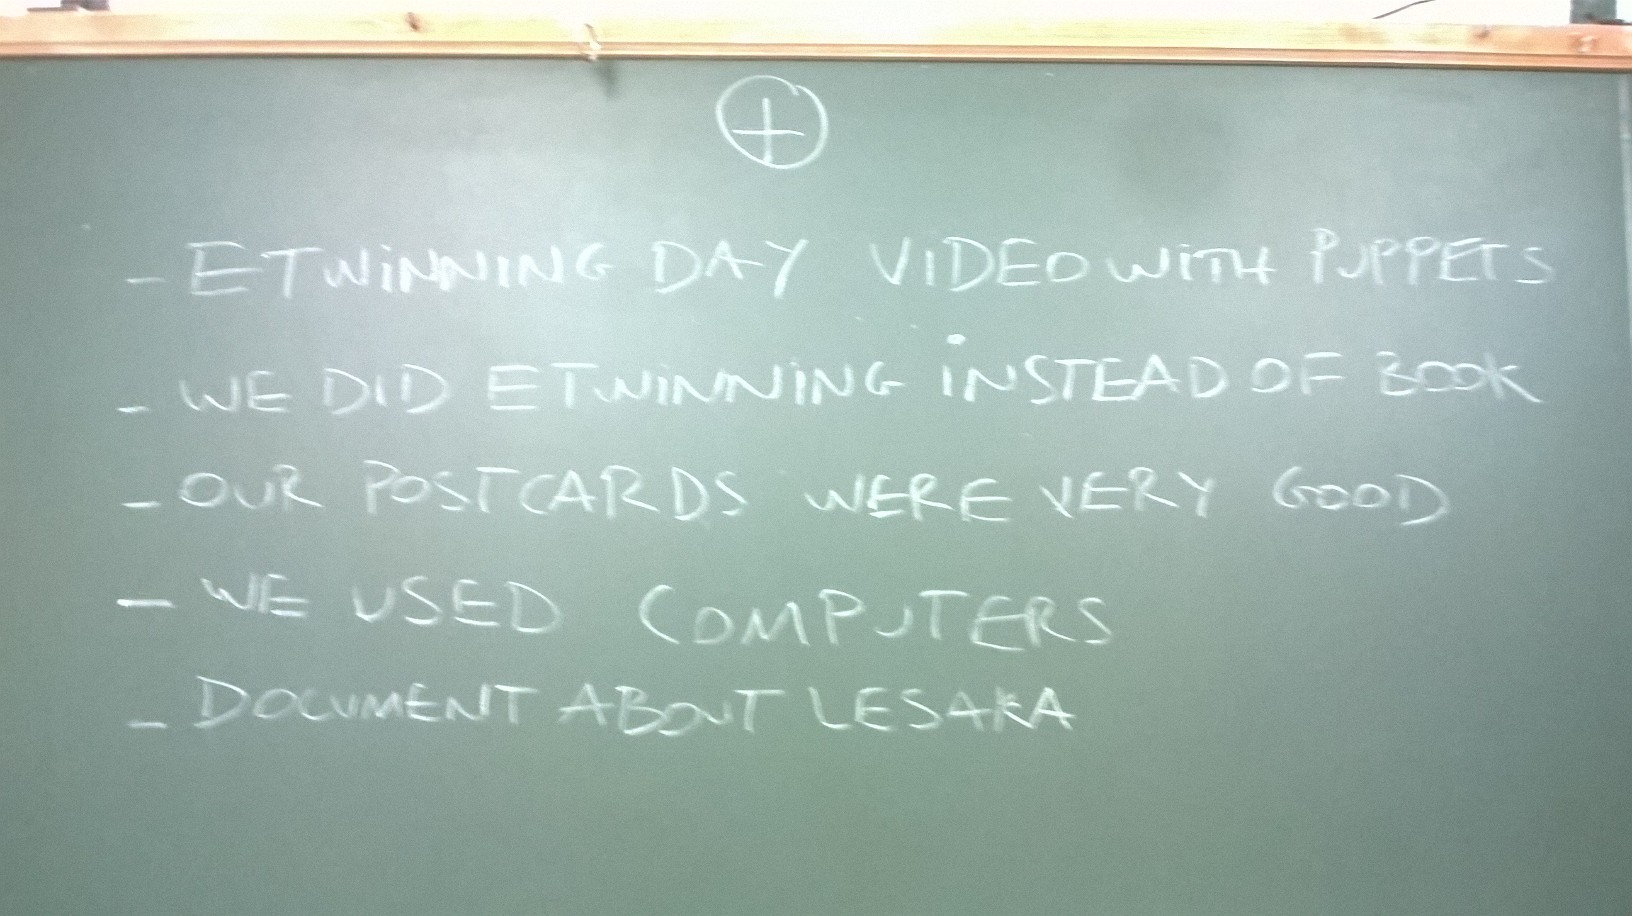
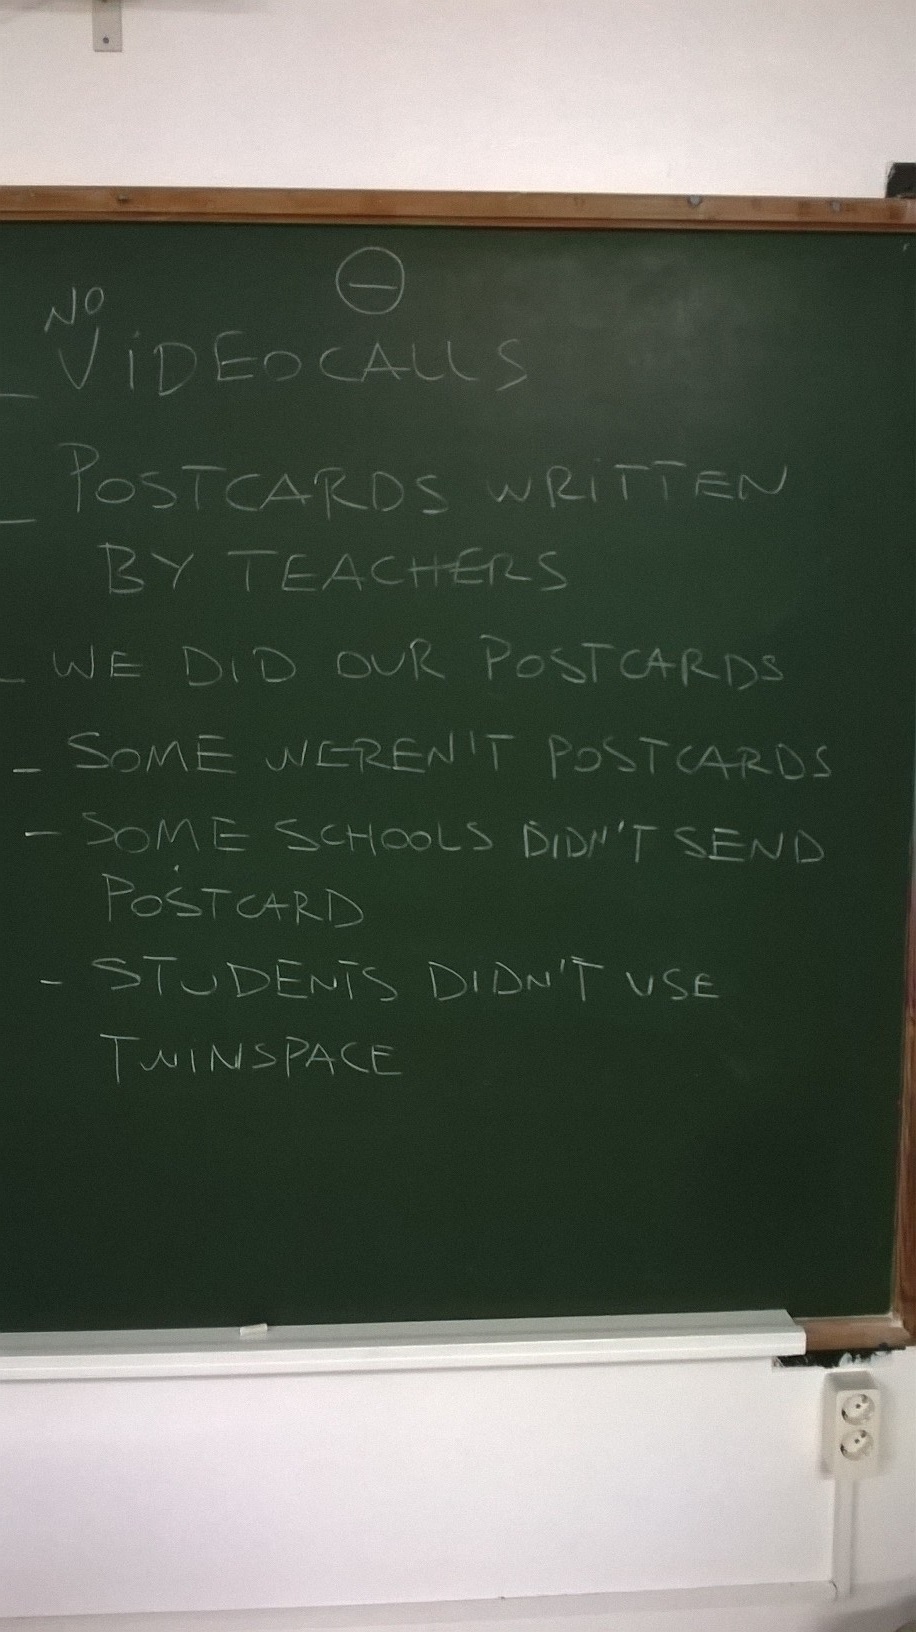
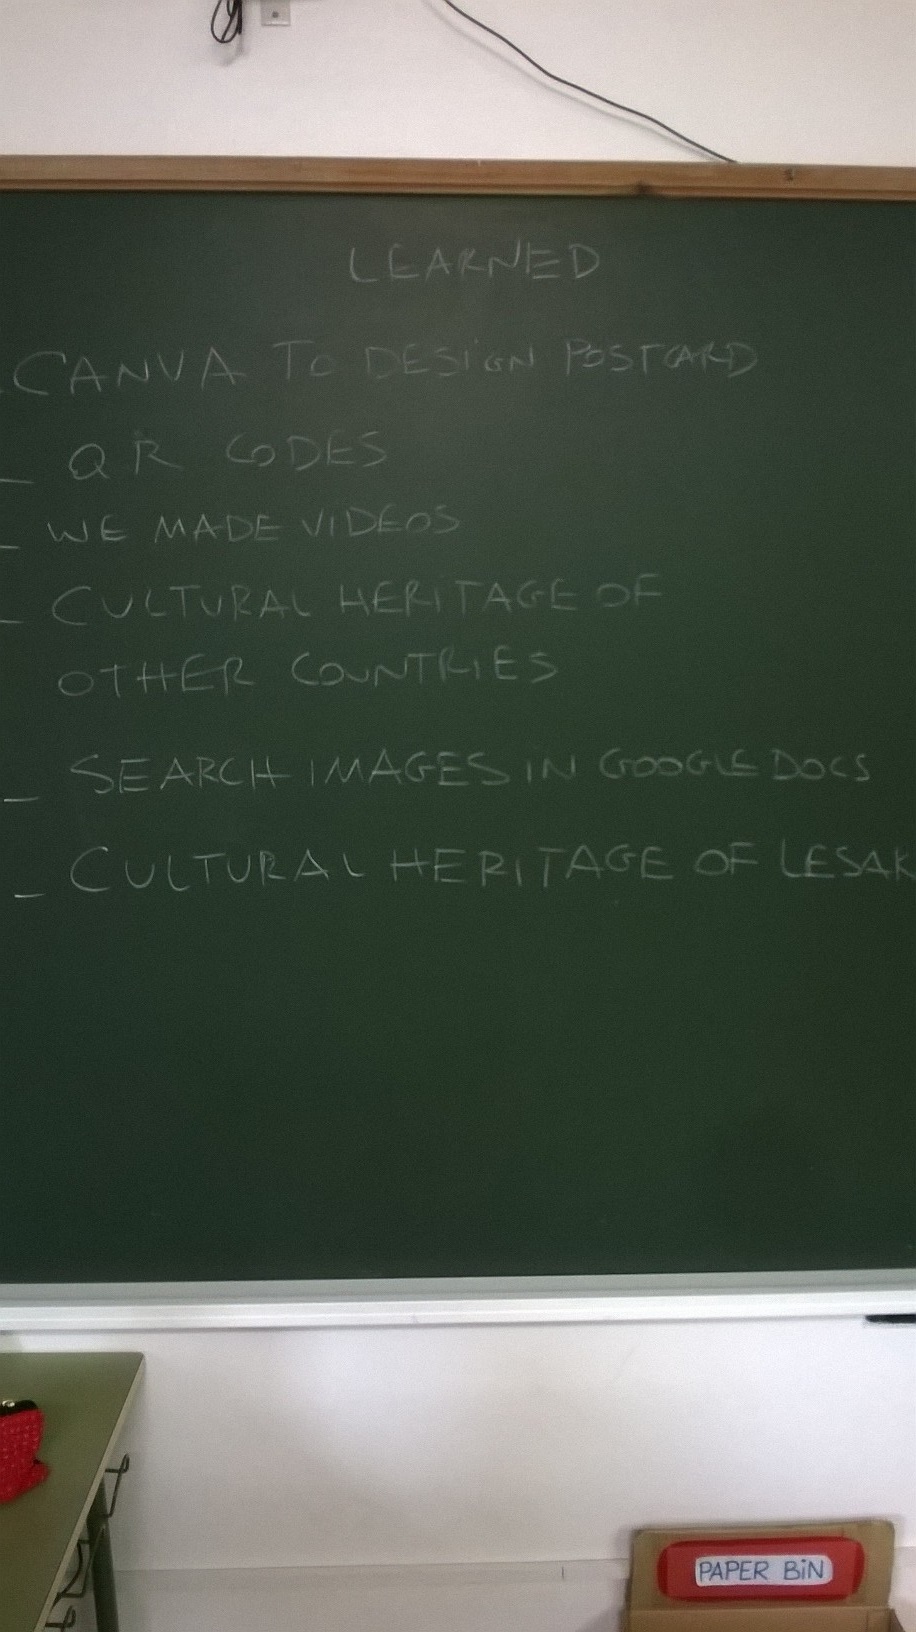
The students have carried out their assessment during an English lesson. First, we have done a brainstorming about the things we liked in the project, the things we didn't like that much, and what we learned. The teacher has written on the blackboard what the students were saying. After that, the students have used their Chromebooks to log into Google Classroom and access a padlet, where each of them has given their opinion. Here are the results of the brainstorming and the padlet.
Here is the assessment of the project done by the two English teachers who have taken part in it:
12. Ongoing activity: filling our poster with postcards
Each postcard we received has been opened in an English lesson,and the students have taken turns to read it aloud. Then, the postcard has circulated among students, so everybody could read it and look at the pictures, stamps, etc. After doing that both in the Year 5 and Year 6 English class, the two groups have taken turns to stick the postcards on the poster.
The ICTs teacher had proposed to make a timelapse video with the students, showing how the poster was gradually covered with the postcards, but the students finished their ICT lessons in May, when some of the postcards had not arrived yet. Therefore, the English teacher has prepared the timelapse video on JellyCam after all the postcards have arrived:
13. Closing activity: telling our schoolmates about the project. Other dissemination activities.
On the last day of regular lessons at school, Year 5 students have explained the activities they did during the project, what they liked the most, and what they thought could be improved in coming eTwinning projects to Year 3 and Year 4 students.
We have disseminated the project in other ways too:
- among teachers in our school in the eTwinning and Education Technologies group that meets every week during two hours
- in the school's staff meetings
- in the last meeting of the School Council, where other members of the community are represented (families, Town Council)