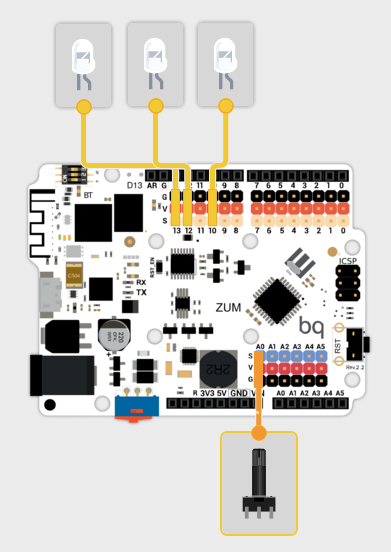
The third lesson is about analogical sensors and how to connect them to the Arduino board, in this case by using the Analog pins which are situated in front of the digital ones and close to the power pins.
AND THIS IS OUR NEW PROGRAM:
int led1=13;
int led2=12;
int led3=10;
int potPin=0; // creation of a variable for the potentiometer to store its value
void setup() { // we do not need to define an analog input here
pinMode (led1, OUTPUT);
pinMode (led2, OUTPUT);
pinMode (led3, OUTPUT);
}
void loop() {
digitalWrite (led1,LOW); //the leds are off if the potPin value is up to 900
digitalWrite (led2,LOW);
digitalWrite (led3, LOW);
potPin = analogRead(A0); // definition of the connection for the potentiometer
if (analogRead (potPin)<= 300){ // condition of reading from the potentiometer
digitalWrite (led1, HIGH);
}
if (analogRead (potPin)<= 600){
digitalWrite (led2, HIGH);
}
if (analogRead (potPin)<= 900){
digitalWrite (led3, HIGH);
}
}