We will be building an App using Microsoft Power Platform.
What is Power Apps?
A description from the Microsoft Docs site:
Power Apps is a suite of apps, services, connectors and data platform that provides a rapid application development environment to build custom apps for your business needs. Using Power Apps, you can quickly build custom business apps that connect to your business data stored either in the underlying data platform (Common Data Service) or in various online and on-premises data sources (SharePoint, Microsoft 365, Dynamics 365, SQL Server, and so on).
We can create an App from scratch or using a model:
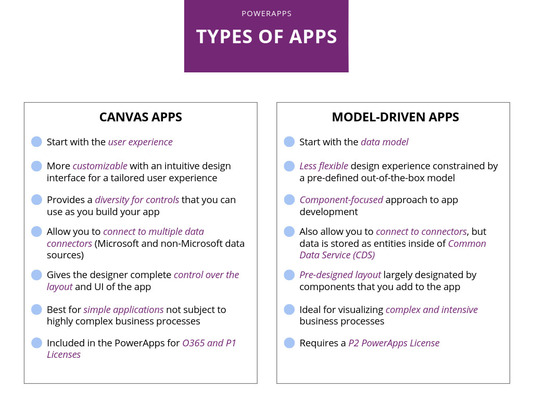
Canvas apps are a great option when you want to build an app from a blank canvas. You start by choosing the screen size: tablet or mobile, then you have a blank screen from which to build. You can interact with data in your app by adding data sources. Drag and drop various controls and add the desired functionality by writing Excel style formulas.
Within our project you will be making and interactive Tourist Guide App of the 4 partner regions!
Let's give you an example for you to start learning the basics:
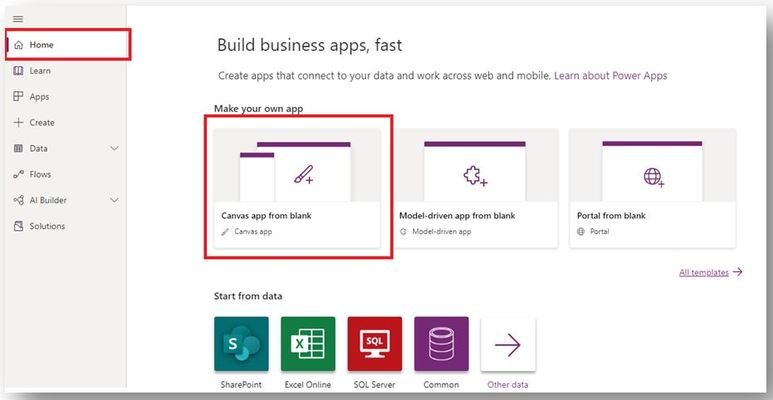
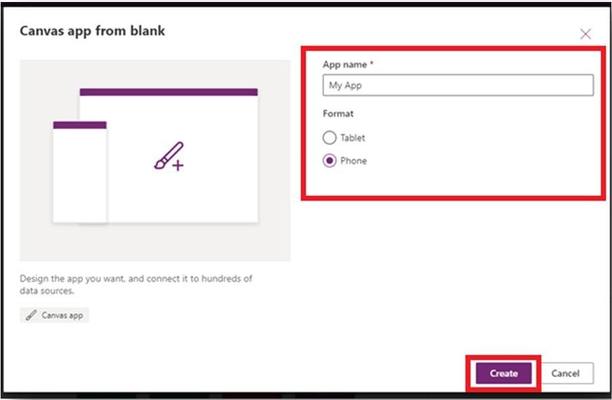
A) Create a Canvas App from blank
Now step by step...
Step 1:
Step 2:
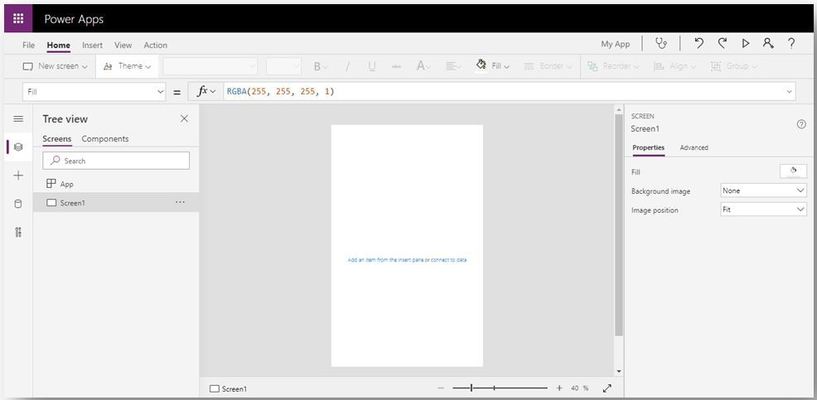
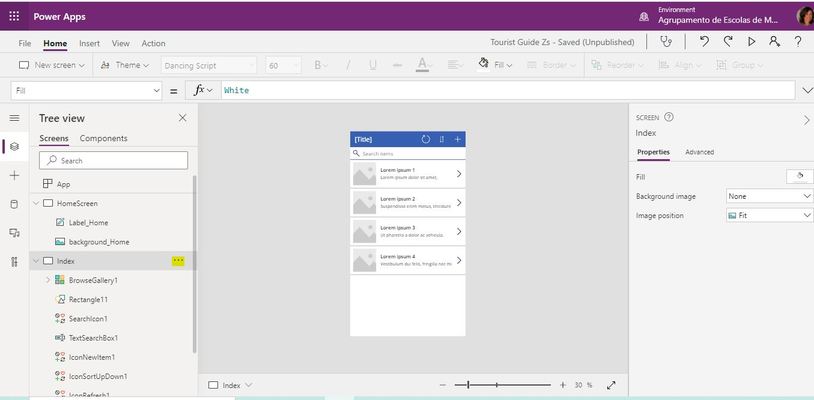
After performing all the above steps, you get a Power Apps studio which will look like the image below.Here you can create your pixel perfect application using drag and drop and some basic formulas.
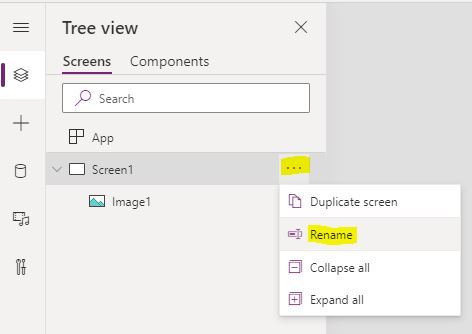
By Clicking on the ... next to Screen 1, at the Tree view, you can change the name of your Screen (change it to HomeScreen, for example).
Change the background of your App Screen by:
1. Upload image into Power Apps
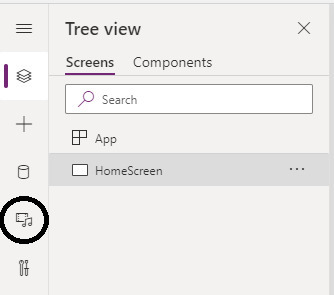
- Click on the Media button on the far left-hand side of the screen
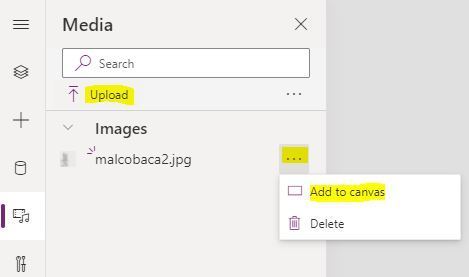
Click on Upload, browse for your image and select it.
Then, click on the ... next to your image name and select Add to Canvas
Now you will see the image appearing on your app:
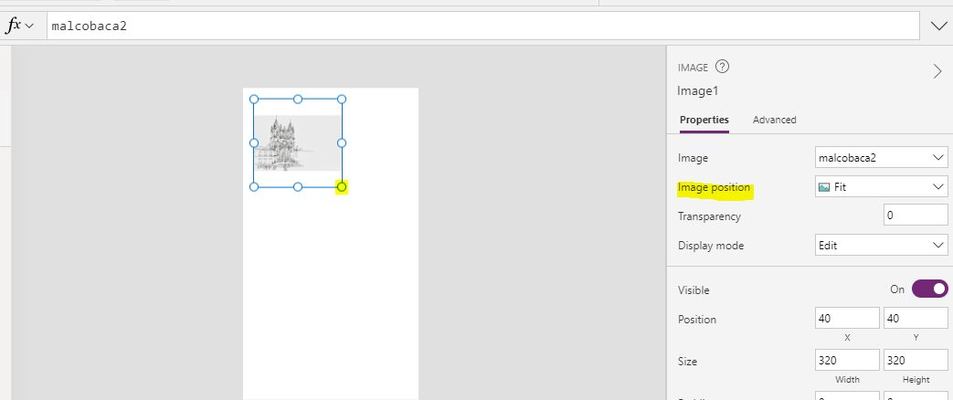
If it is to small you can stretch it: move the mouse pointer over one of the handles and then click and drag the mouse or click in the Properties panel on the far right-hand side of the screen, click into the drop-down list next to the Image Position property and then select Fill.
B) Add labels and buttons to your App and save it:
Step by step...
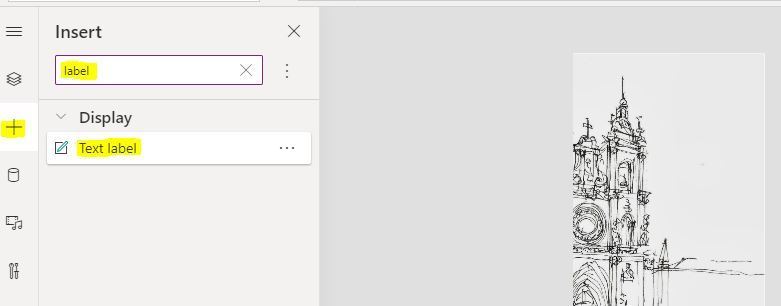
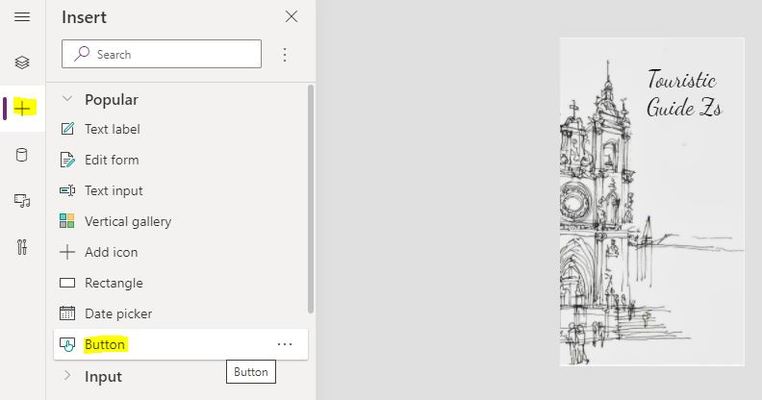
Insert Label: Click on the Insert button (+ on the left), type label and click on Text label.
Format Label: Drag one of the handles to resize it, move it by holding the left button of the mouse in the middle of the Label and draging it, change text, font size, color, ...
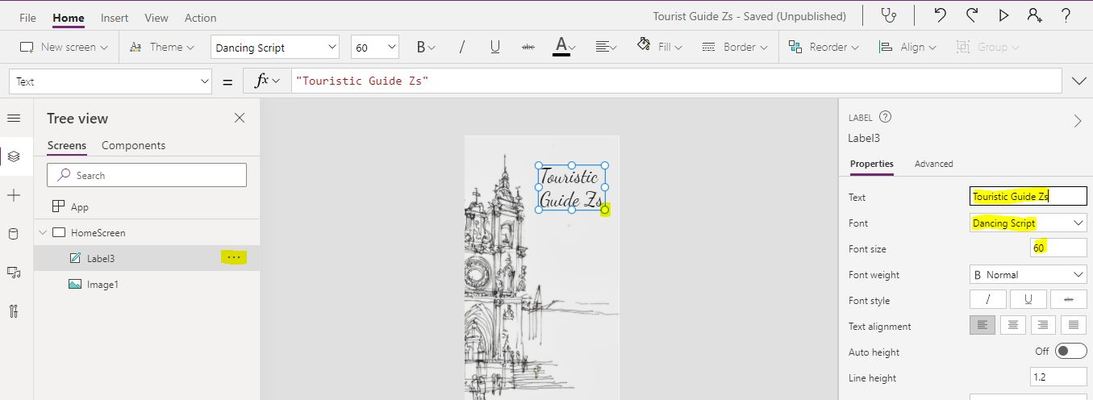
By clicking on the ... in the Tree view next to the new label you can change it's name.
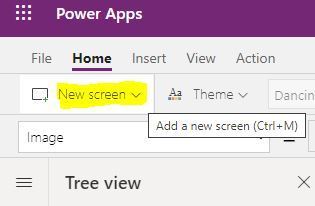
C) Add new screens to your App
Step by step ...
Click on Add new screen:
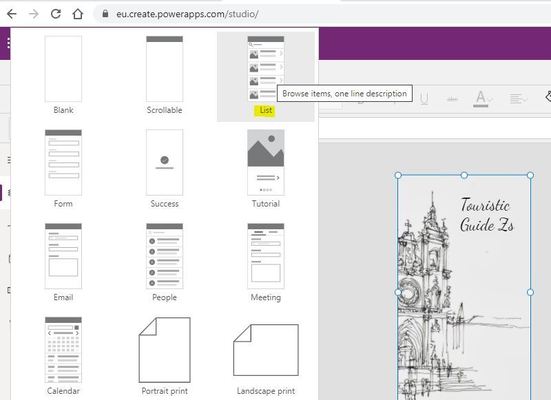
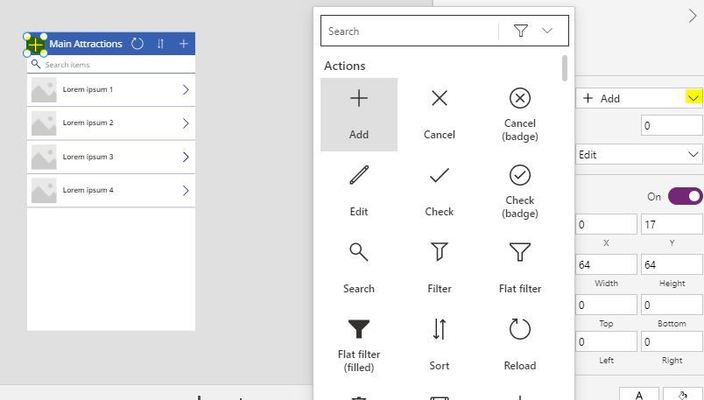
Choose the type of screen you want to add, in this example we chose List:
After adding your screen change it's name clicking on the ...:
Click on the first row (it will show a blue border around the whole item) to be able to change the Layout:
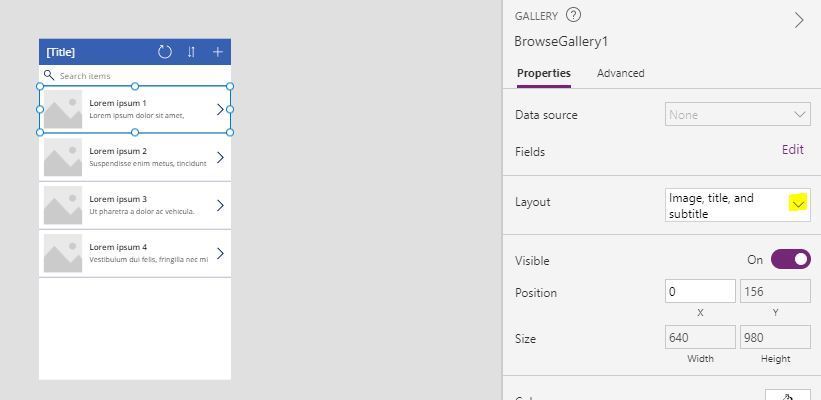
And then choose one of the available layouts that better suite your layout,
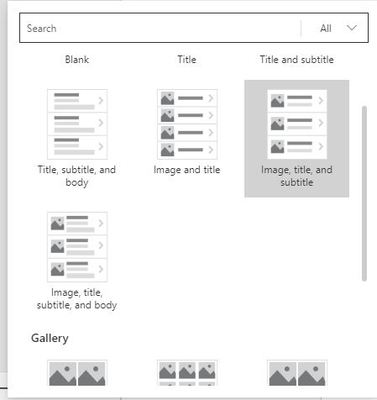
in this example we chose Image and Title.
And then change the [Title] clicking on it and typing your Title in the functions bar (in this example we choose Main Attractions):
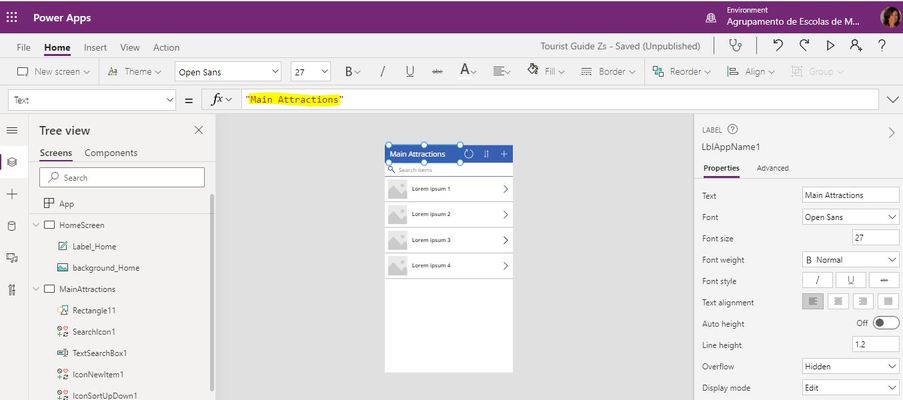
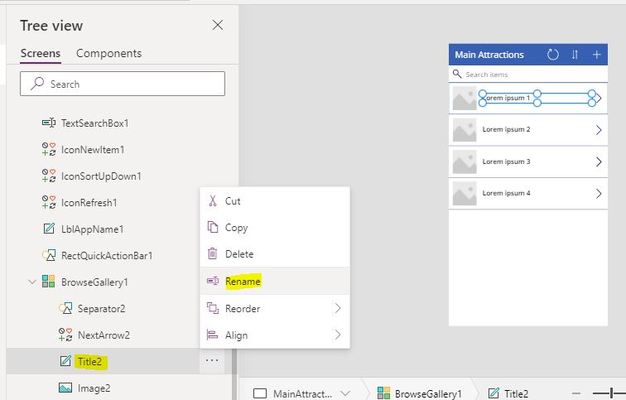
Rename the title and image at the Tree view to keep track of your App (in this example we chose AttractionsName):
D) Connect the two screens together:
Step by step...
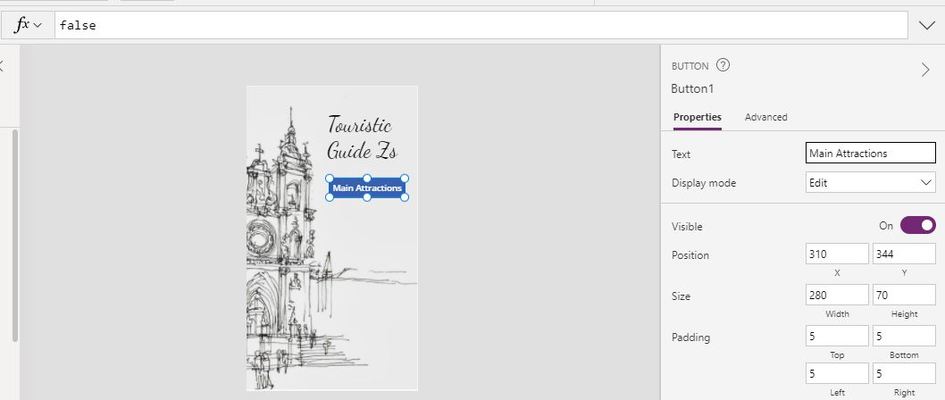
Add a button to our HomeScreen (Click on the Screen at the Tree view to select the screen where you want to add your button) :
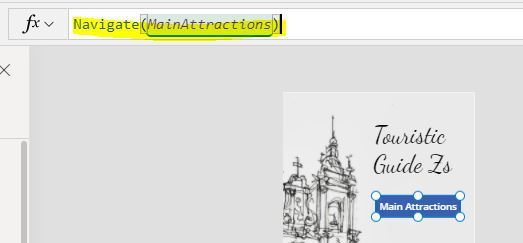
Change the text (see text box on the right) on your Button (in this example we chose Main Attractions, the name of the screen we want to connect to):
Link that button to the screen you want to connect to using the function Navigate(Name of the Screen):
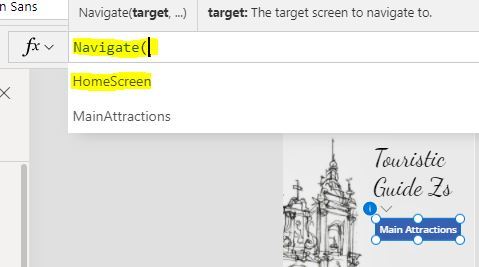
Please note that if the function is incorrect a red cross will apper next to the button.
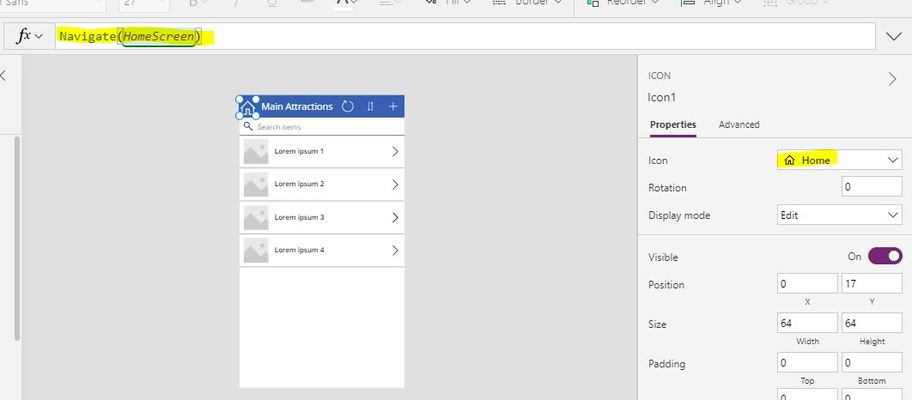
Now select the other screen on the Tree view and add an icon to move you back to the screen you want:

Place the icon in place and choose the symbol you prefer:
In this case we chose the Home icon and the function Navigate(Name of the screen)
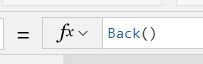
but in other cases it could be useful just to use the function Back().
E) Create an Excel Datastore
For your App to display certain Data, you will need to create a Datastore. In our example we will use an excel file, stored in Onedrive:
Step by step...
Create an excel file and place it in Onedrive. Input your data into that excel file and format it as Table. Please note that if you want to display Images the Column Label should be Image [image] and the links in for each image should be a Direct link:
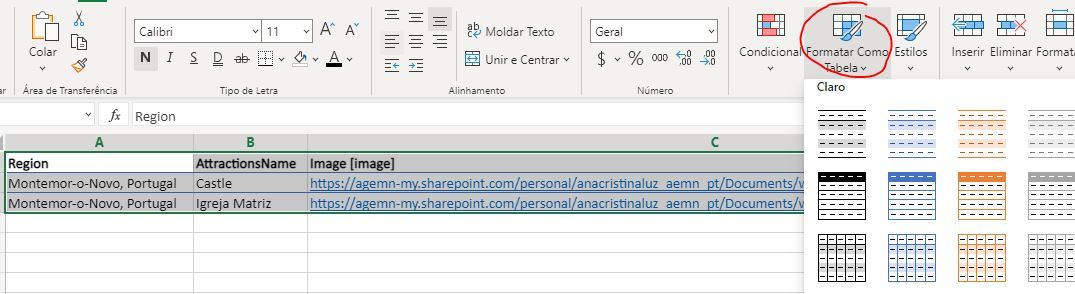
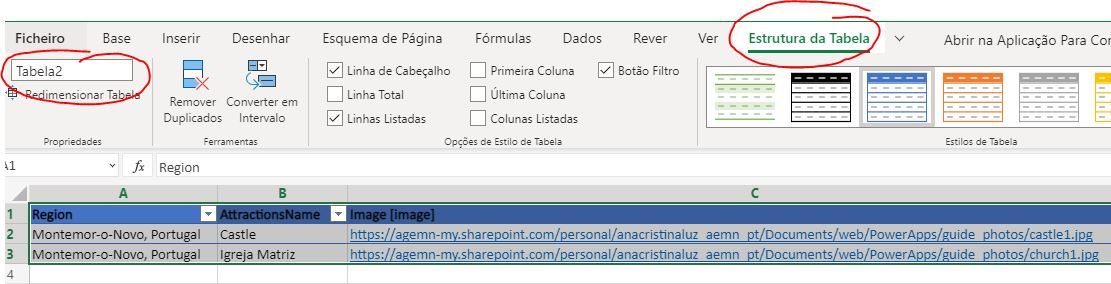
Select your table, choose Table Tools and change its name (in this example we name it MainAttractions):
F) Connect your Datastore to your App:
Step by step ...
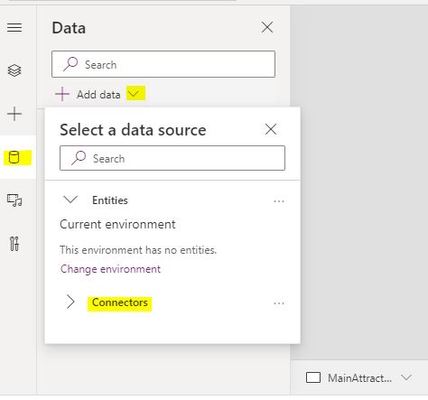
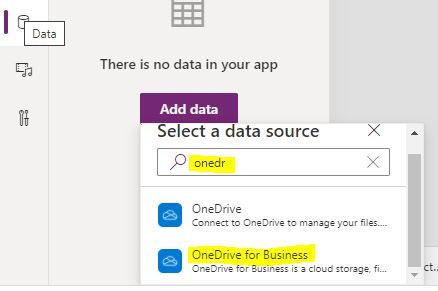
Connect your Datasource:
Choose Onedrive for Buiseness:
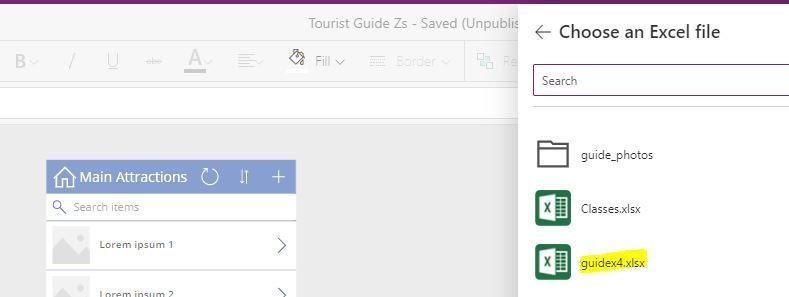
and select for your excel file (in this example guidex4.xls):
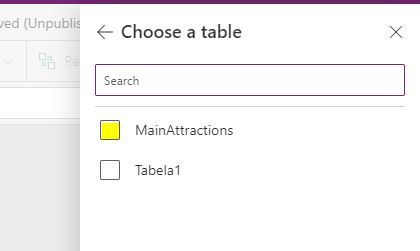
Select your Table name (in this example MainAttractions):
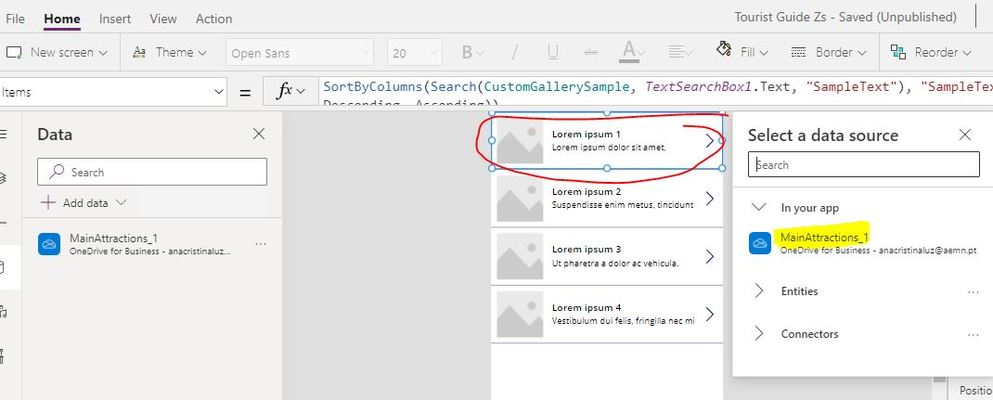
Now click on the first row on your App Screen and select your Datastore:
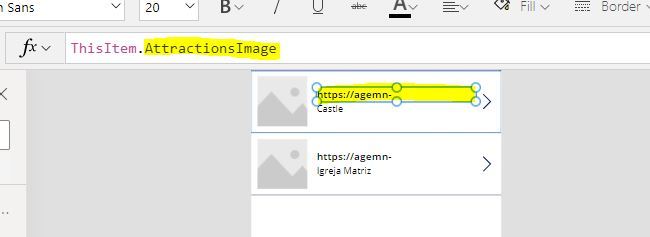
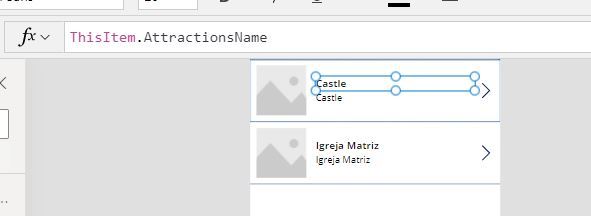
If the data are not linked correctly we have to amend it at the function bar:
In this case the Title should point to AttractionsName:
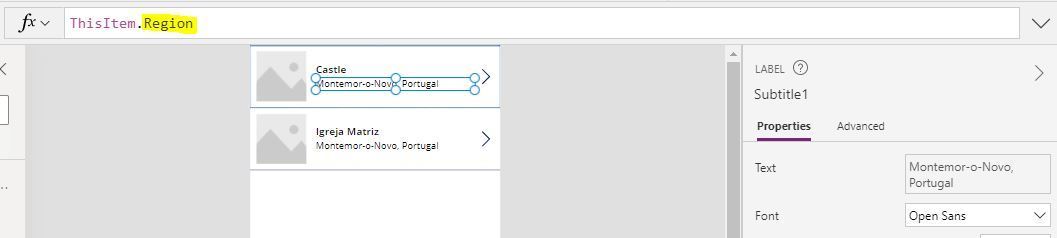
the Subtitle to the Region:
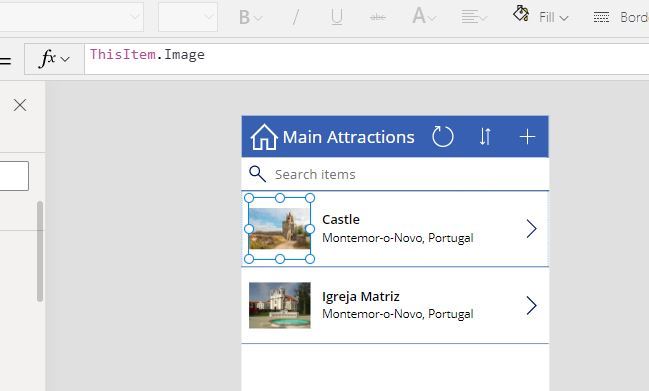
and the Image to its link:
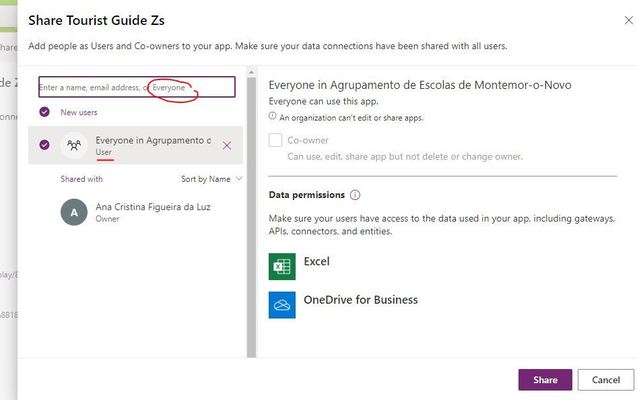
And finally to forget to save your App at all times (Shortcut CTRL + S) and Share it at the end:
Now it's up to you,
Give wings to your creativity!!!!
Fill free use the discussion page below to share your doubts and ideas.